<?xml version="1.0" encoding="utf-8"?><feed xmlns="http://www.w3.org/2005/Atom" ><generator uri="https://jekyllrb.com/" version="4.2.2">Jekyll</generator><link href="http://localhost:4000/feed.xml" rel="self" type="application/atom+xml" /><link href="http://localhost:4000/" rel="alternate" type="text/html" /><updated>2023-04-04T10:18:01+02:00</updated><id>http://localhost:4000/feed.xml</id><title type="html">Mr. Mary’s Ramblings</title><subtitle>I wrote this thing only to not clog up others&apos; Twitter feed with my stuff (I ain&apos;t no Foone)</subtitle><entry><title type="html">L-Tek Dance Pad Lisek Mod - getting your pad ready for Tech</title><link href="http://localhost:4000/2023/04/03/ltek-lisekmod.html" rel="alternate" type="text/html" title="L-Tek Dance Pad Lisek Mod - getting your pad ready for Tech" /><published>2023-04-03T04:00:00+02:00</published><updated>2023-04-03T04:00:00+02:00</updated><id>http://localhost:4000/2023/04/03/ltek-lisekmod</id><content type="html" xml:base="http://localhost:4000/2023/04/03/ltek-lisekmod.html"><![CDATA[<ul id="markdown-toc">
  <li><a href="#intro" id="markdown-toc-intro">Intro</a></li>
  <li><a href="#disclaimer" id="markdown-toc-disclaimer">Disclaimer</a></li>
  <li><a href="#materials" id="markdown-toc-materials">Materials</a></li>
  <li><a href="#steps" id="markdown-toc-steps">Steps</a>    <ul>
      <li><a href="#0-prepare-your-working-environment" id="markdown-toc-0-prepare-your-working-environment">0. Prepare your working environment</a></li>
      <li><a href="#1-remove-the-panels" id="markdown-toc-1-remove-the-panels">1. Remove the panels</a></li>
      <li><a href="#2-mark-the-middle-of-the-panel-for-later" id="markdown-toc-2-mark-the-middle-of-the-panel-for-later">2. Mark the middle of the panel for later</a></li>
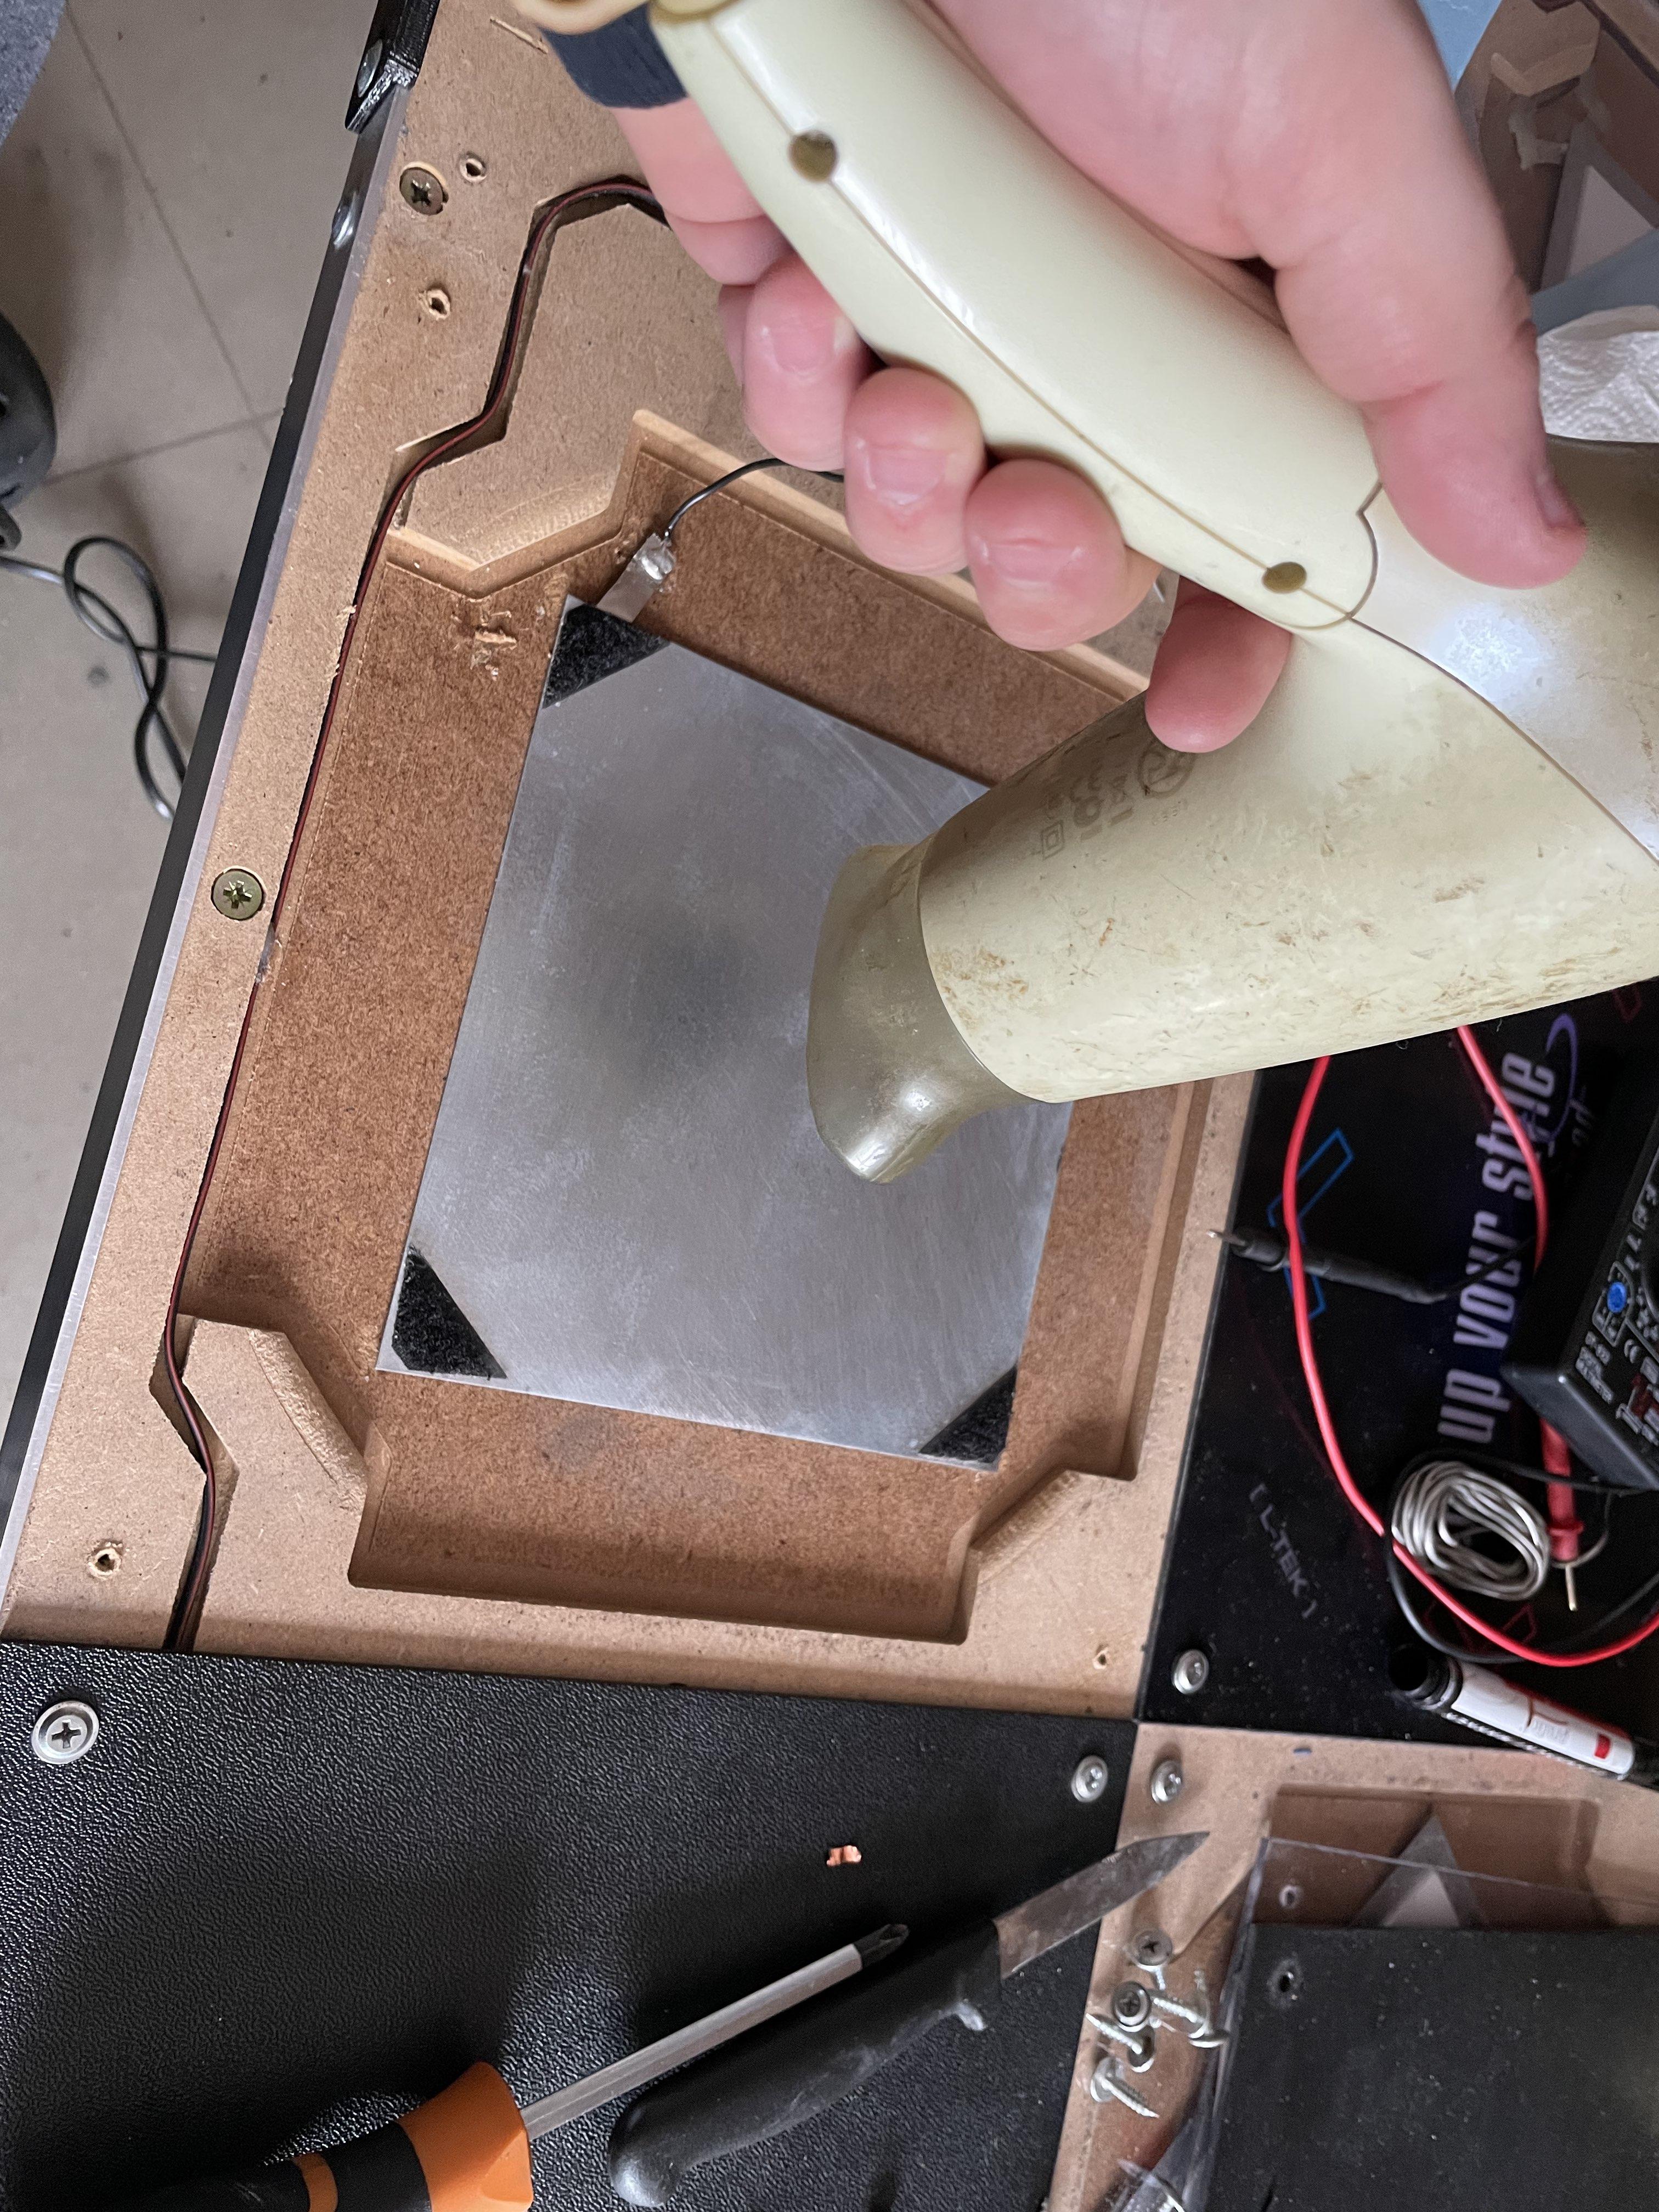
      <li><a href="#3-get-rid-of-the-hot-glue" id="markdown-toc-3-get-rid-of-the-hot-glue">3. Get rid of the hot glue</a></li>
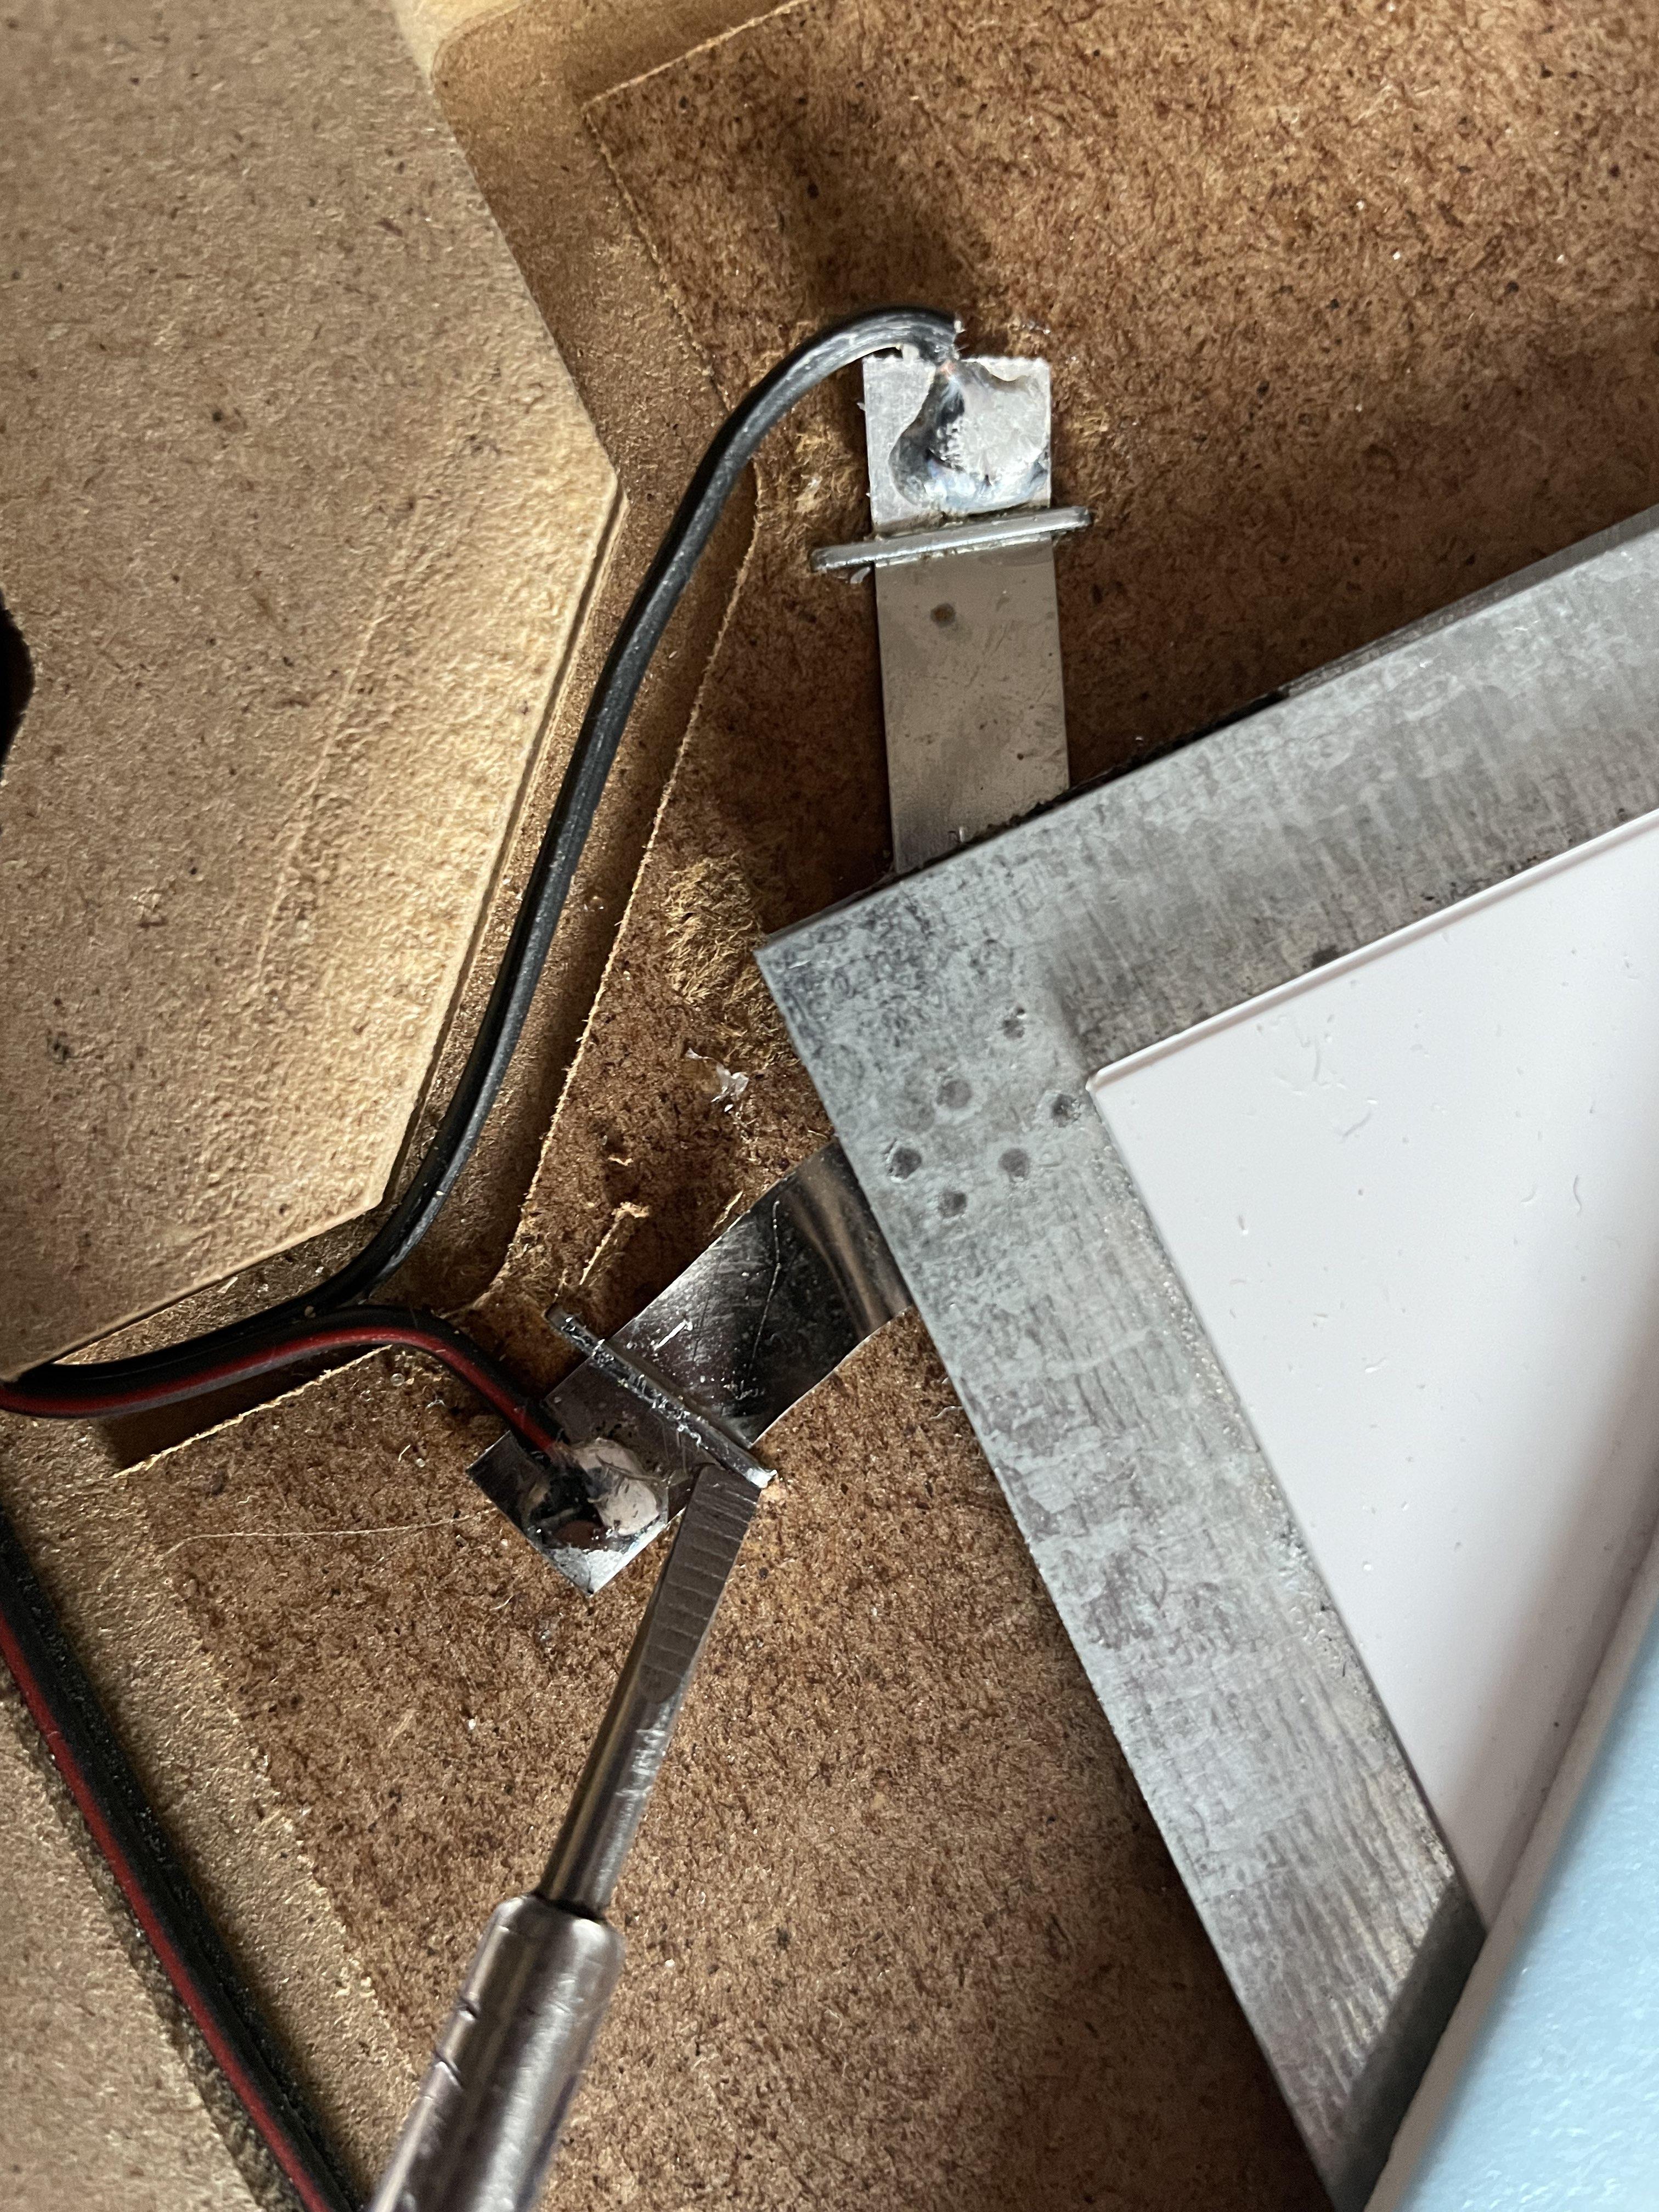
      <li><a href="#4-remove-the-staples-holding-the-tabs-in" id="markdown-toc-4-remove-the-staples-holding-the-tabs-in">4. Remove the staples holding the tabs in</a></li>
      <li><a href="#5-remove-the-bottom-plate" id="markdown-toc-5-remove-the-bottom-plate">5. Remove the bottom plate</a></li>
      <li><a href="#6-test-fit-the-plates-and-cut-the-wires-if-necessary" id="markdown-toc-6-test-fit-the-plates-and-cut-the-wires-if-necessary">6. Test fit the plates and cut the wires if necessary</a></li>
      <li><a href="#7-solder-the-extension-wire" id="markdown-toc-7-solder-the-extension-wire">7. Solder the extension wire</a></li>
      <li><a href="#8-reseat-the-bottom-plate" id="markdown-toc-8-reseat-the-bottom-plate">8. Reseat the bottom plate</a></li>
      <li><a href="#optional-add-copper-tape" id="markdown-toc-optional-add-copper-tape">(Optional) Add copper tape</a></li>
      <li><a href="#9-secure-the-newly-installed-cables" id="markdown-toc-9-secure-the-newly-installed-cables">9. Secure the newly installed cables</a></li>
      <li><a href="#10-reassemble-the-panel" id="markdown-toc-10-reassemble-the-panel">10. Reassemble the panel</a></li>
    </ul>
  </li>
  <li><a href="#additional-notes" id="markdown-toc-additional-notes">Additional notes</a></li>
  <li><a href="#acknowledgements" id="markdown-toc-acknowledgements">Acknowledgements</a></li>
</ul>

<h1 id="intro">Intro</h1>

<p>I assume you all are well acquainted with the L-Tek Dance Pads (aka Polish Pads) by now. And so is Lisek - head of the Lisia Nora (tl - Foxy Den) community, who’s been in the game since 2006 or so.</p>

<p>In 2010 he bought the Pad, but he wasn’t satisfied with its bracketing ability, so he sent the pad back in order to get something done about it. A couple things were done to it, like a PVC foam square being added on top of the sensor (a standard issue now), but what actually made a difference was something very simple - <strong>turning the entire sensor by 45 degrees</strong>.</p>

<p>This turned out to have significantly improved to ability to hit a bracket with the pad, as the actuation point was placed closer to the corners of the panels - by default the corners is where the velcro joining the two metal pieces are placed. Even the edge sensitivity gained a bit, as the active corners of the sensor were placed closer to the edge.</p>

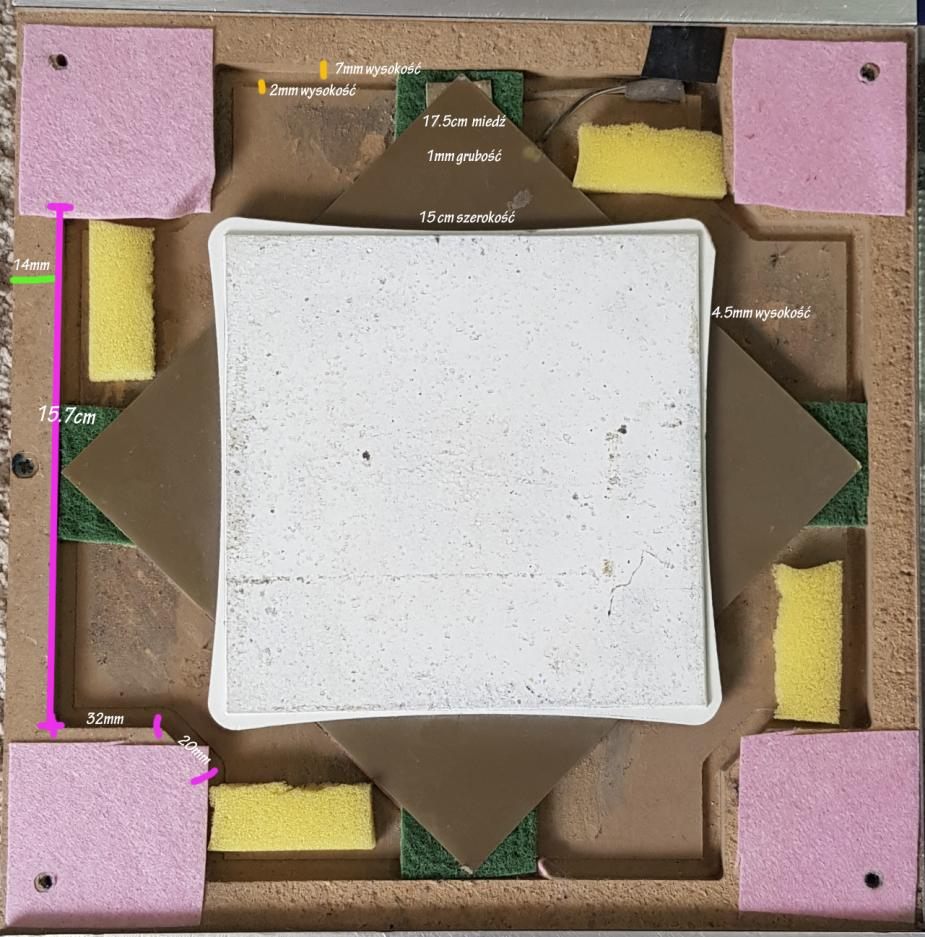
<p><img src="/assets/lisekmod/lisekmod_og.png" alt="Lisek mod as seen in Lisek's pad" /></p>

<p>(<em>All the foam is placed to help dampen the acryllic panel and isn’t related to the mod itself</em>)</p>

<p>But why didn’t we get this in modern pads? This could be because at that time it didn’t really bring any profit to a casual player - Tech charts wouldn’t become popular in Cabinet-less parts of the world until the 2020s, and with Poland itself lagging behind (it’s 2023 and only now we are considering dropping ITG1/2 charts from the tournament pools), the mod fell into obscurity. The US community came up with its own spin on the sensitivity increasing mod by doing what Americans do best - throw money at stuff until it becomes better (the Pennymod).</p>

<p>But today with the International Timing League tournament many L-Tek mains (including myself) feel excluded from serious participation as they’re held back by their pads’ weak ability to hit brackets (you can hit a bracket only if you stomp REALLY hard), and the Lisek Mod is slowly gaining popularity as an alternative to the often-damaging pennymod (when incorrectly performed it can make the pennies dent the metal plates decreasing sensitivity over time).</p>

<h1 id="disclaimer">Disclaimer</h1>

<ul>
  <li>This is not meant to be a complete guide on the modding process. I’m sure someone better suited will come up with a more robust guide in some time, and I’m only showing you the process from a simple guy’s perspective</li>
  <li>I am not to be held responsible for any damage you’ll do to your pad or anything else during the modding process</li>
  <li>Following through the guide will lead to your warranty being void</li>
  <li>This mod involves soldering - if you’re not comfortable doing it you could get away without it by just twisting the required cables together, but adding some solder in will help secure the connection (consider the fact that the cables will be shaking A LOT during gameplay)</li>
</ul>

<h1 id="materials">Materials</h1>

<ul>
  <li>An L-Tek DDR dance pad with square sensors that are roughly 17cm long
    <ul>
      <li>If your pad came with smaller sensors, you will have to replace them with bigger ones which you can make from scratch, but this is outside the scope of this guide</li>
    </ul>
  </li>
  <li>A Philips head screwdriver
    <ul>
      <li>Used to unscrew the panels</li>
    </ul>
  </li>
  <li>A pen or a marker
    <ul>
      <li>Used to mark where the bottom plate will go</li>
    </ul>
  </li>
  <li>A hot air gun or a hair dryer
    <ul>
      <li>Used to help easen up the glue holding the metal plate in</li>
    </ul>
  </li>
  <li>A flat long tool (like a flathead screwdriver)
    <ul>
      <li>Used to help lift the metal plate off</li>
    </ul>
  </li>
  <li>Some wire
    <ul>
      <li>Used to extend the cables linking the control board to the sensors</li>
      <li>I used 30AWG wire because that’s what I had on hand and it works fine, IDK what’s the spec for the cables used by L-Tek</li>
    </ul>
  </li>
  <li>Wire stripper (or a nail clipper)
    <ul>
      <li>Used to strip wires, duh</li>
    </ul>
  </li>
  <li>An adequate-sized heat shrink sleeve
    <ul>
      <li>Used to secure the soldered wires</li>
    </ul>
  </li>
  <li>A hot glue gun or duct tape
    <ul>
      <li>Used to secure the cables</li>
    </ul>
  </li>
  <li>Doublesided tape
    <ul>
      <li>Used to hold down the bottom sensor plate</li>
    </ul>
  </li>
  <li>(Optional) Copper tape
    <ul>
      <li>Can be used to mitigate the damage done by an incorrectly-done pennymod</li>
    </ul>
  </li>
</ul>

<h1 id="steps">Steps</h1>

<h2 id="0-prepare-your-working-environment">0. Prepare your working environment</h2>

<p>This is not a kind of thing that you want to be doing laid down on the floor. Get your pad situated on a stable workbench or a table that you’ll be able to comfortably work on.</p>

<h2 id="1-remove-the-panels">1. Remove the panels</h2>

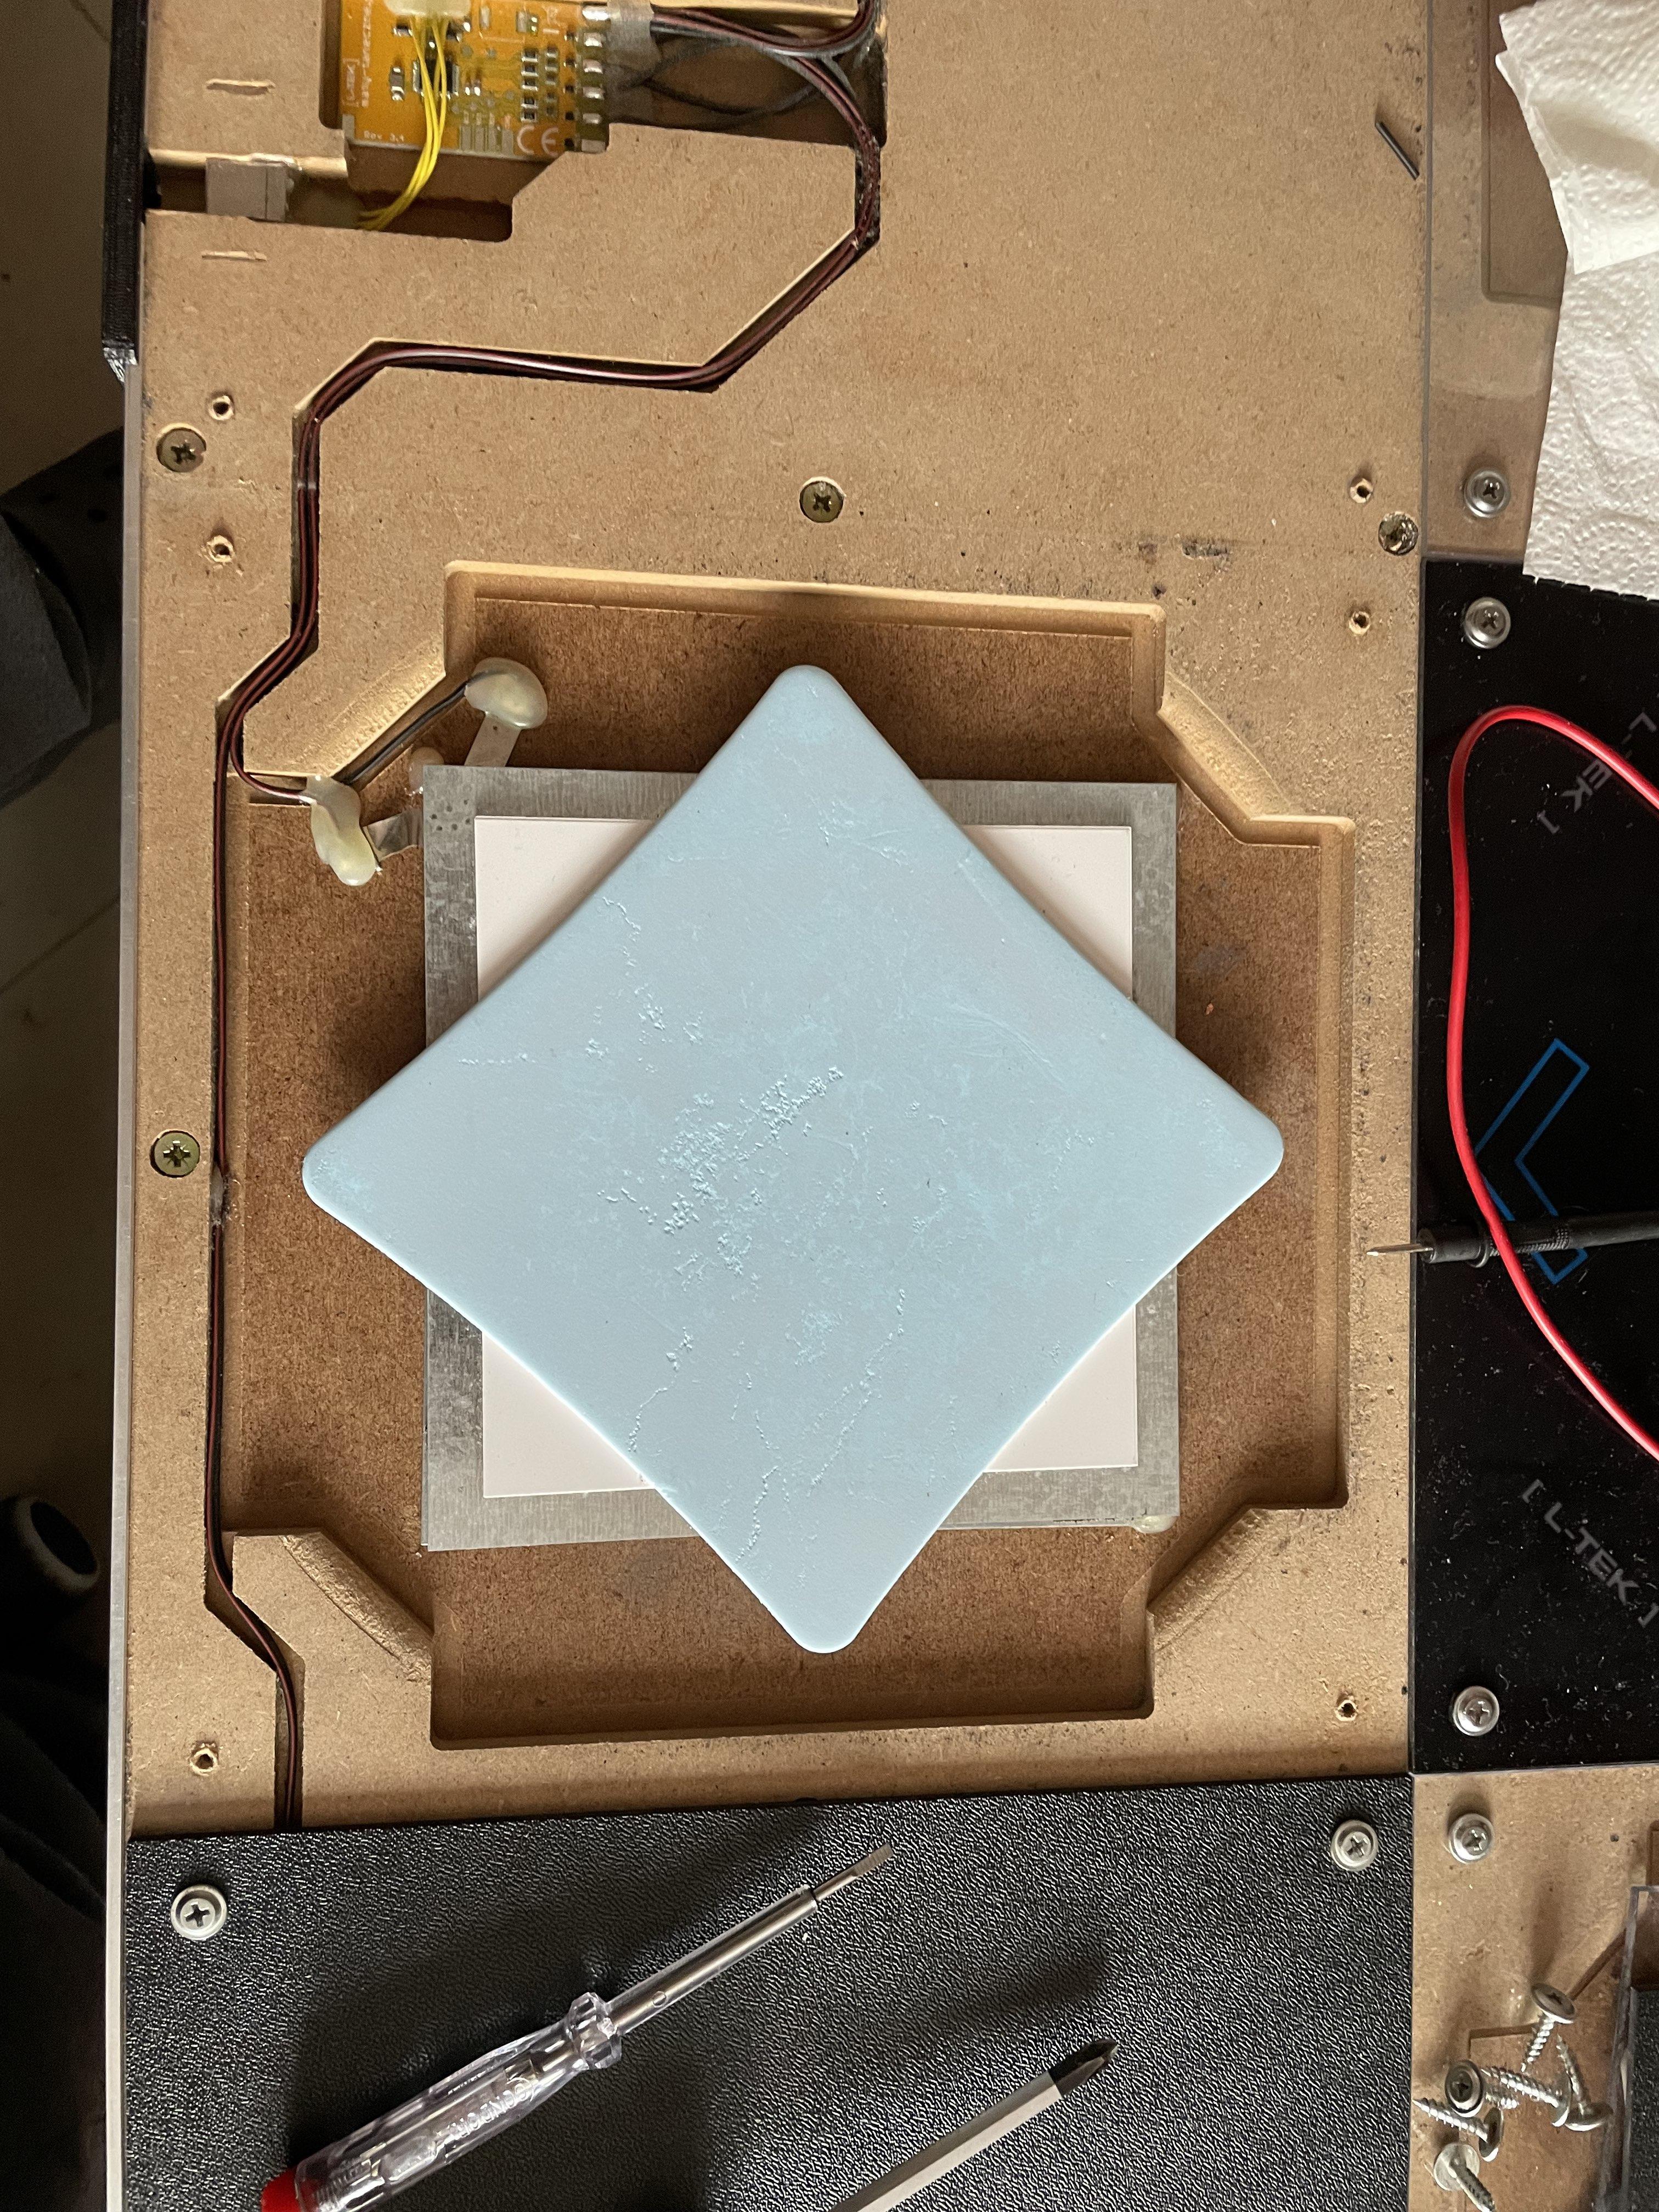
<p>Start off by unscrewing and removing the active panels. I also recommend removing the adjacent panel from which the wires are coming from, so that you’ll have an easier time manipulating them.</p>

<p><img src="/assets/lisekmod/step1.jpg" alt="step1" /></p>

<h2 id="2-mark-the-middle-of-the-panel-for-later">2. Mark the middle of the panel for later</h2>

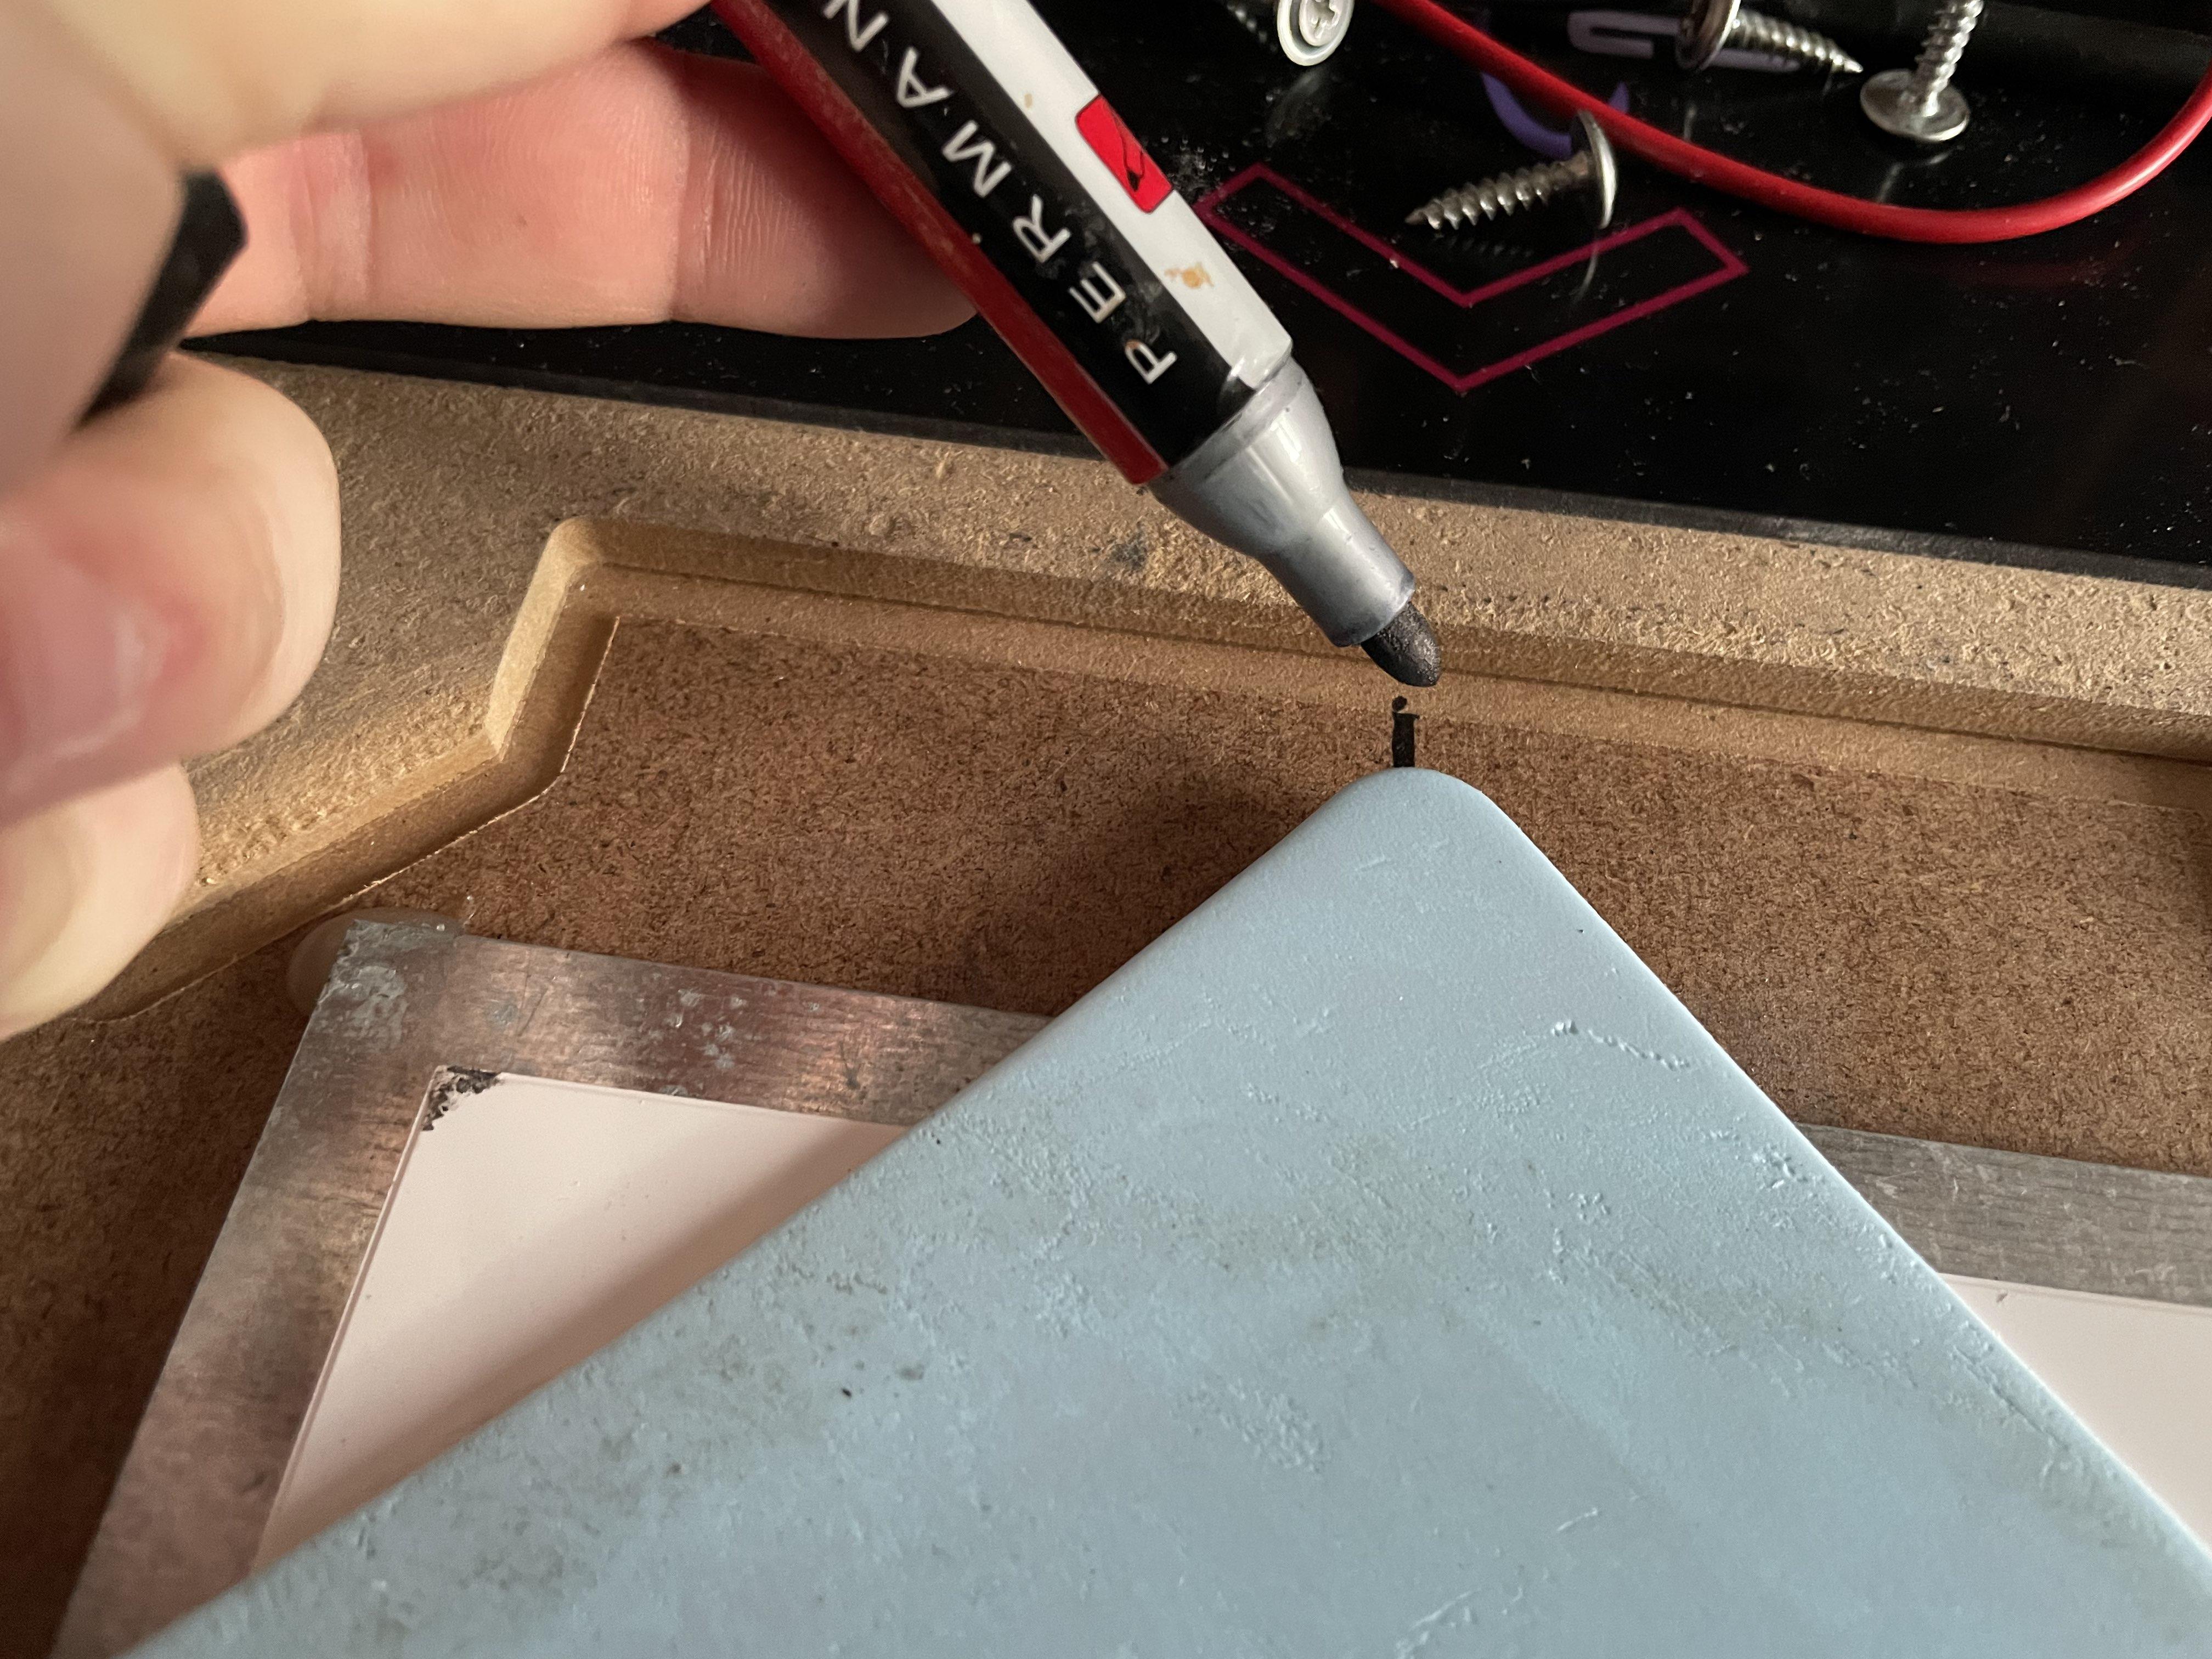
<p>Use the corners of the foam square to mark the the middles of the sides. This will help us align the bottom metal plate down the line.</p>

<p><img src="/assets/lisekmod/step2.jpg" alt="step2" /></p>

<h2 id="3-get-rid-of-the-hot-glue">3. Get rid of the hot glue</h2>

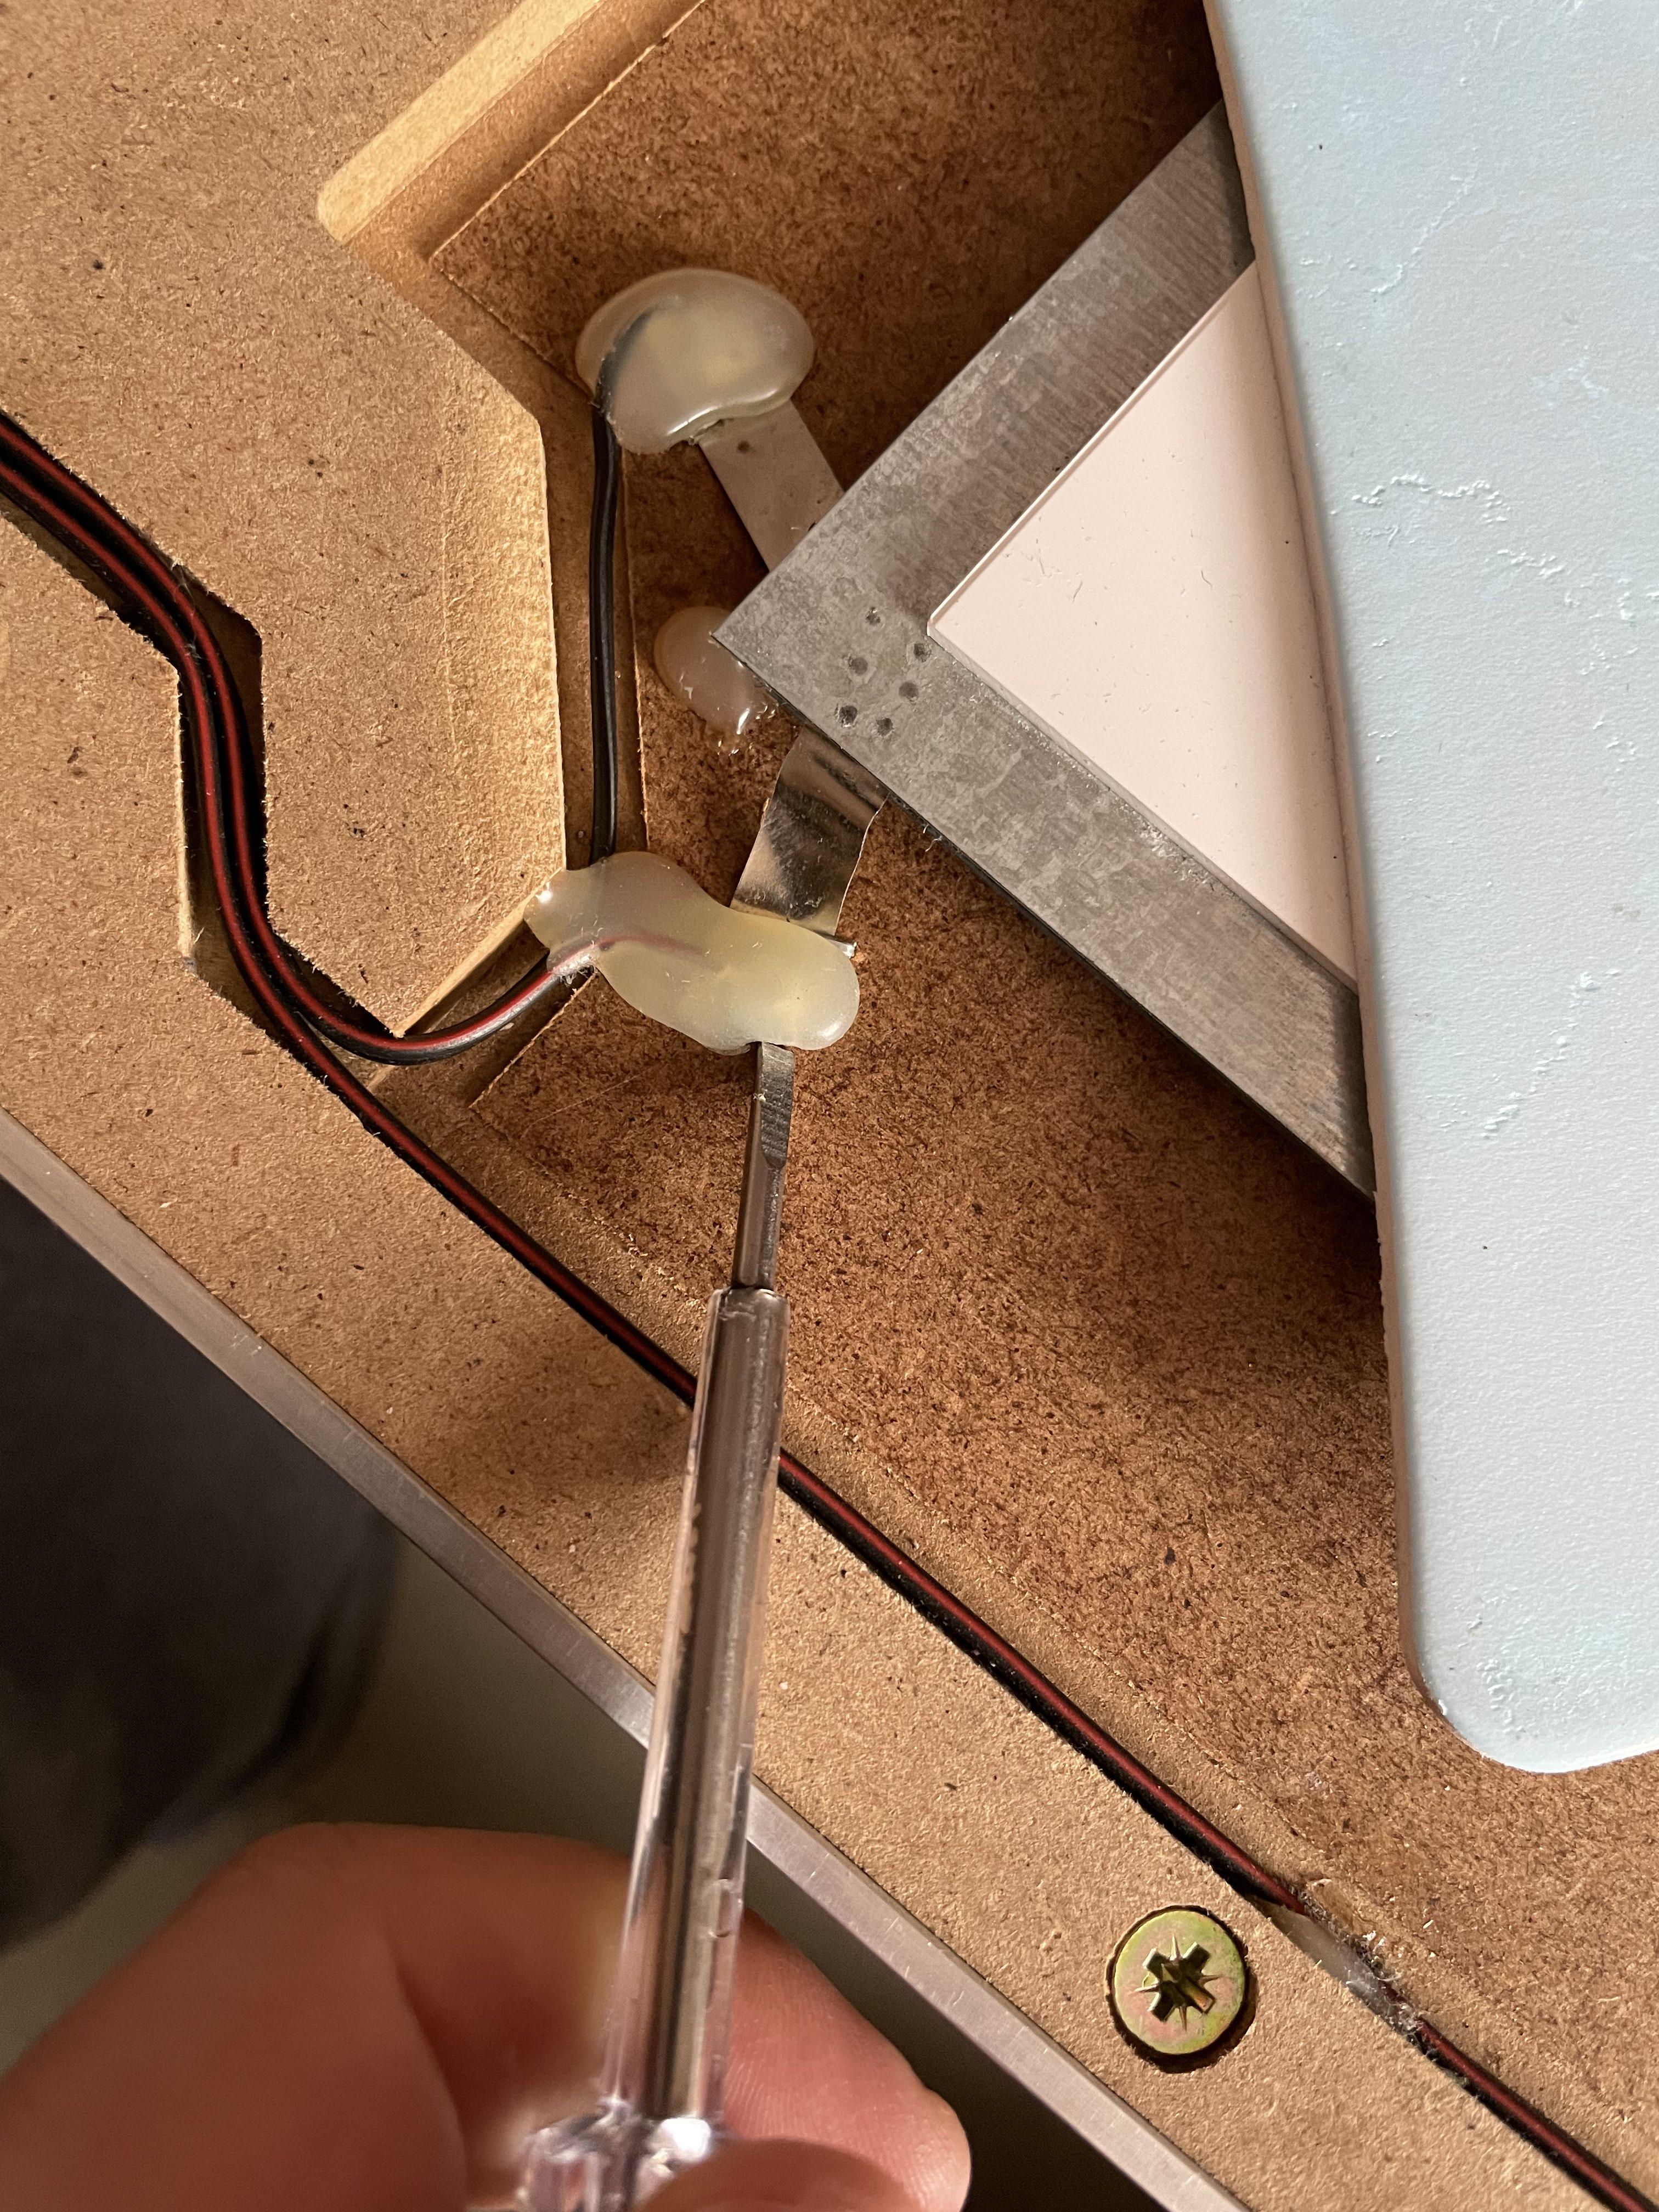
<p>L-Tek is a fan of liberal use of the hot glue to keep the sensor elements in place - the corners and the small tabs attaching to the sensor plates.</p>

<p>Use a flathead screwdriver or a similar tool to rip them off. Pay extra attention when removing glue from cables and from velcro.</p>

<p><img src="/assets/lisekmod/step3.jpg" alt="step3" /></p>

<h2 id="4-remove-the-staples-holding-the-tabs-in">4. Remove the staples holding the tabs in</h2>

<p>The metal tabs attached to the plates are additionally secured in place by a staple. To remove them use a flathead screwdriver or another thin tool to get under the staple (or the tab itself) and slowly wiggle it out.</p>

<p><img src="/assets/lisekmod/step4.jpg" alt="step4" /></p>

<h2 id="5-remove-the-bottom-plate">5. Remove the bottom plate</h2>

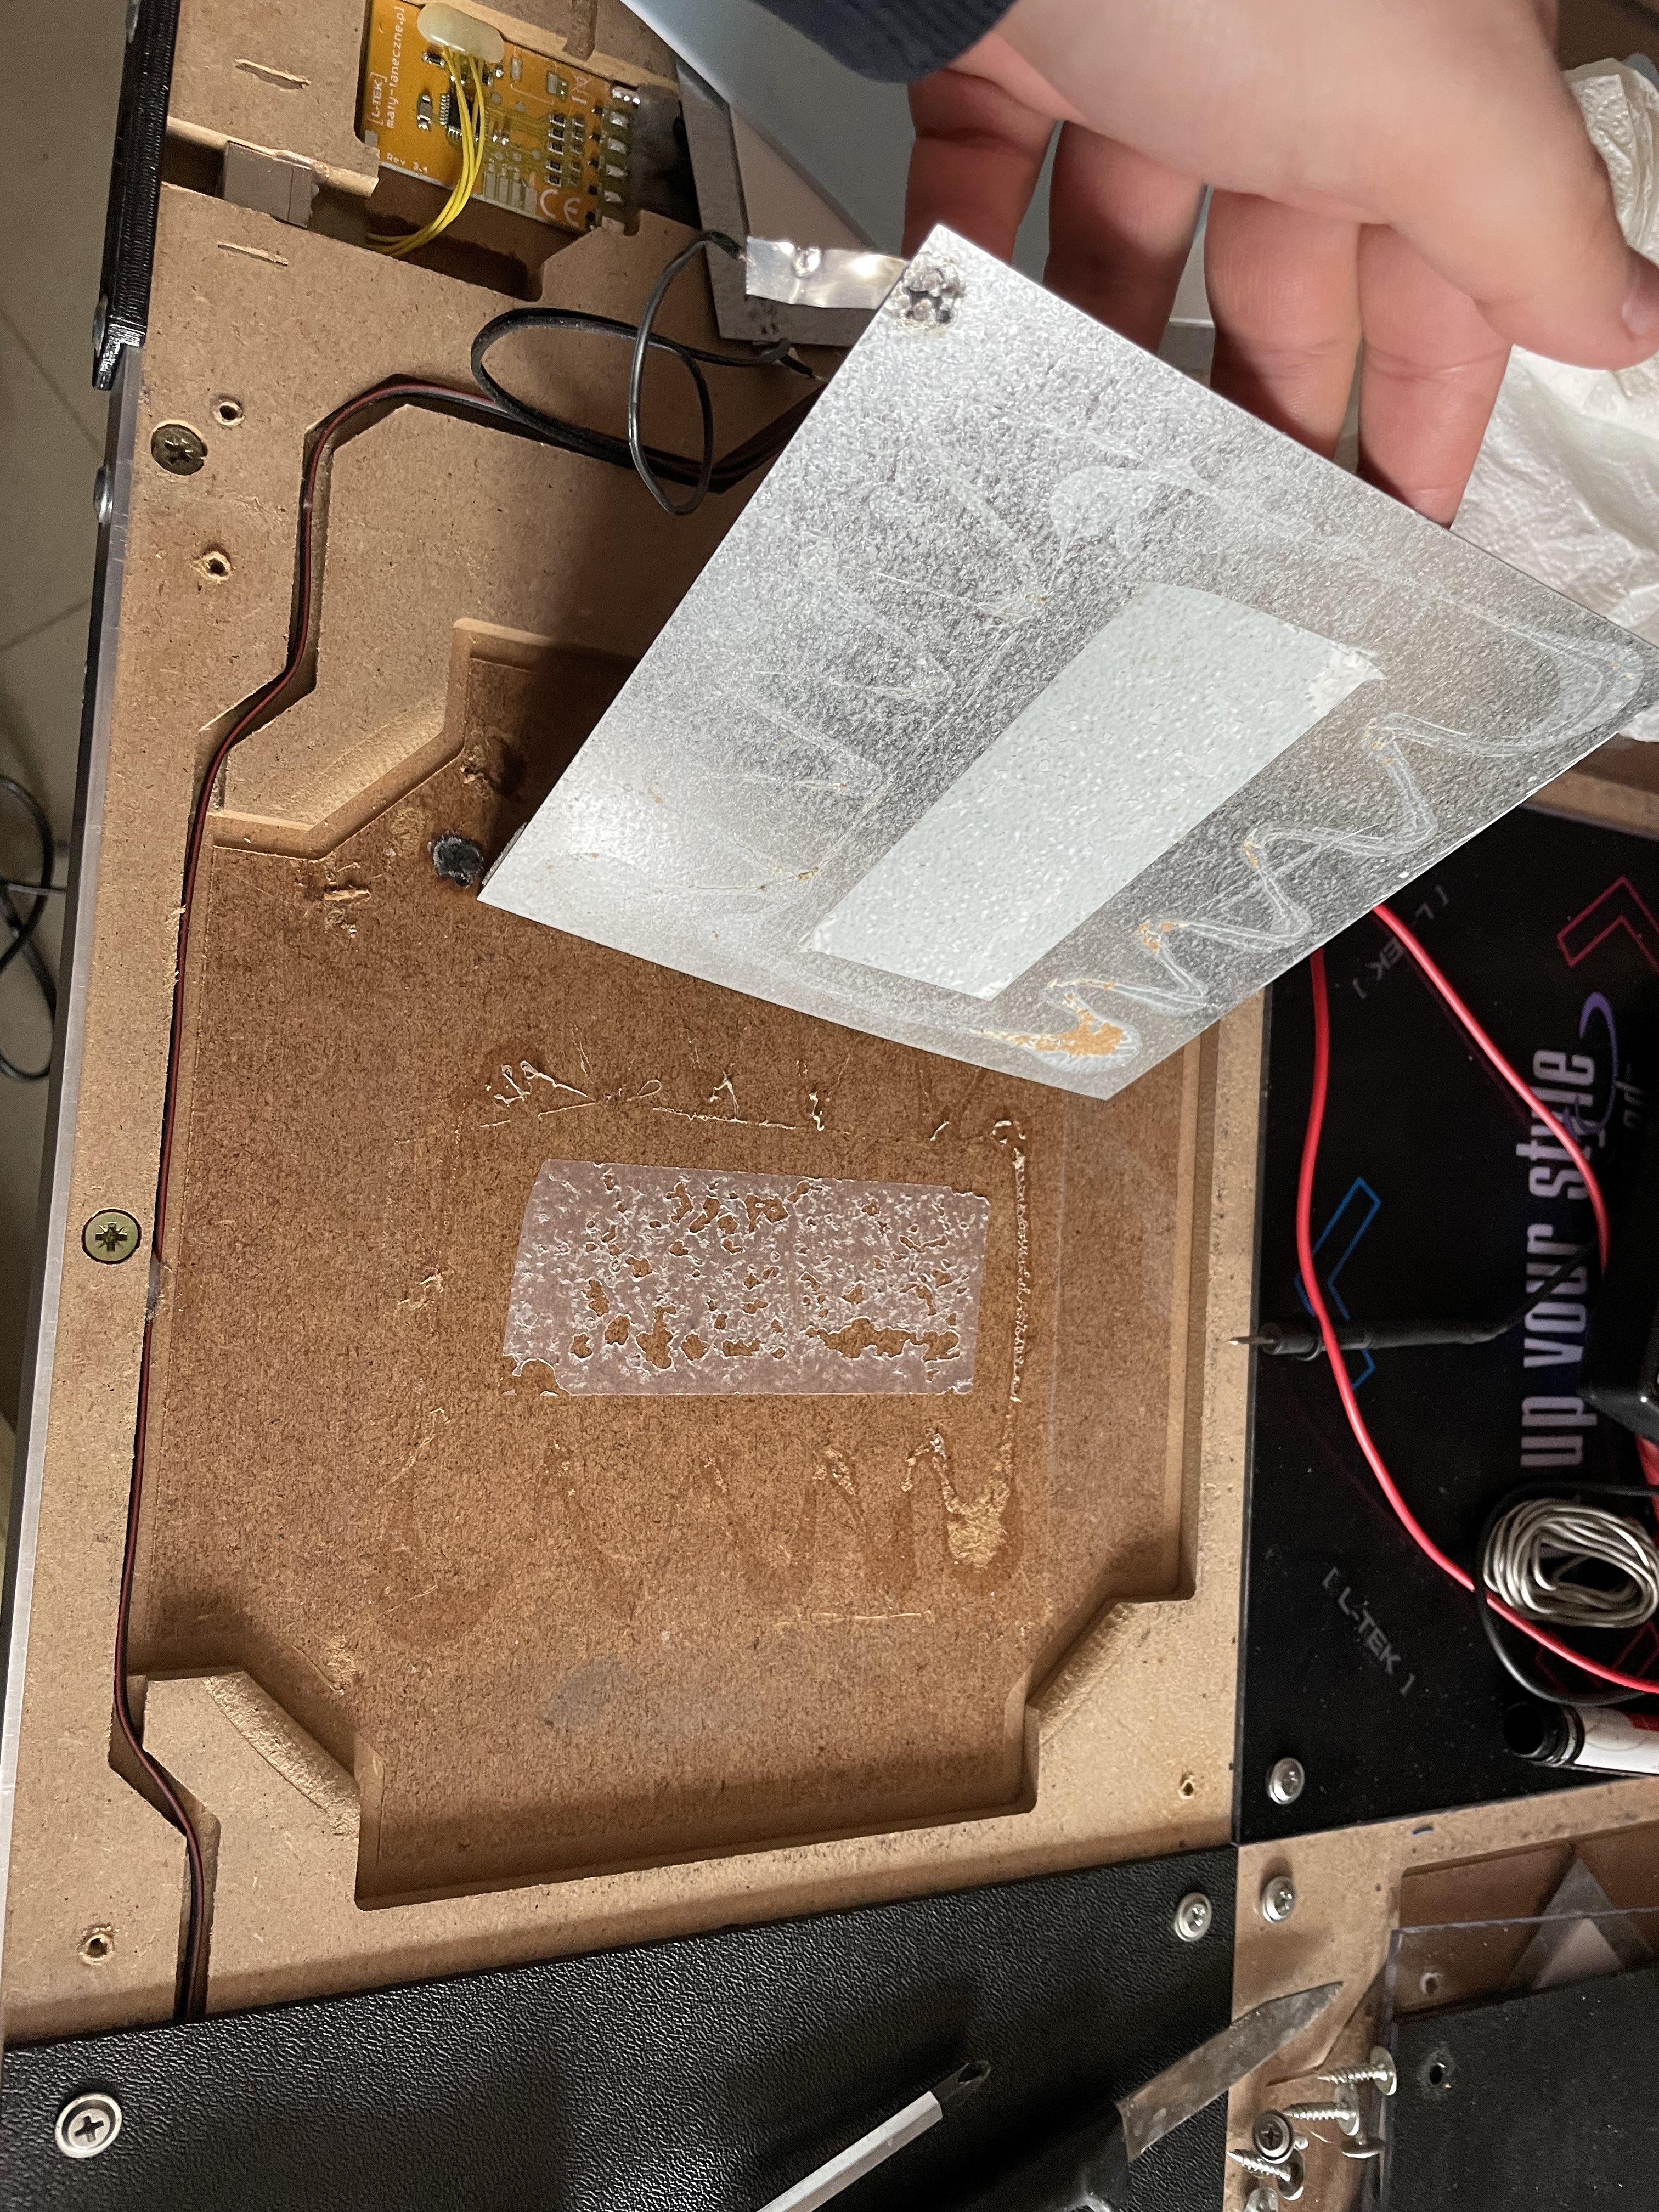
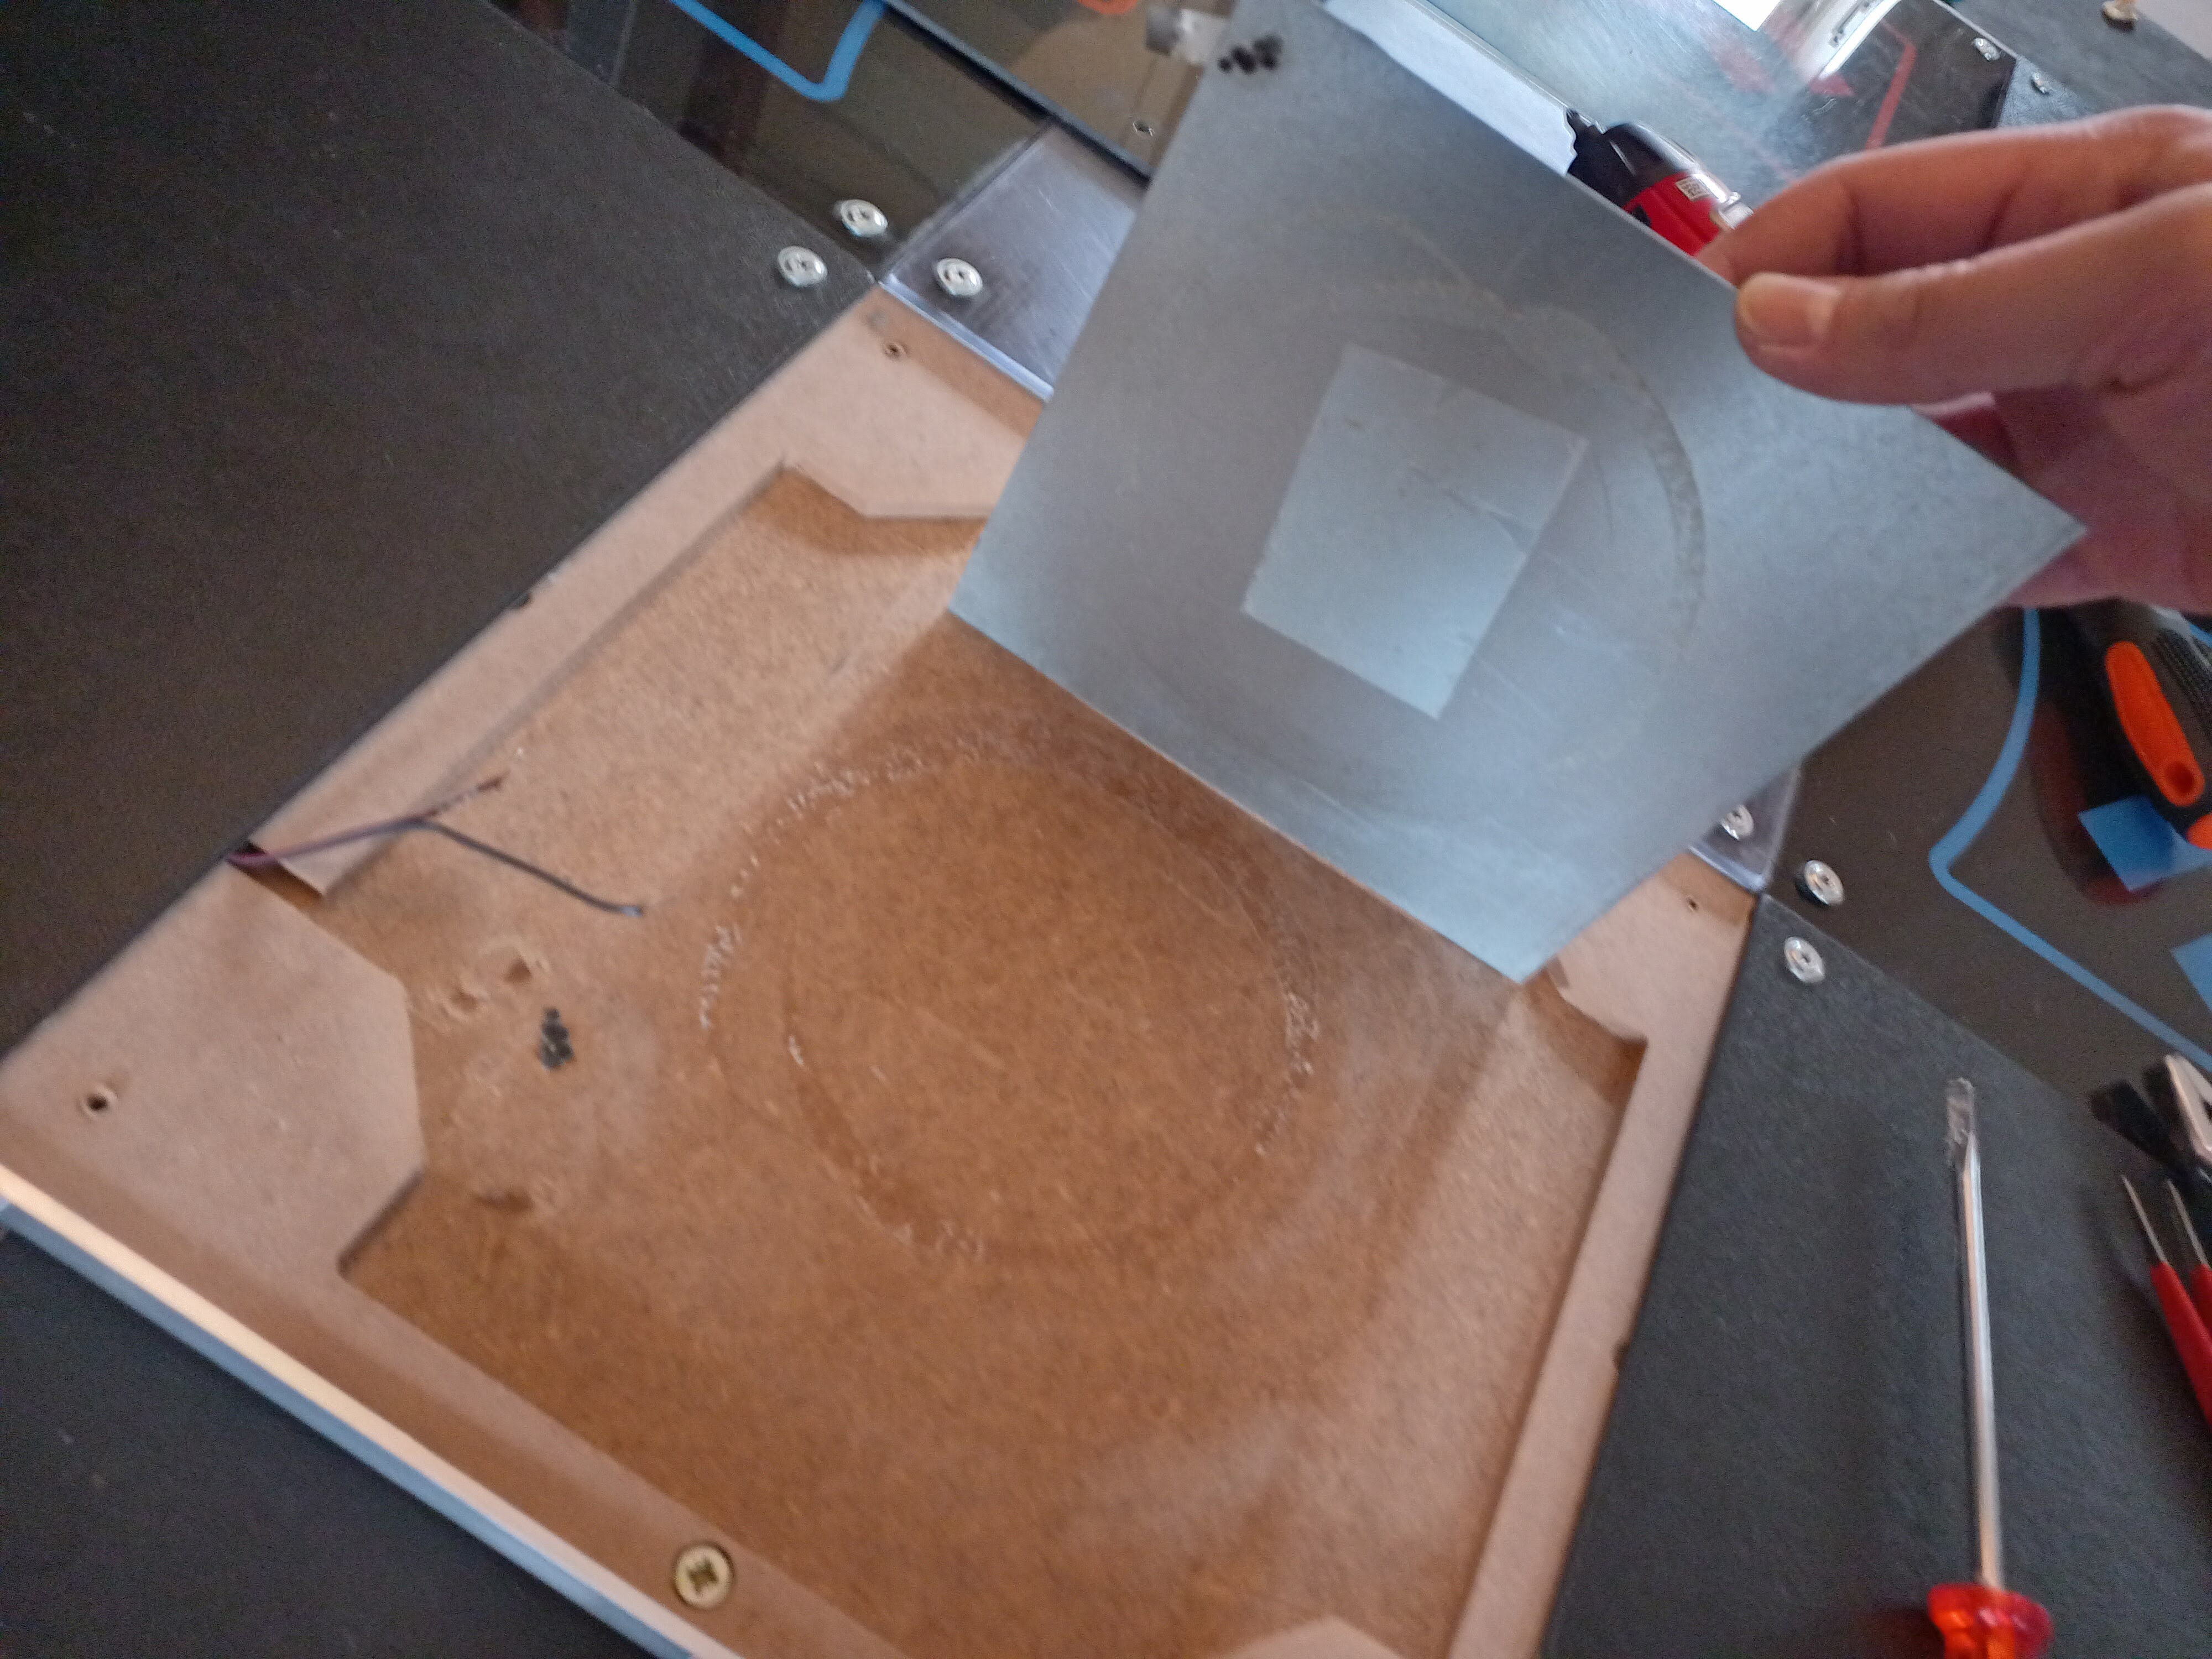
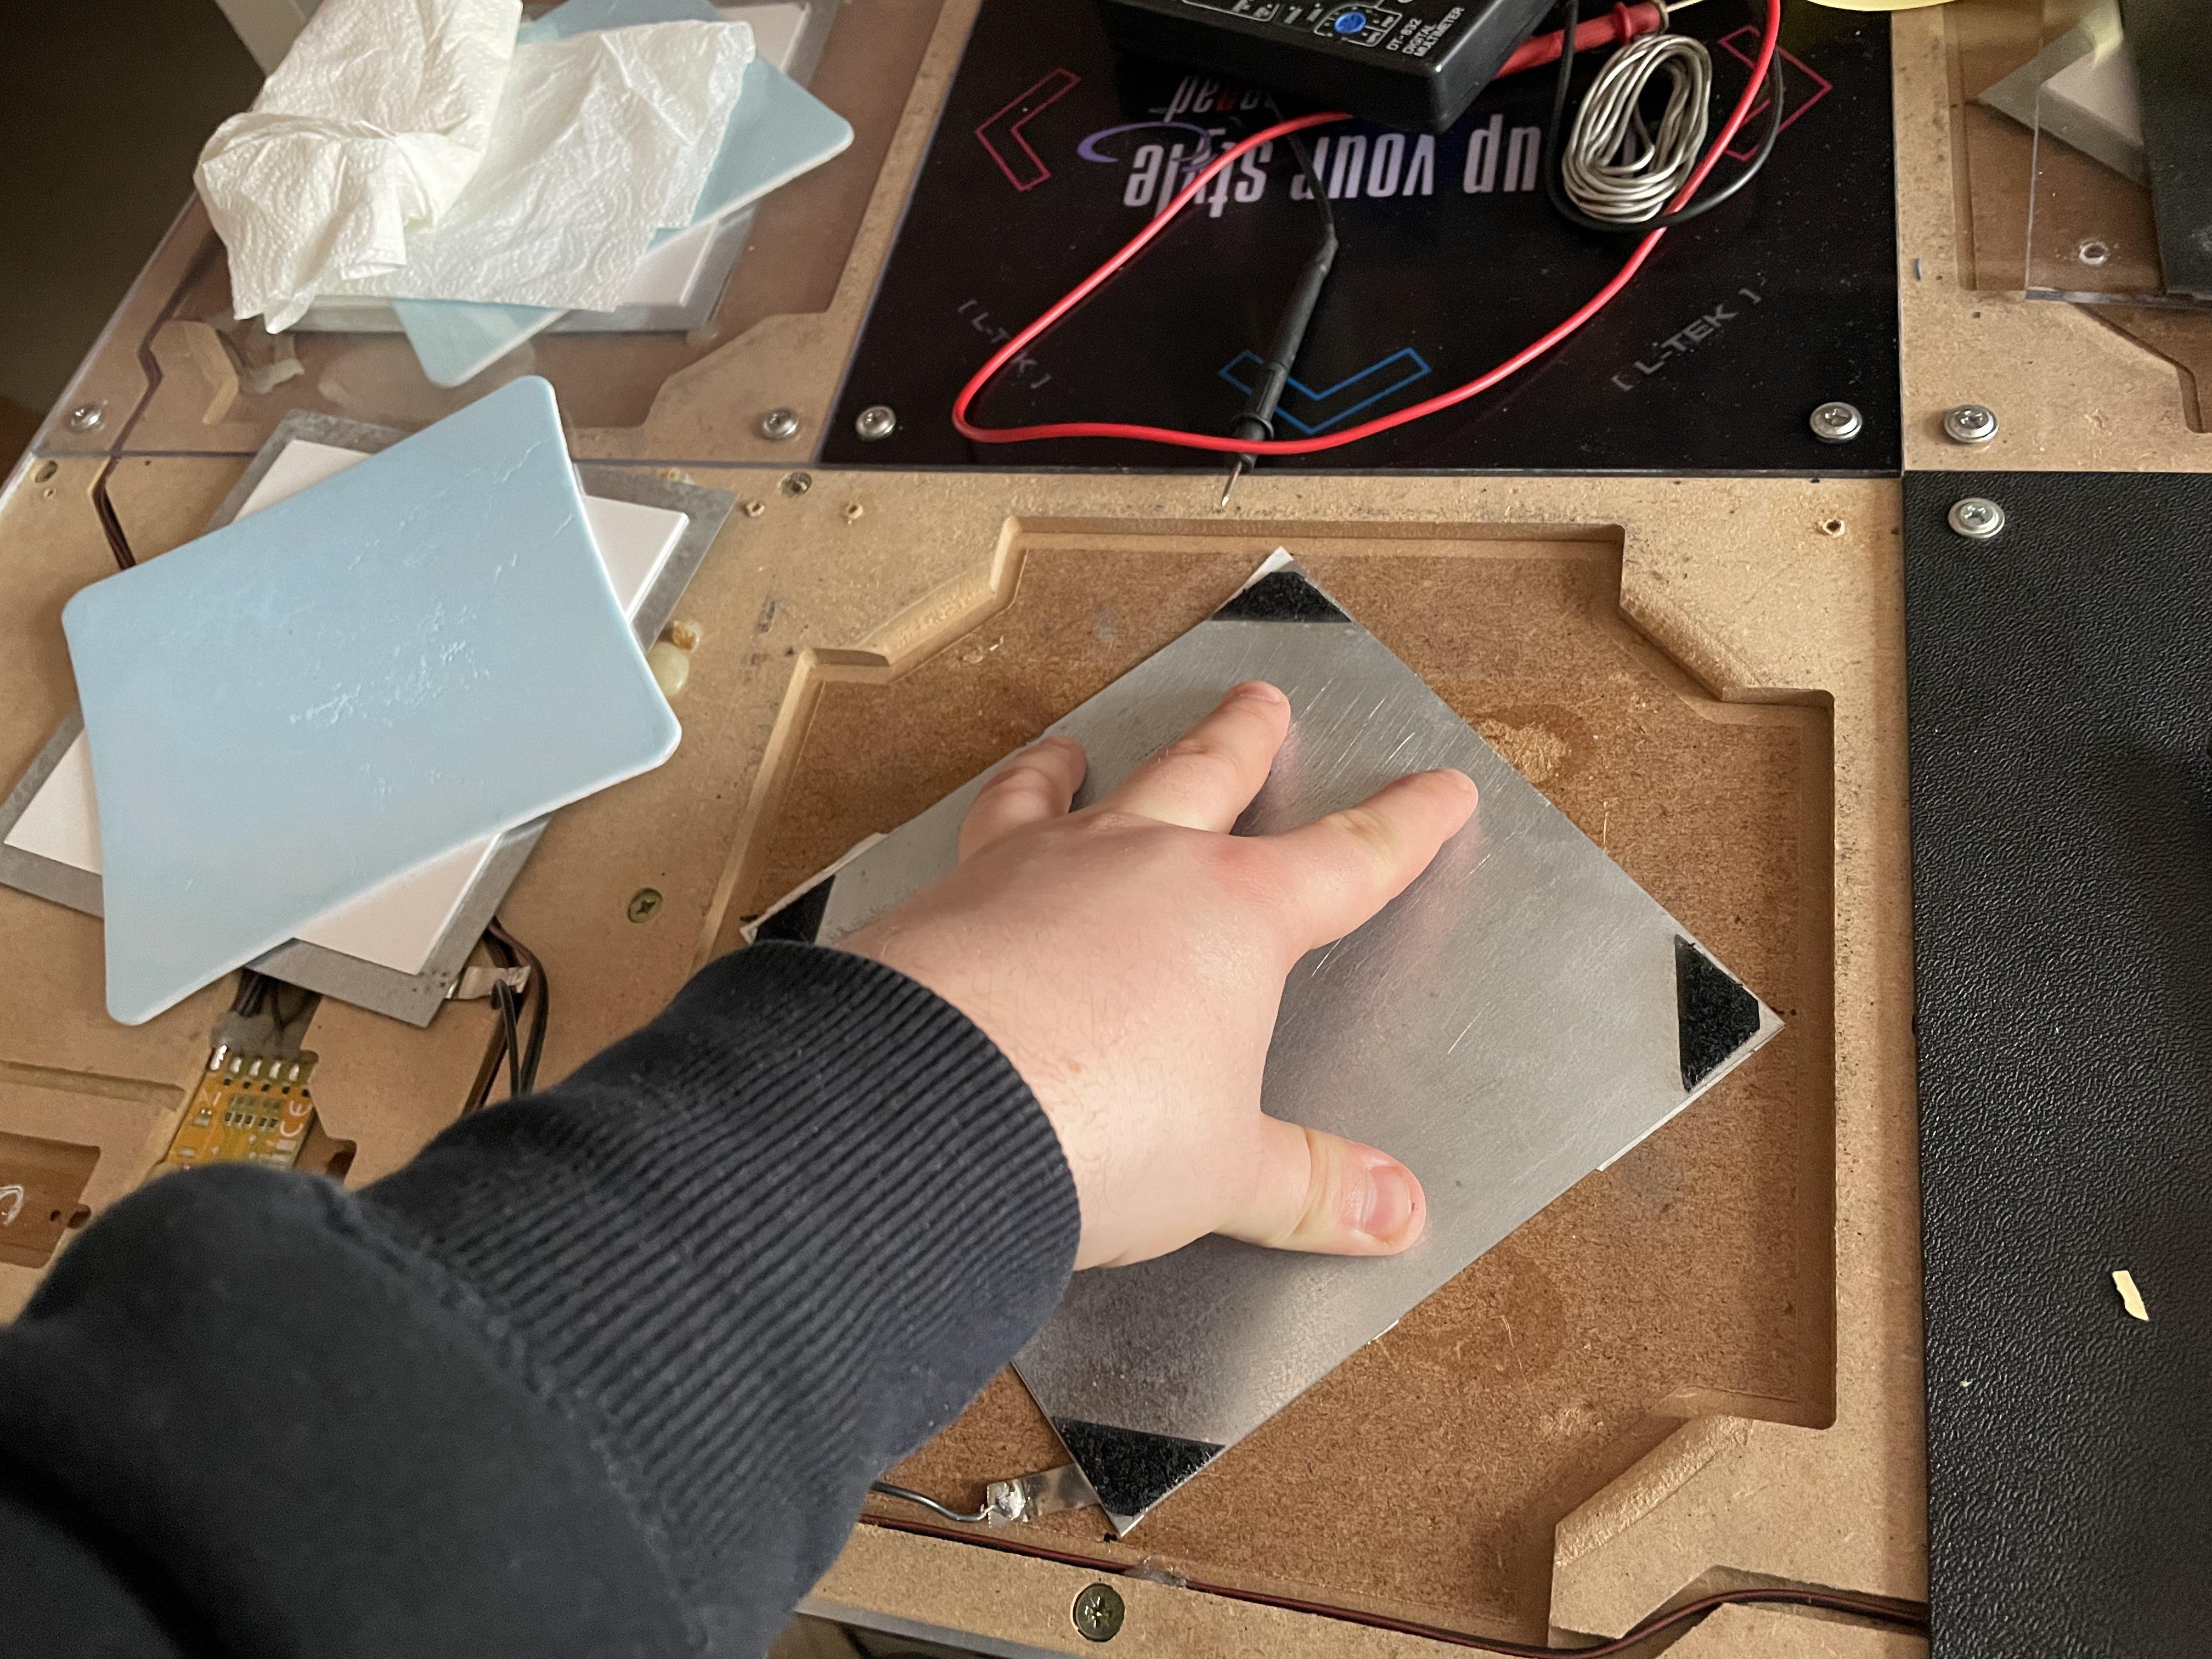
<p>With hotglue and staples gone, you should be able to deattach the top plate. The bottom plate is held down with a combination of adhesive and doublesided tape. You’ll want to work around the plate with an air blower or a hair dryer spreading the heat evenly to the whole plate. Use a flat tool to help lift the plate off. Do your best to avoid bending it in the process, as it’s very difficult to bend it back into shape (a slight arc is acceptable).</p>

<p><img src="/assets/lisekmod/step5.jpg" alt="step5" /></p>

<p>Depending on when was your pad made, it may be attached with different proportions of adhesive and doublesided tape.</p>

<table>
  <thead>
    <tr>
      <th style="text-align: center">Pad A</th>
      <th style="text-align: center">Pad B</th>
    </tr>
  </thead>
  <tbody>
    <tr>
      <td style="text-align: center"><img src="/assets/lisekmod/step5a.jpg" alt="step5a" /></td>
      <td style="text-align: center"><img src="/assets/lisekmod/step5b.jpg" alt="step5b" /></td>
    </tr>
  </tbody>
</table>

<h2 id="6-test-fit-the-plates-and-cut-the-wires-if-necessary">6. Test fit the plates and cut the wires if necessary</h2>

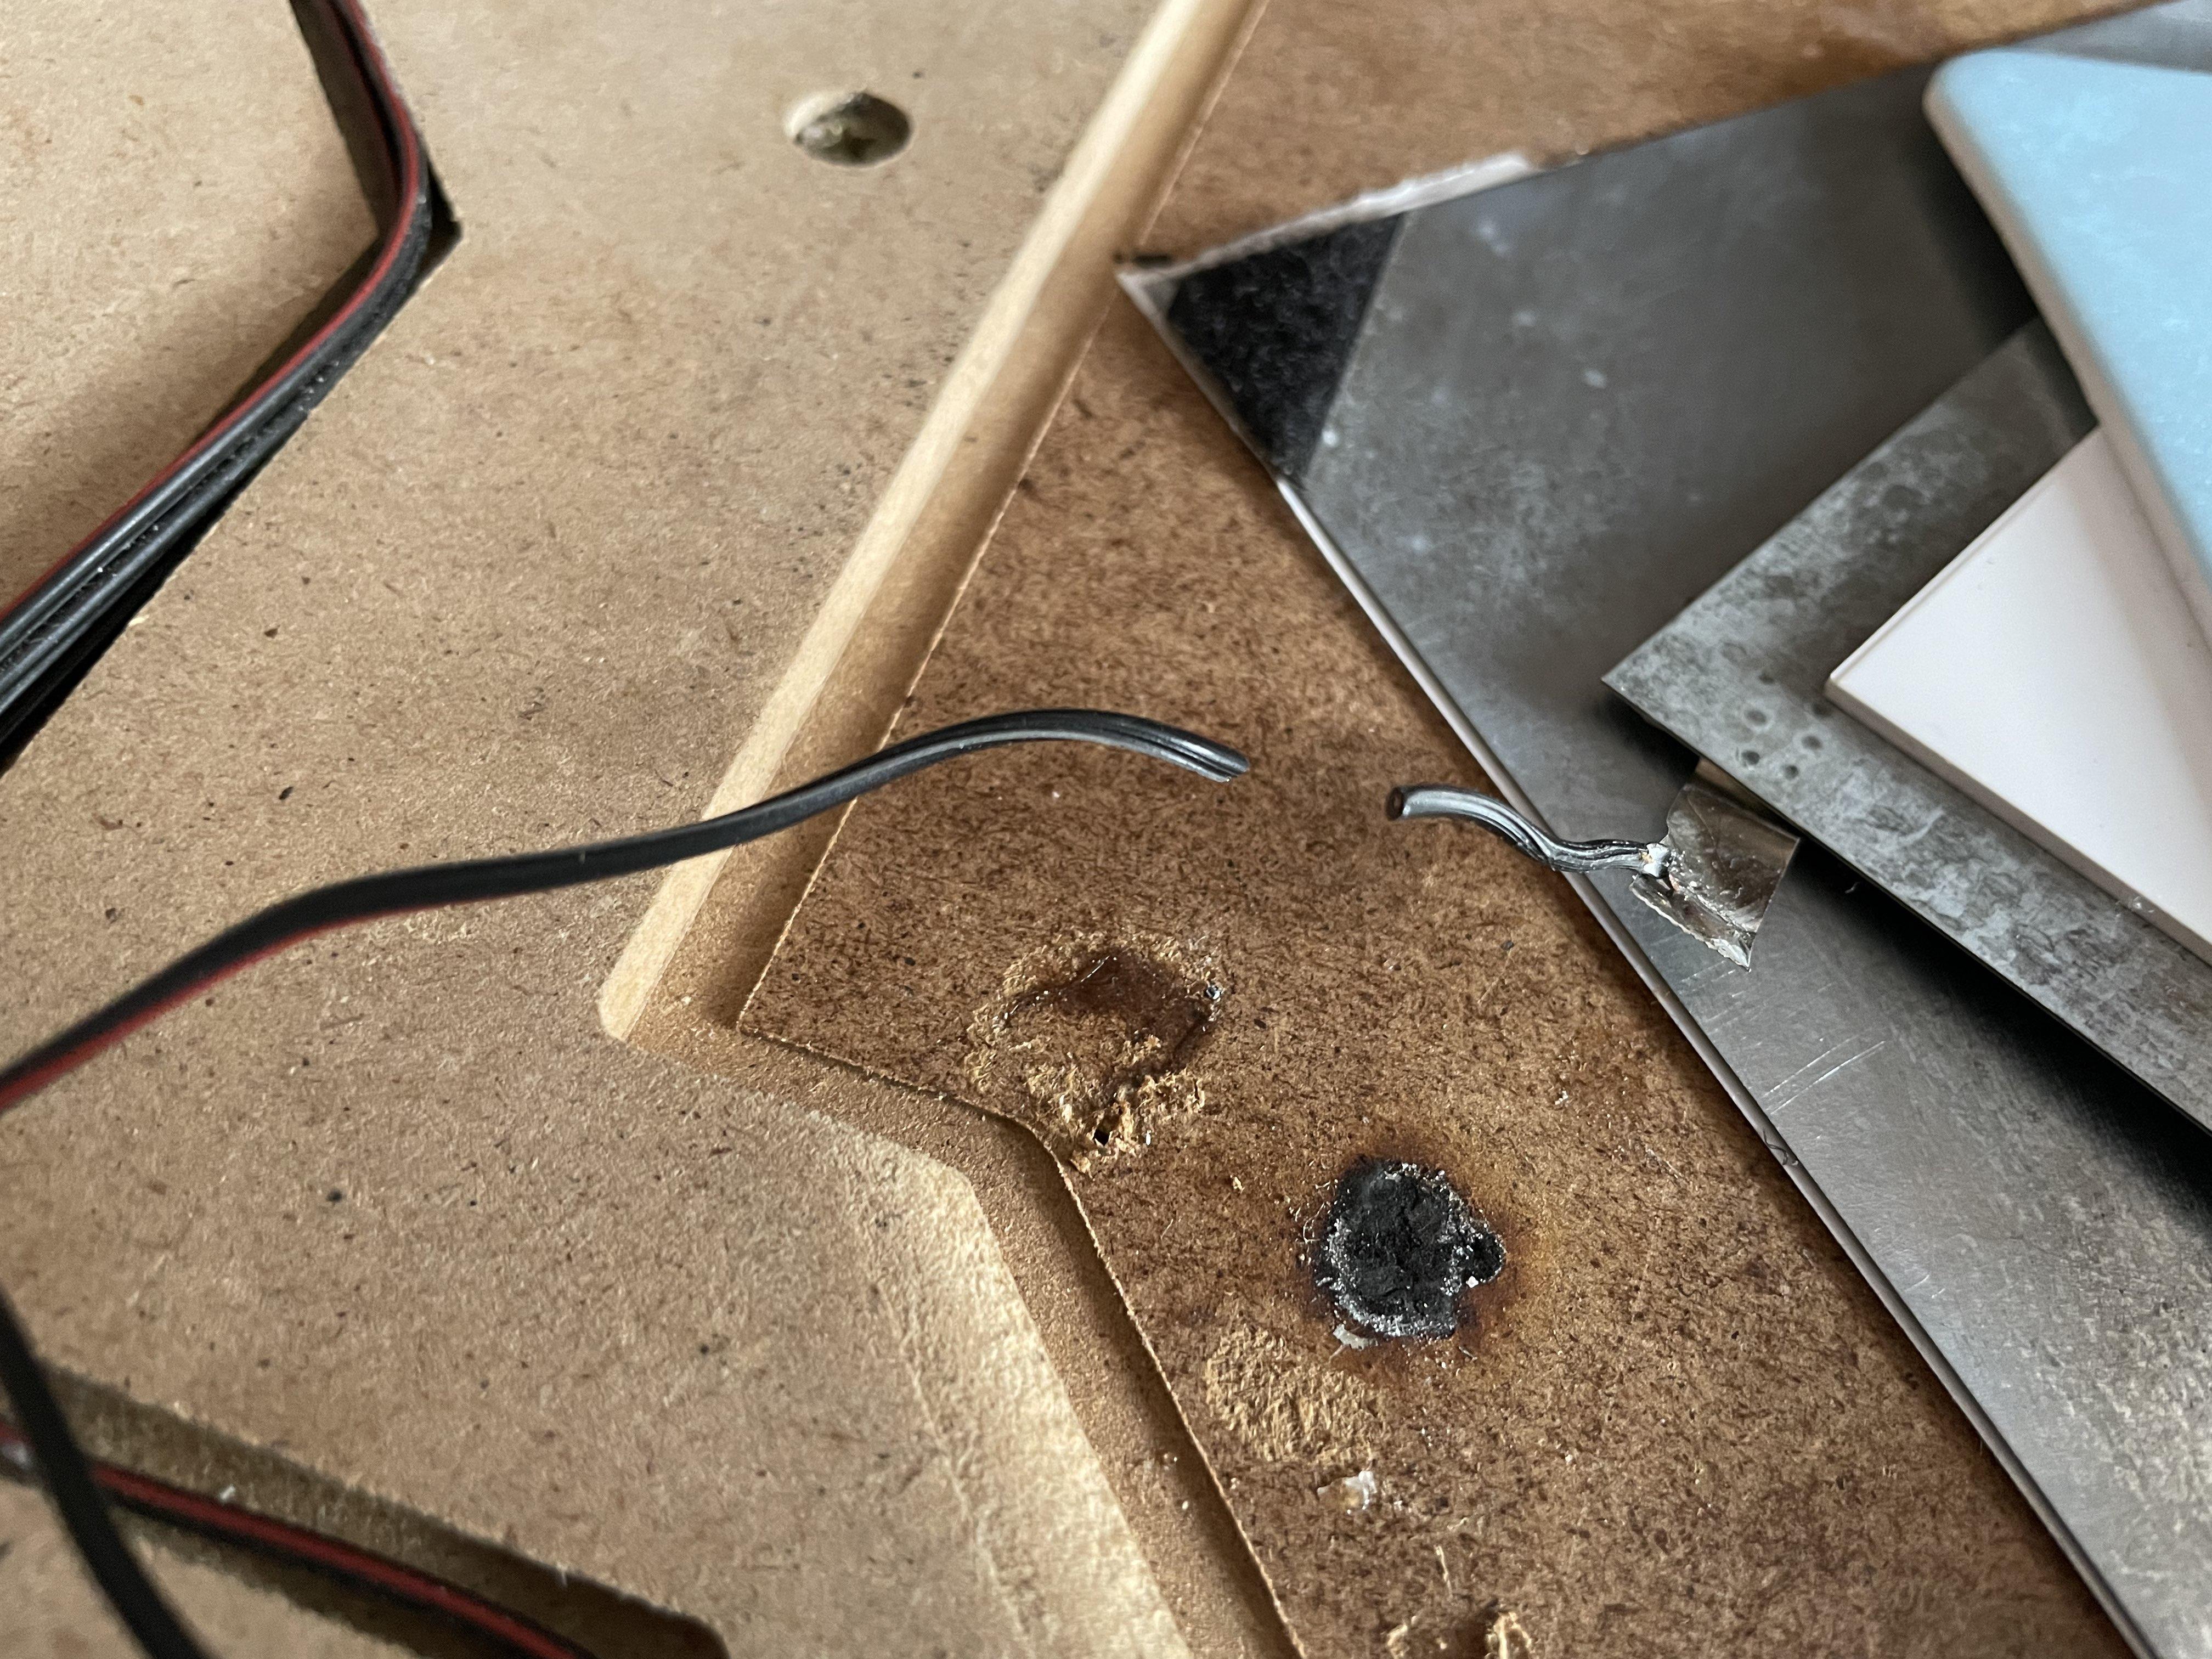
<p>First check if you can get away with turning the plates while keeping the attached wires in the channels and not straining them. If not, you will have to extend the wire.</p>

<p>You want to leave around 2cm of the wire. on the plate side. Use the wire stripper to strip about 1cm of shielding from both ends.</p>

<p><img src="/assets/lisekmod/step6.jpg" alt="step6" /></p>

<h2 id="7-solder-the-extension-wire">7. Solder the extension wire</h2>

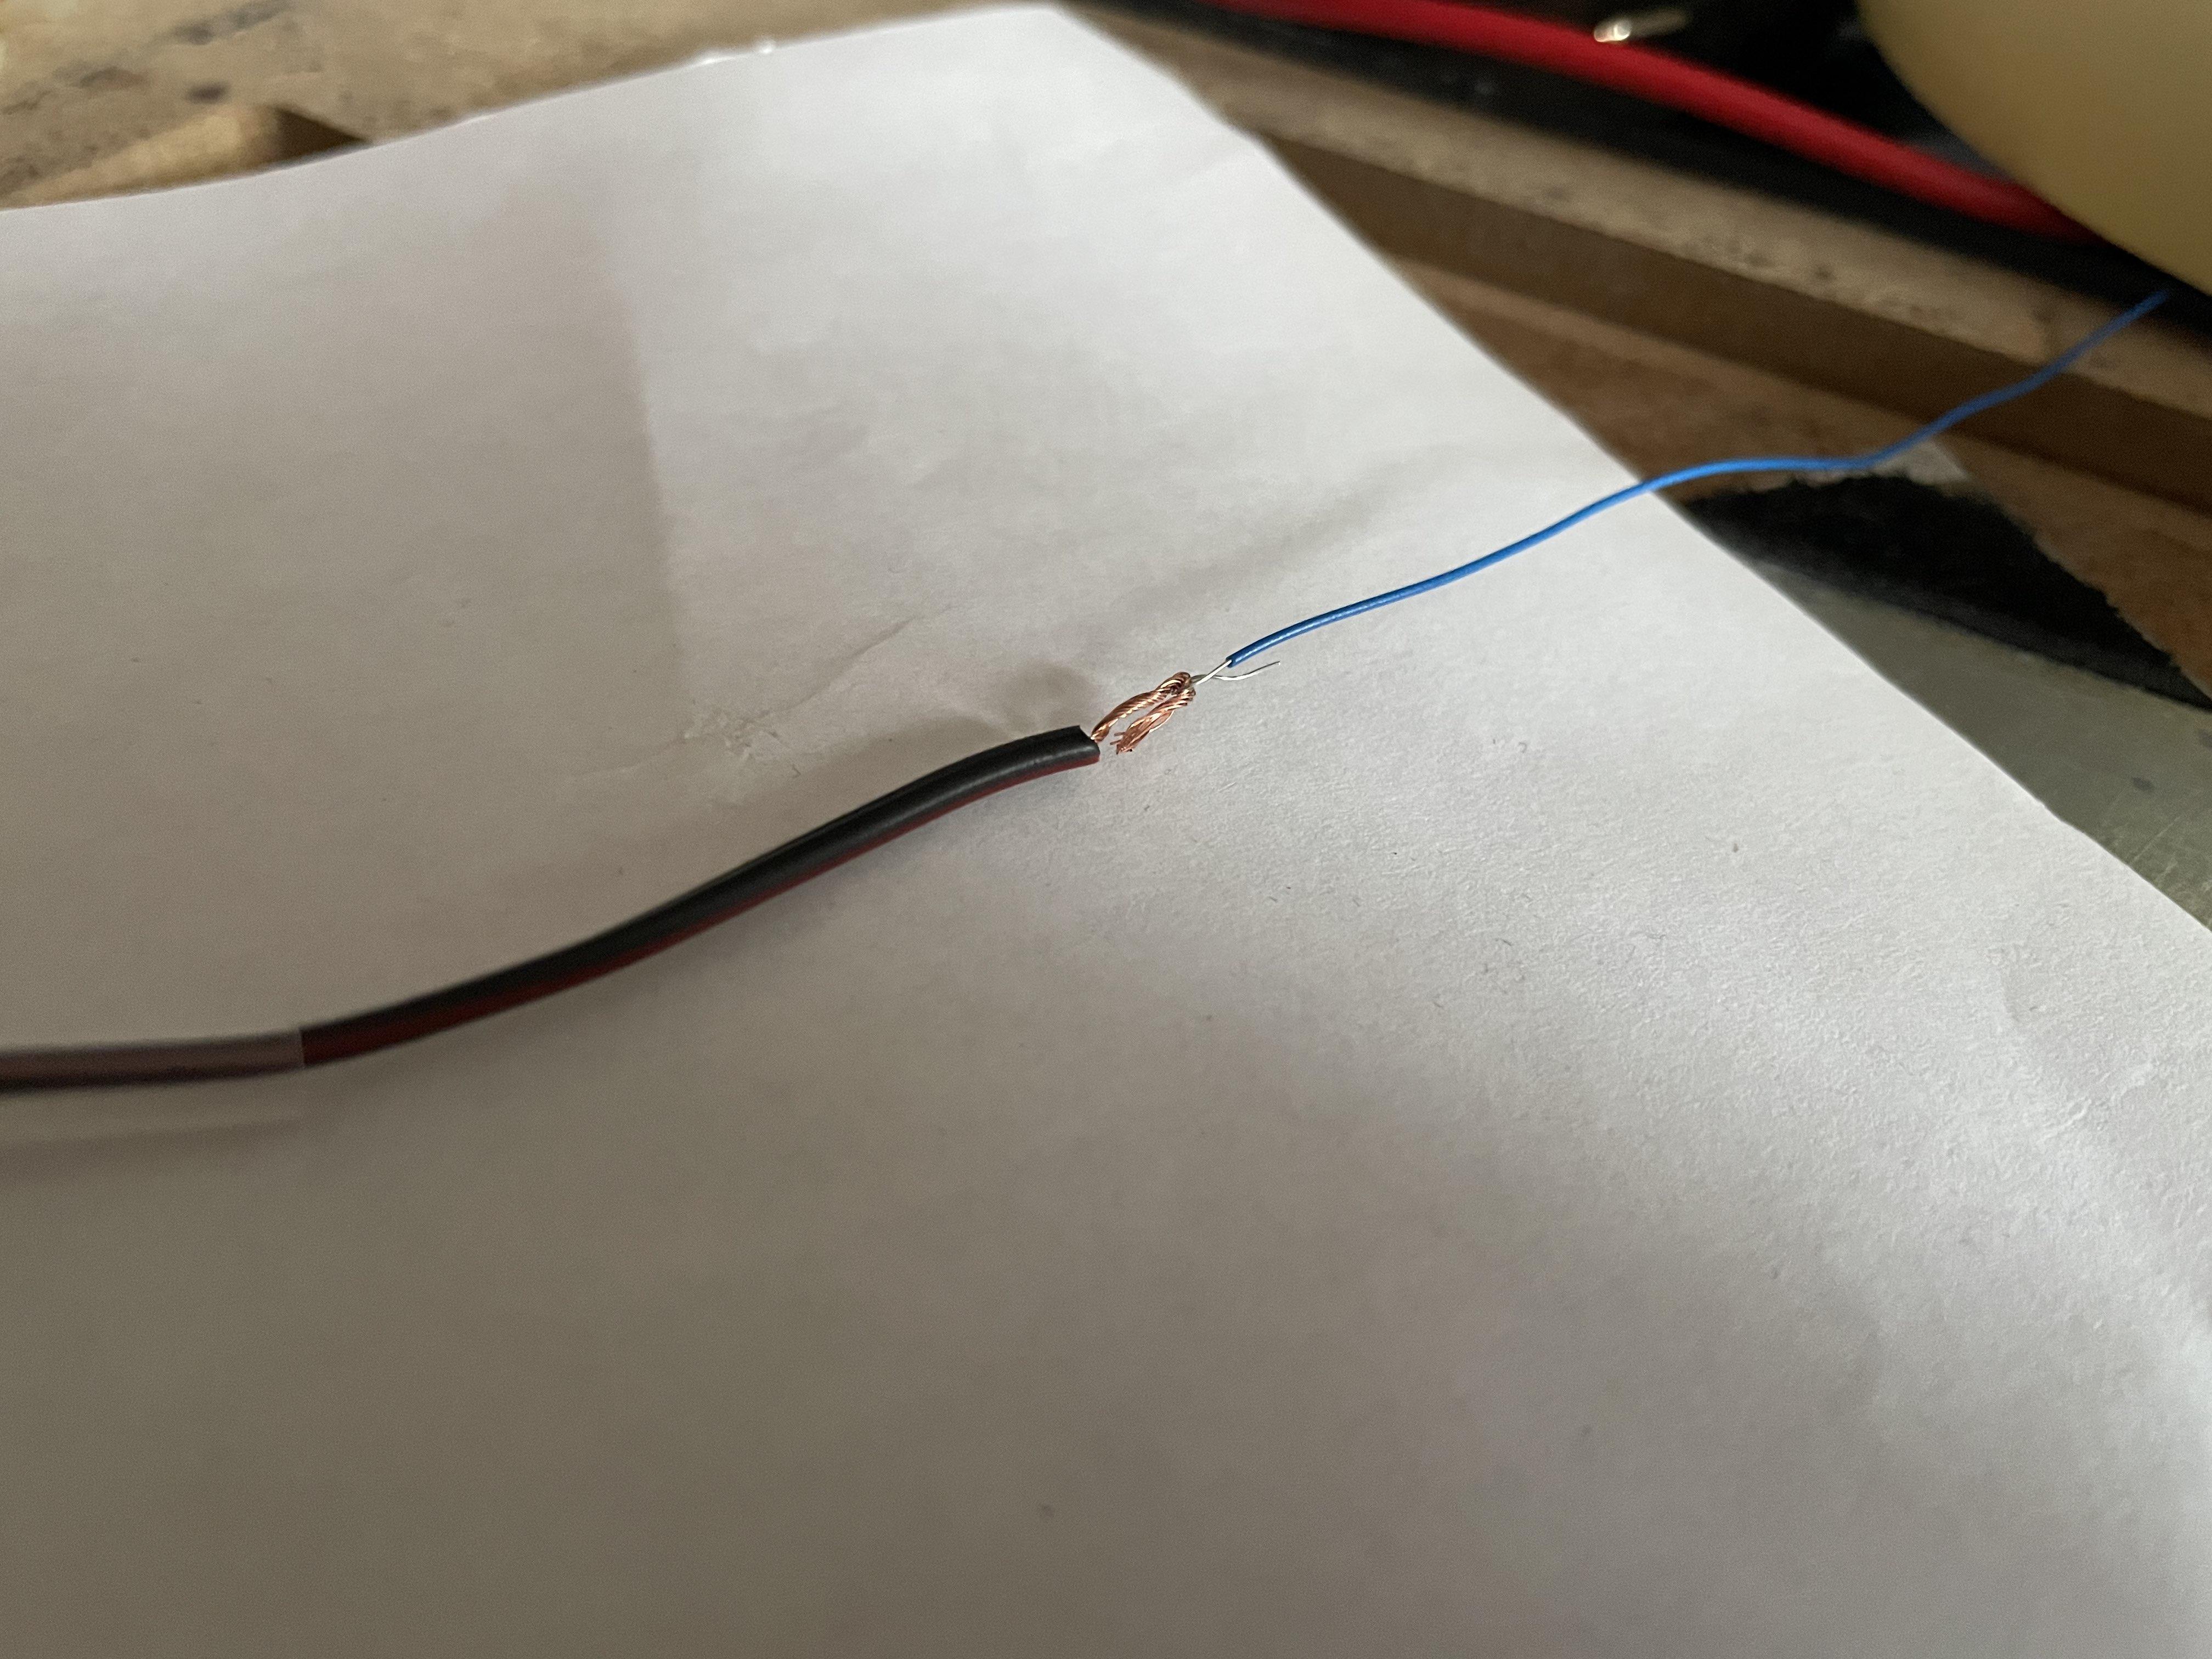
<p>First place your plates in the desired position and measure how much extra wire you will need. Prepare a piece of wire that is a bit longer than that and strip about 1cm on each end.</p>

<p>Next you want to twist one end and the pad wire together (you can also form hooks with the ends and join them together).</p>

<p><img src="/assets/lisekmod/step7a.jpg" alt="step7a" /></p>

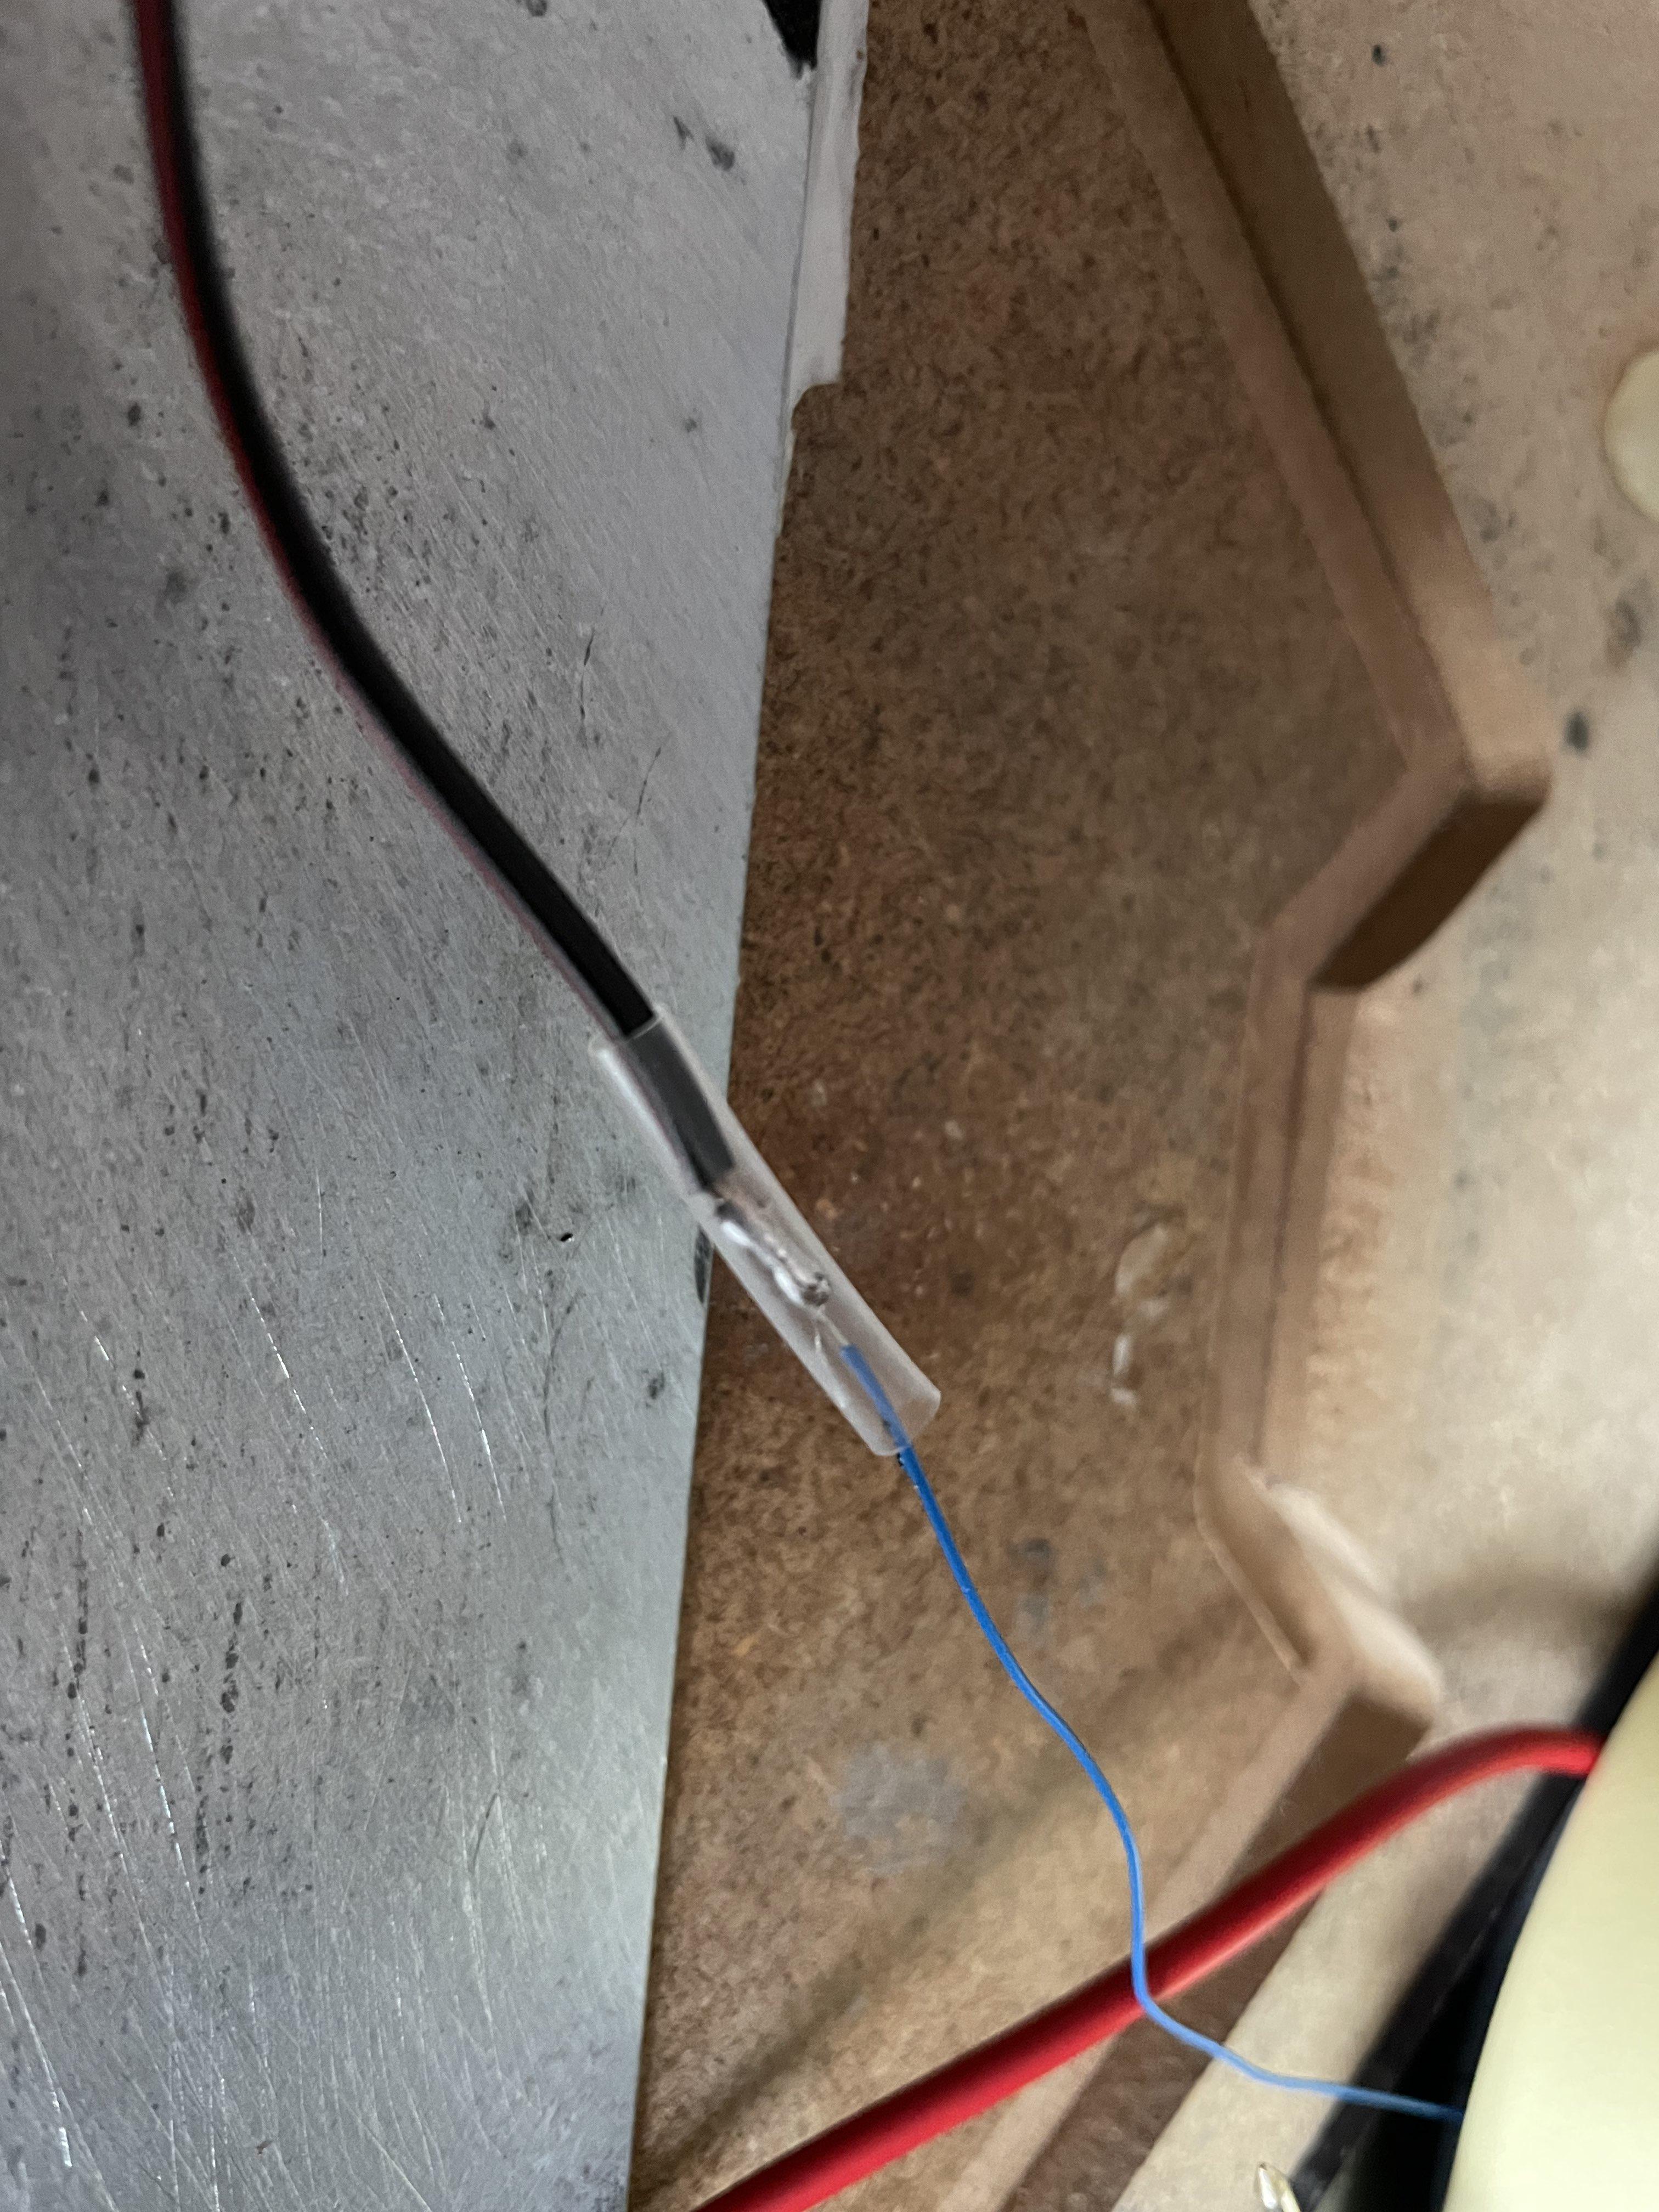
<p>Then get them nice and straight and tin the joint with some solder. After that put on a heat shrink sleeve and apply some heat with a heat gun or the soldering iron.</p>

<p><img src="/assets/lisekmod/step7b.jpg" alt="step7b" /></p>

<p>After that pull the wire through another sleeve, repeat the process for the sensor end of the wire, and put on the said sleeve.</p>

<h2 id="8-reseat-the-bottom-plate">8. Reseat the bottom plate</h2>

<p>Cover the bottom of the bottom plate with doublesided tape and stick it firmly onto the pad surface using the marks you left in step 2 as guides.</p>

<p><img src="/assets/lisekmod/step8a.jpg" alt="step8a" /></p>

<p><img src="/assets/lisekmod/step8b.jpg" alt="step8b" /></p>

<h2 id="optional-add-copper-tape">(Optional) Add copper tape</h2>

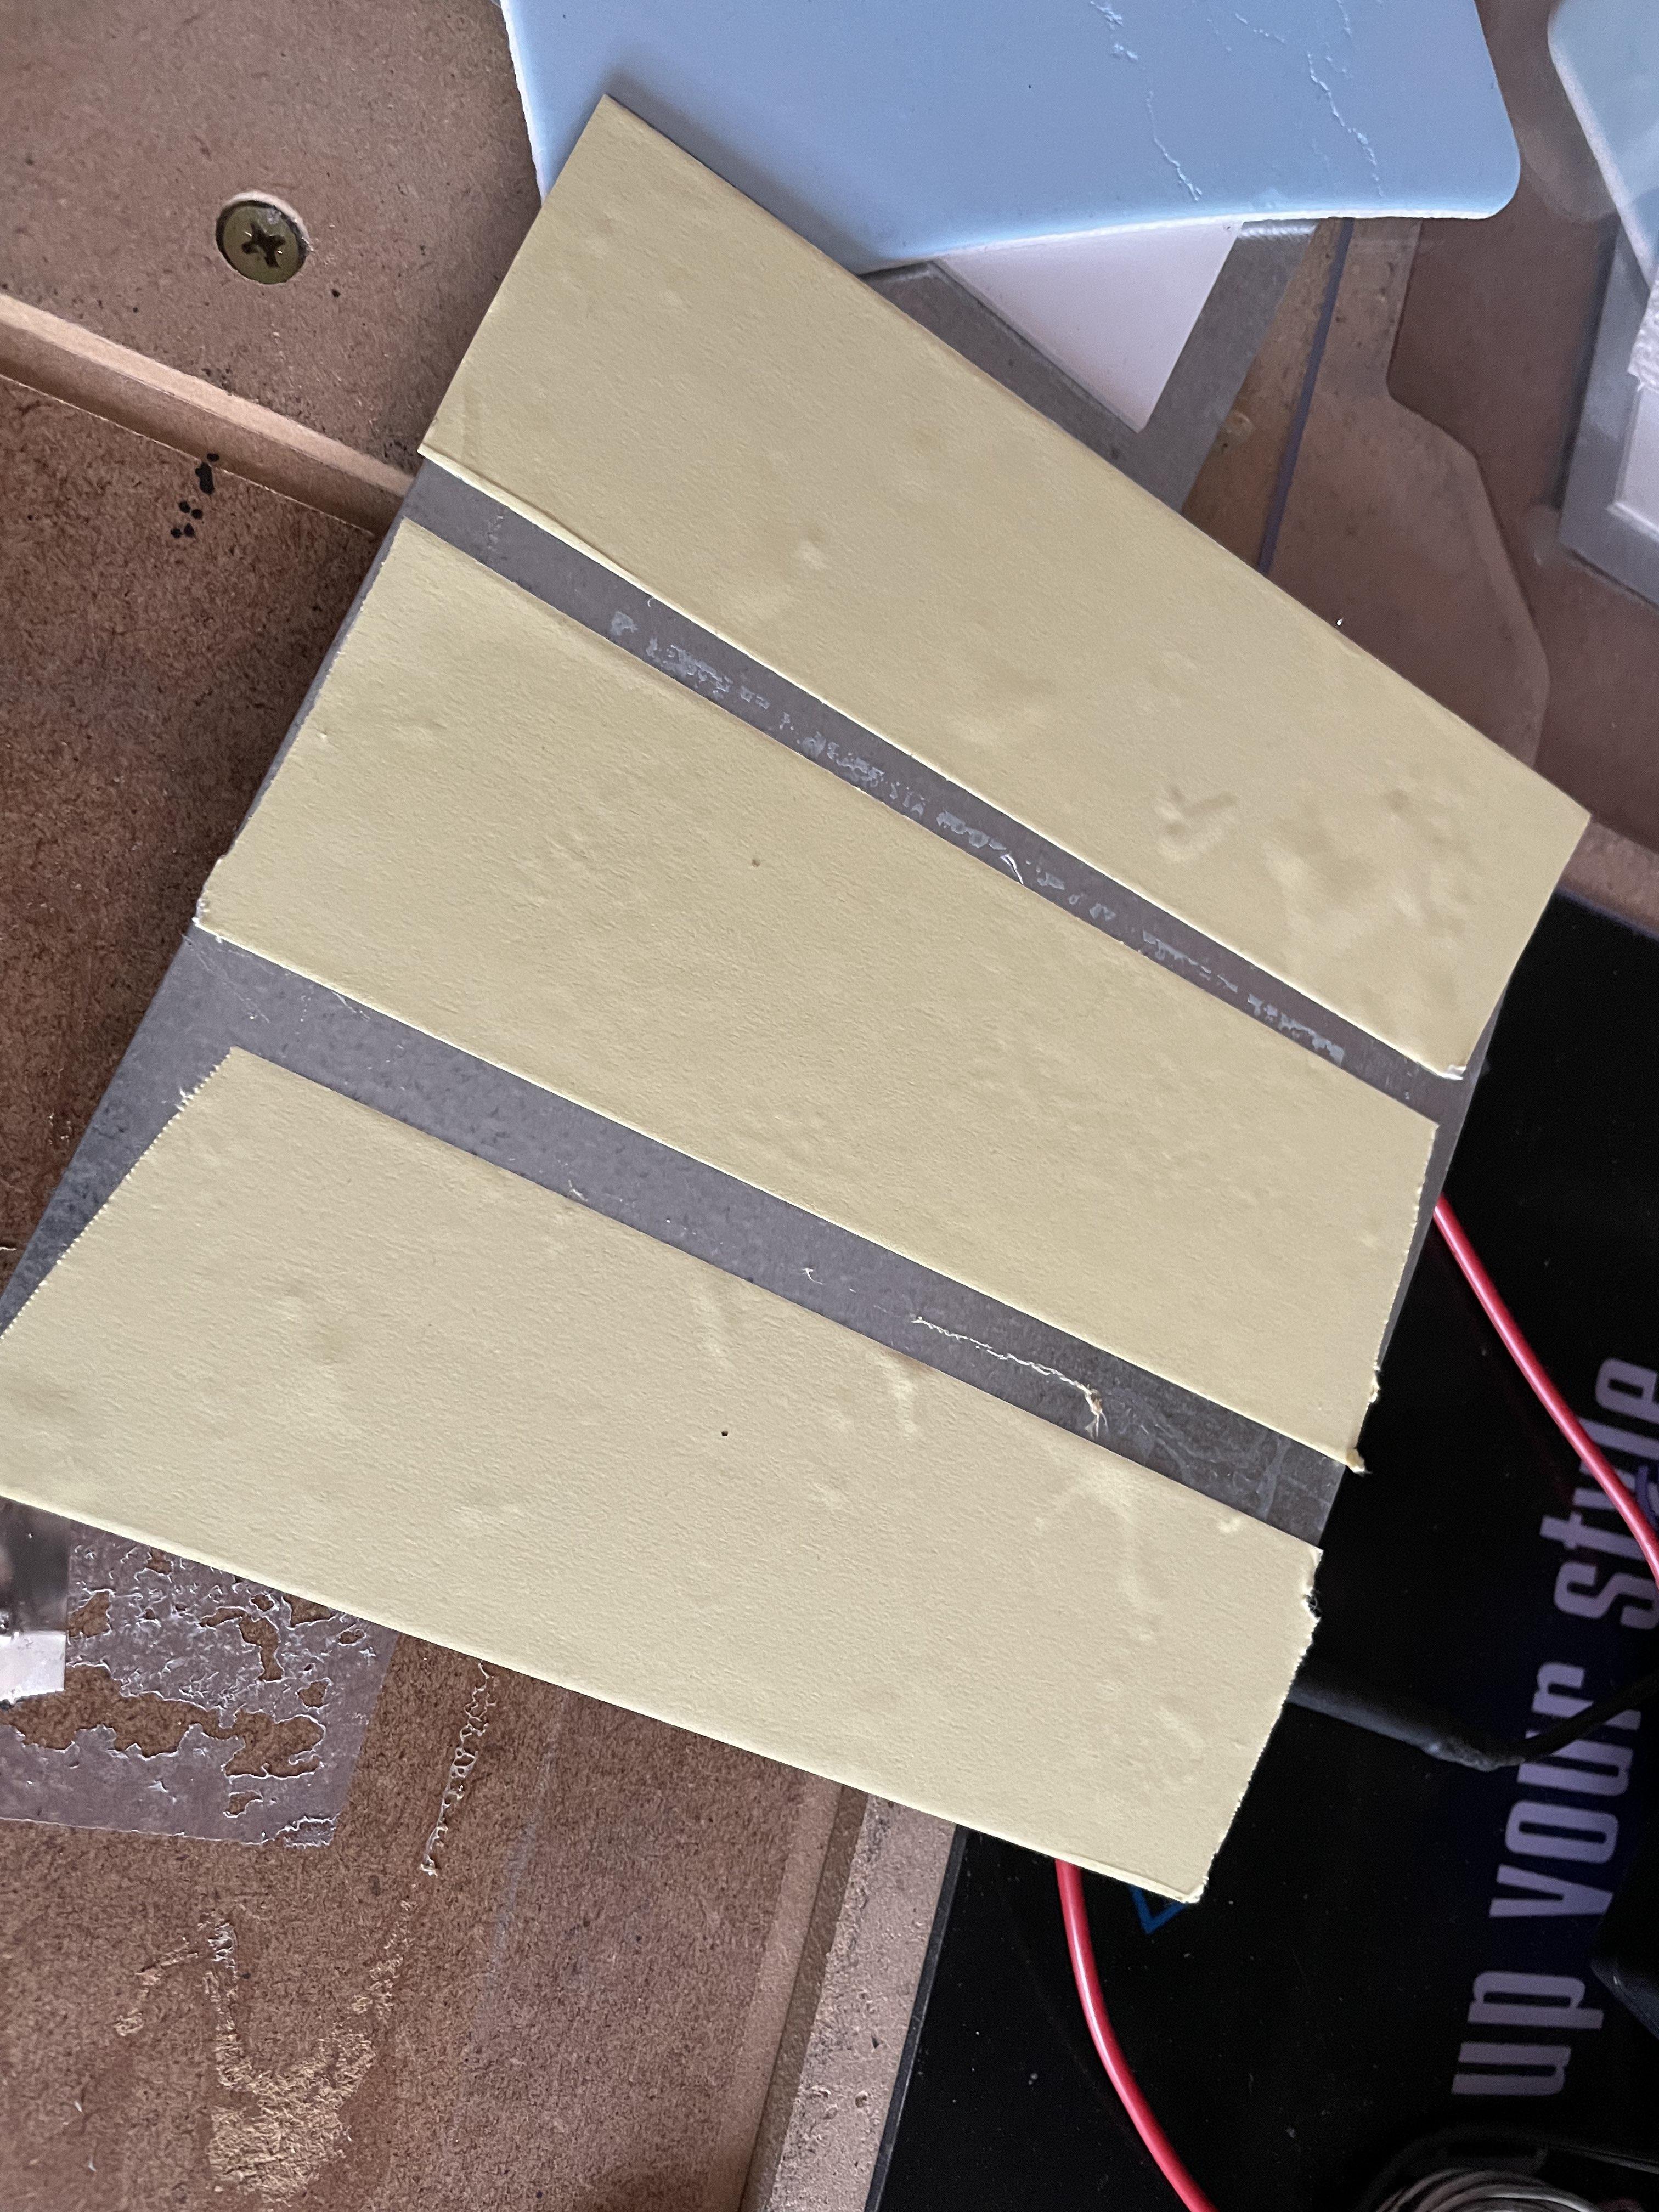
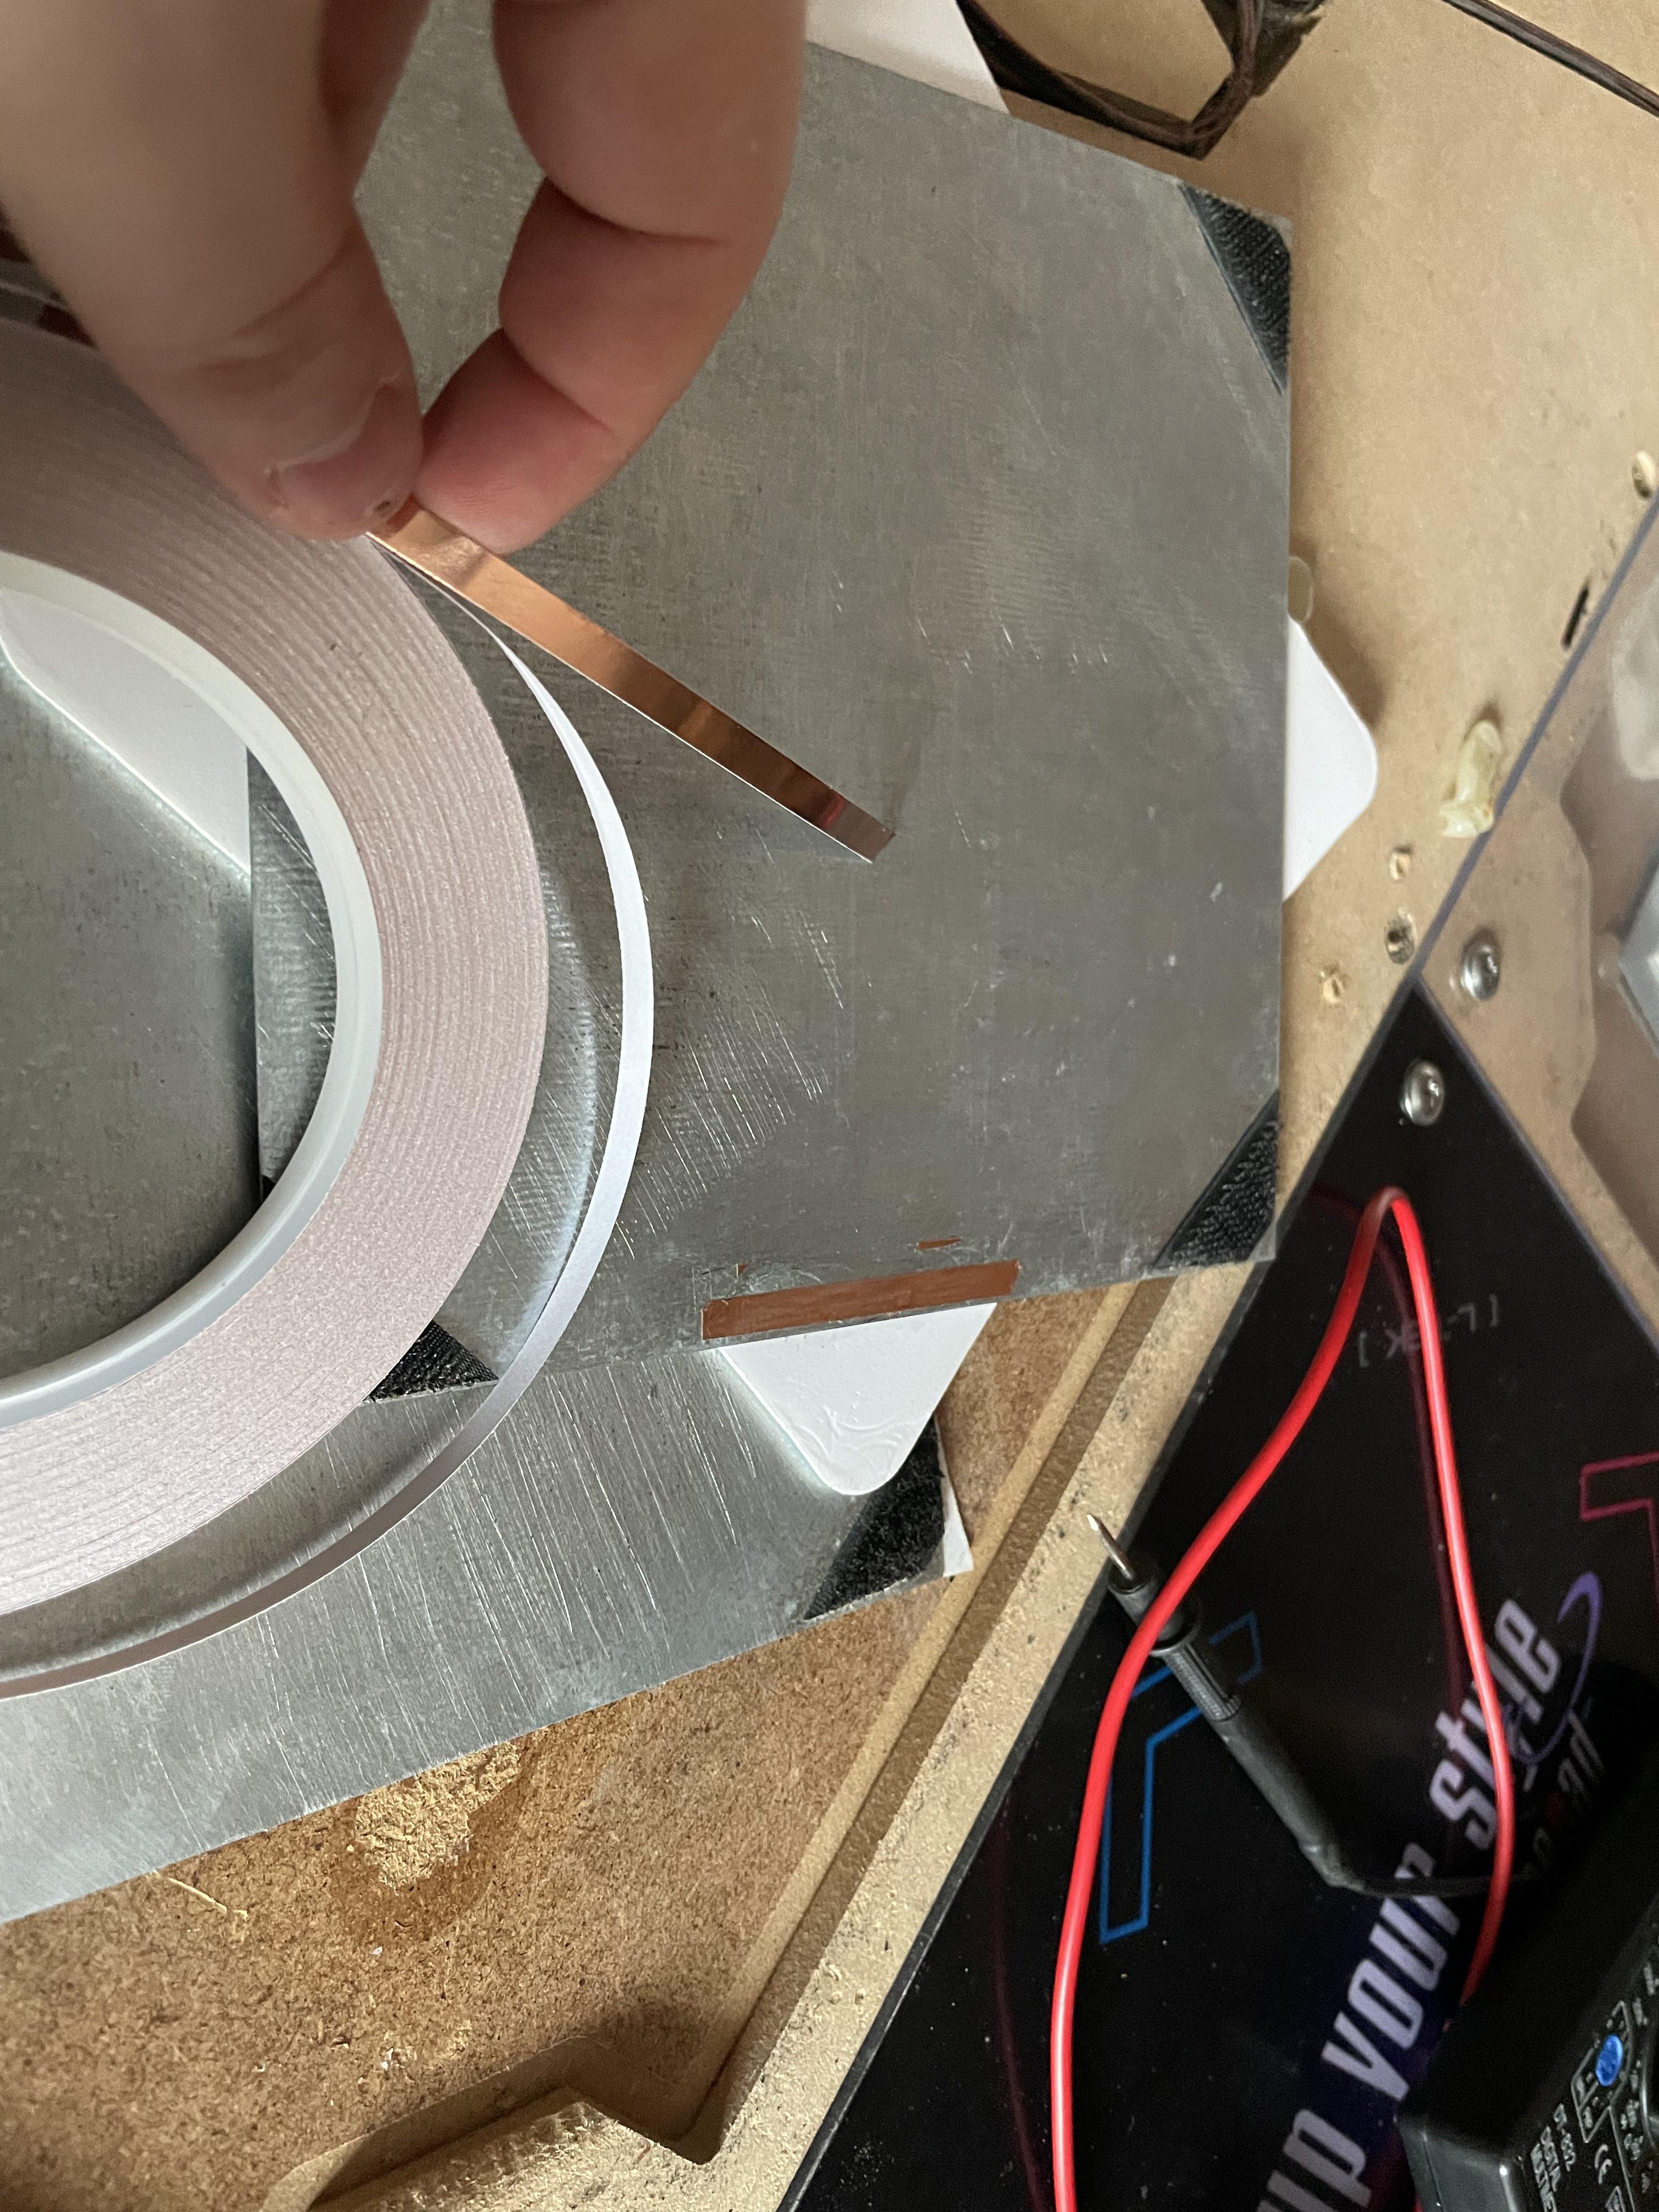
<p>If after sticking on the top plate you feel that the brackets aren’t consistent enough on both inner corners of the sensor, you may want to add some copper tape right here.</p>

<p>I had to use the copper tape, because in the past I’ve incorrectly pennymodded the pad causing the pennies to dent into the sensor place, which resulted in decreased sensitivity.</p>

<p><img src="/assets/lisekmod/copper.jpg" alt="copper" /></p>

<p>Add as many layers of copper tape as you think is needed. Personally I was aiming for actuation after pushing down the corner piece by placing my whole fingertip on the foam corner (not just the tippity tip).</p>

<h2 id="9-secure-the-newly-installed-cables">9. Secure the newly installed cables</h2>

<p>I used duct tape because I didn’t have a hotglue gun at hand.</p>

<h2 id="10-reassemble-the-panel">10. Reassemble the panel</h2>

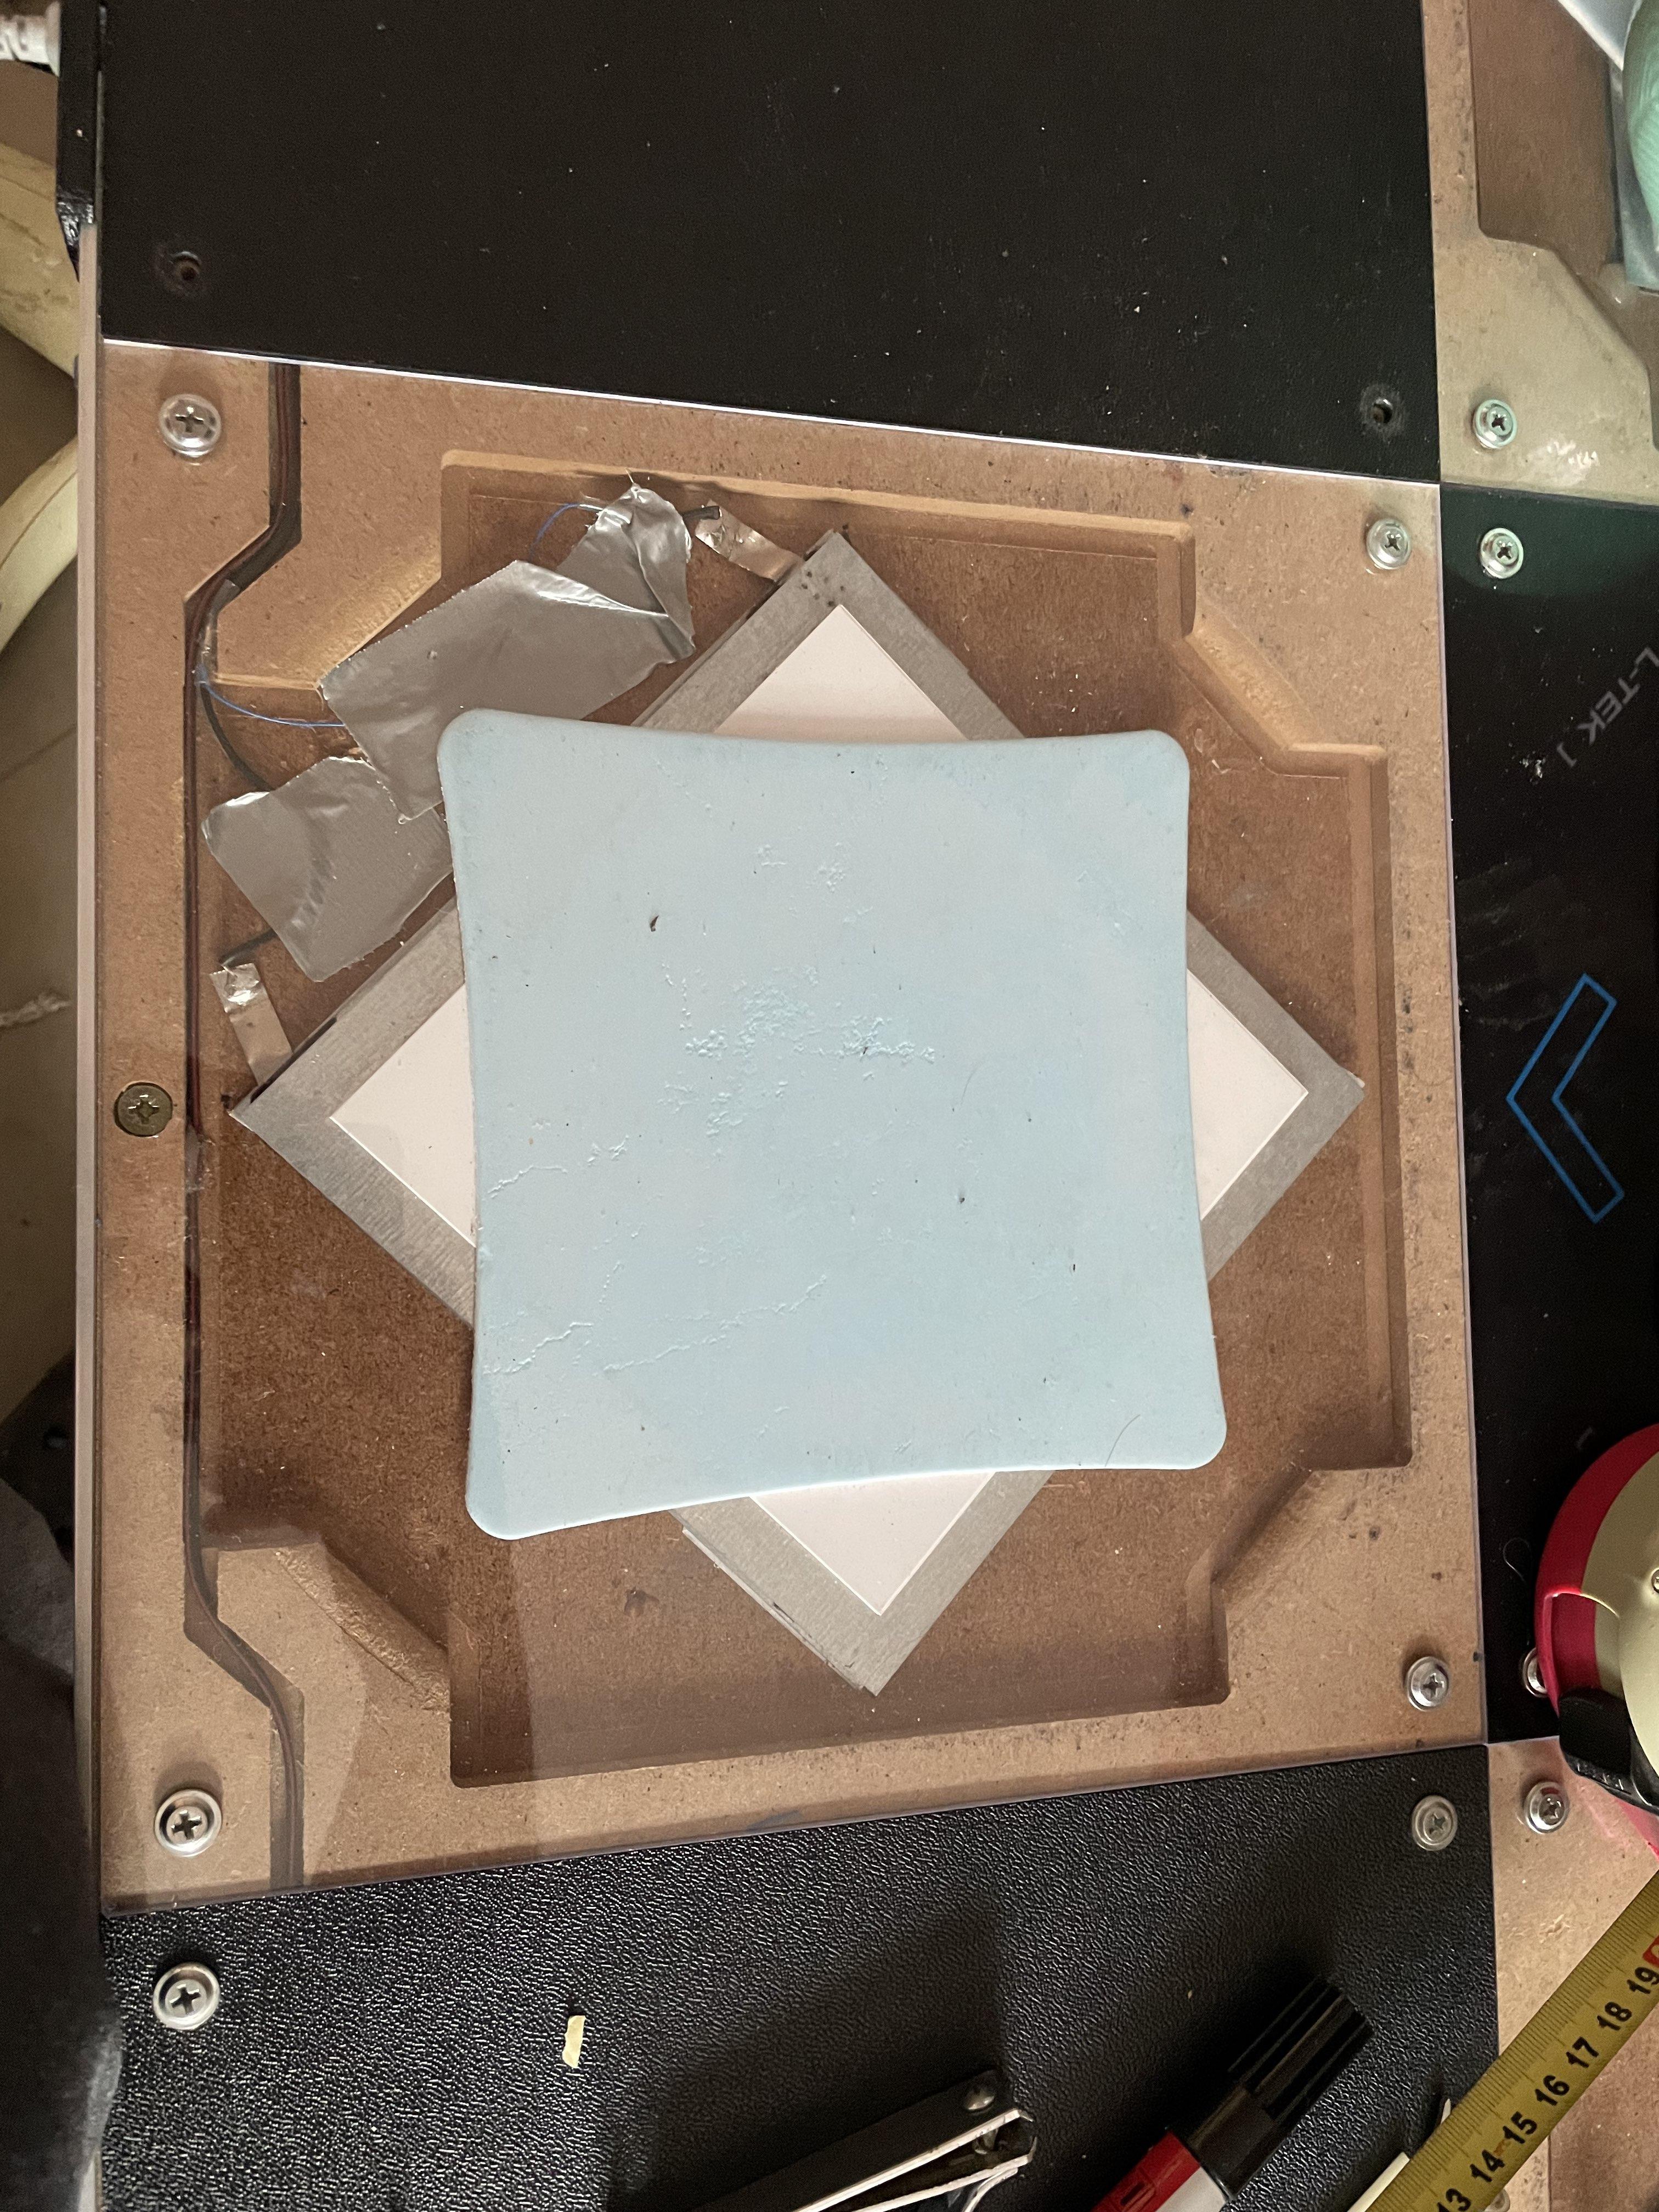
<p>Screw the panels back on. Keep in mind that the center of the edges will stick out a bit due to how the sensor is placed currently, but the same thing happens with a pennymod.</p>

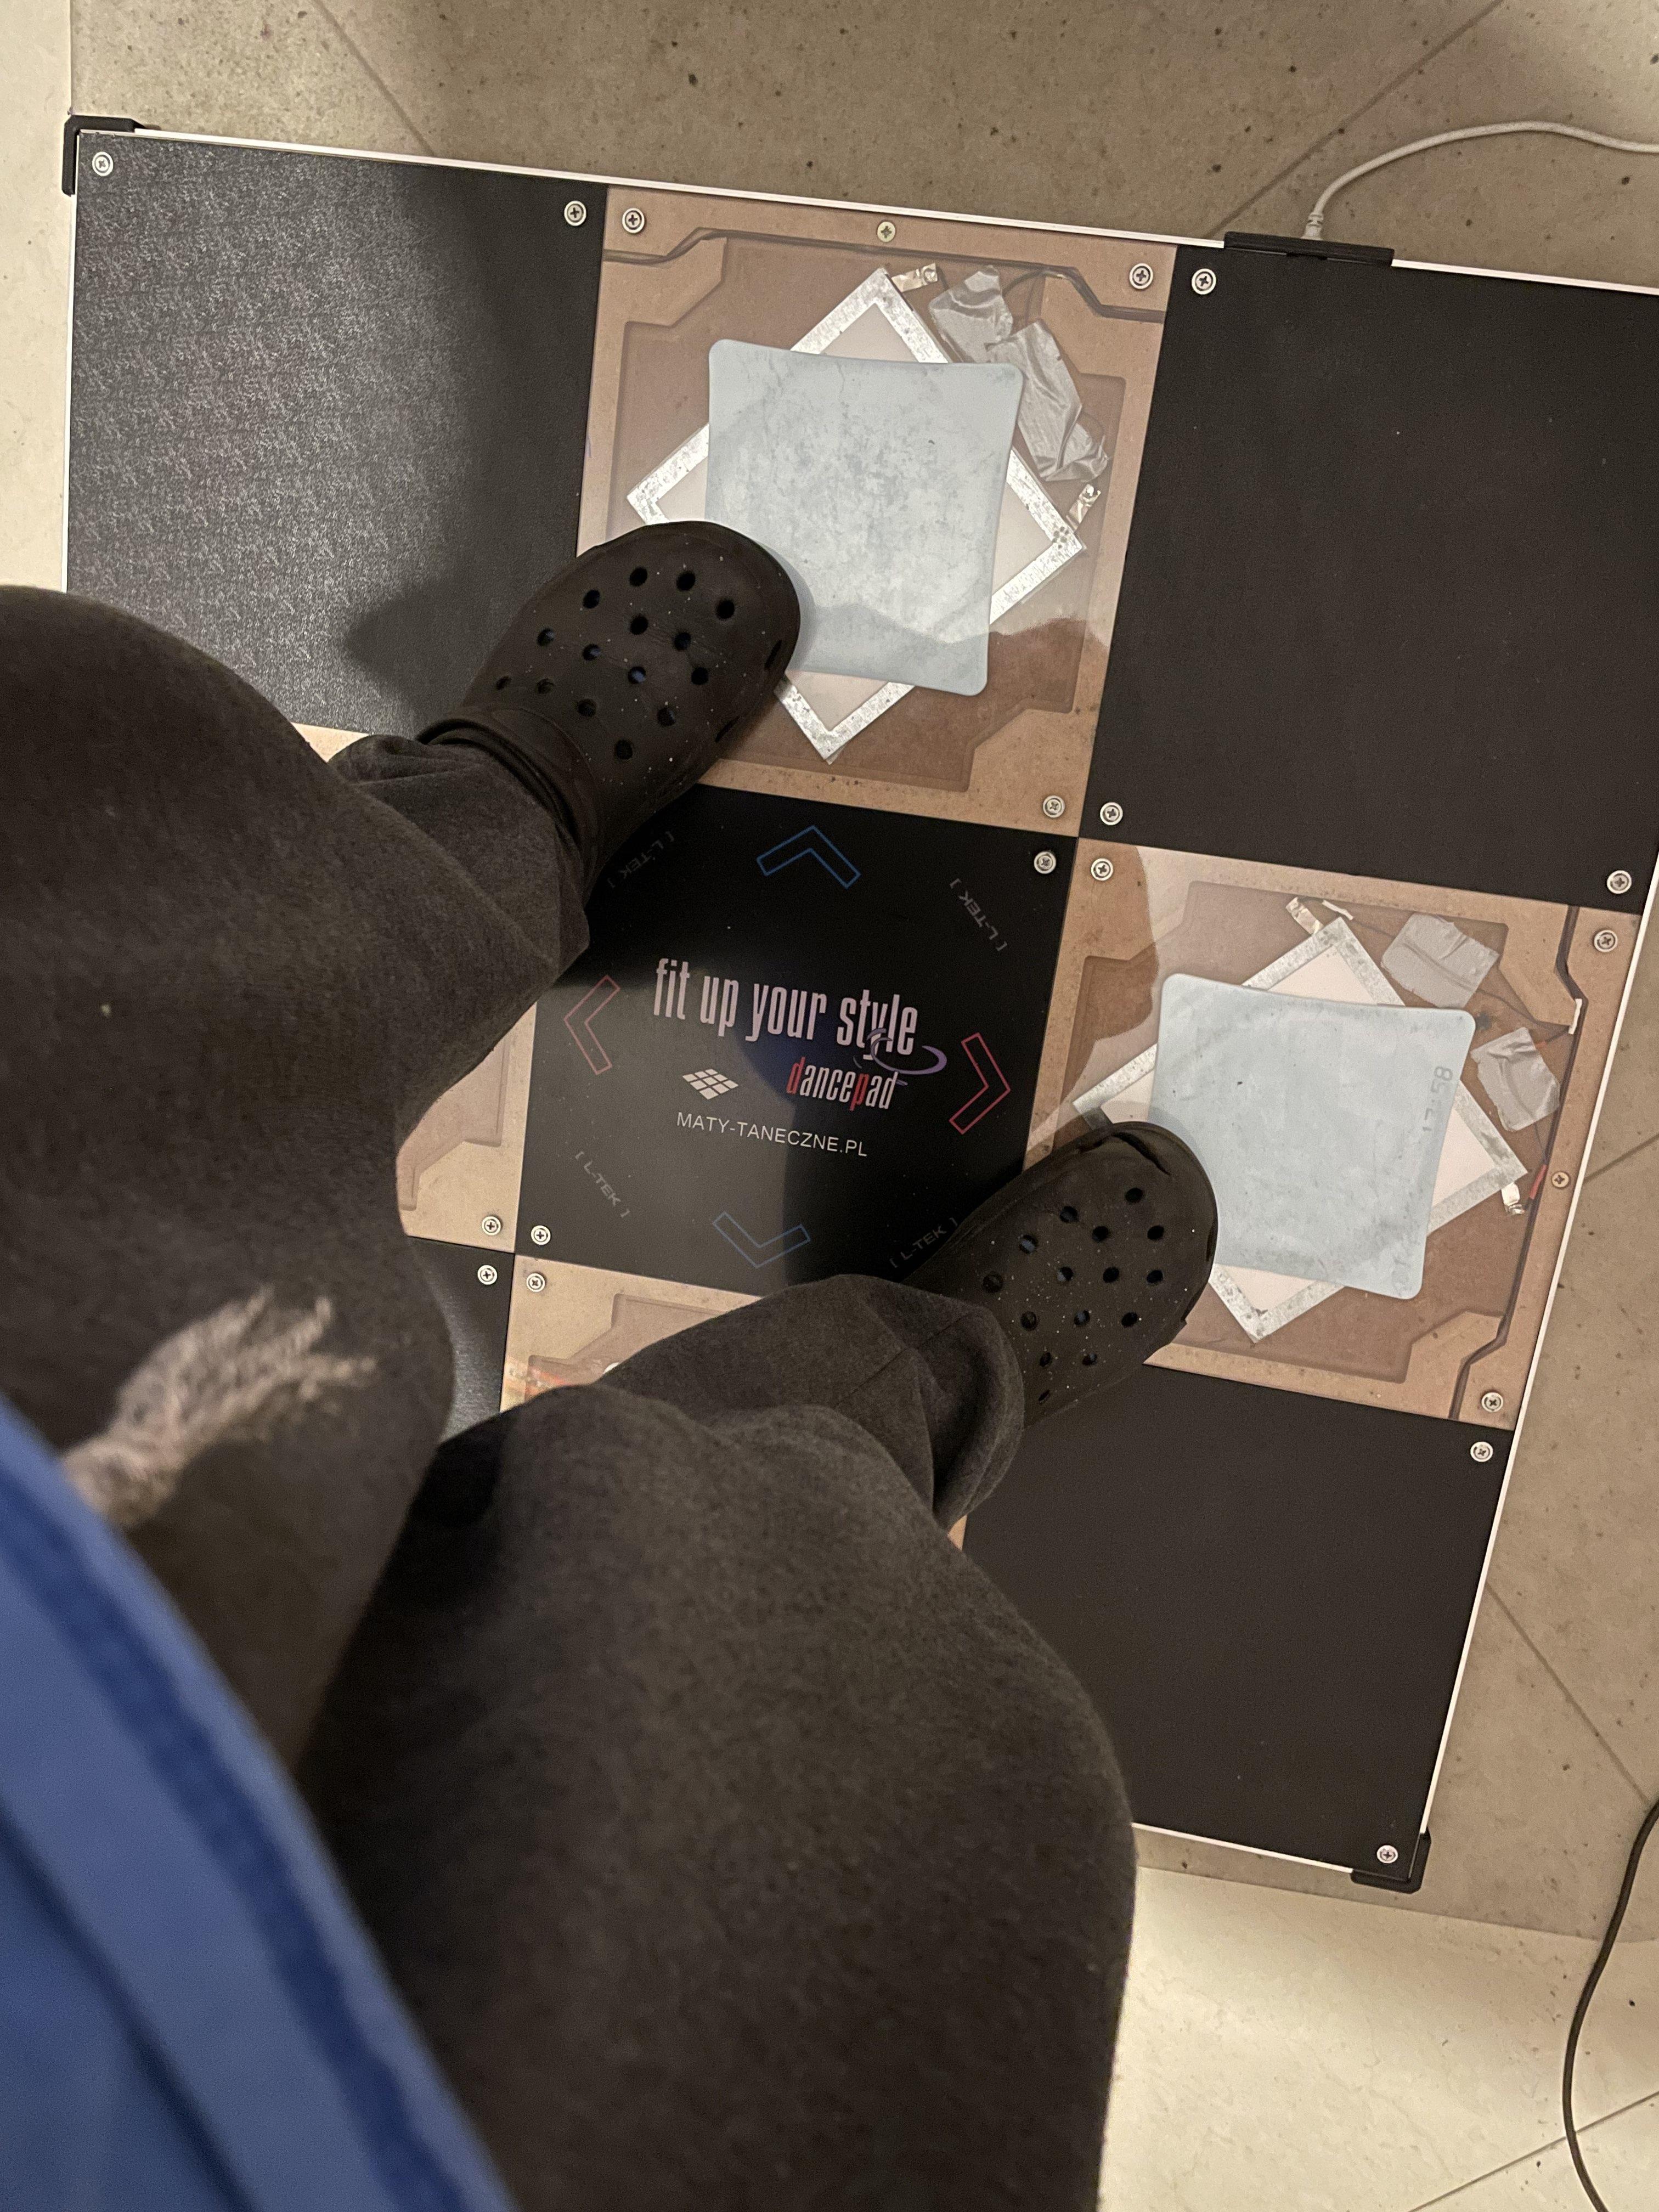
<p>Congrats, now you have a Polish Pad modded with Polish methods!</p>

<p><img src="/assets/lisekmod/step9.jpg" alt="step9" /></p>

<p><img src="/assets/lisekmod/finish1.jpg" alt="finish1" /></p>

<p><img src="/assets/lisekmod/finish2.jpg" alt="finish2" /></p>

<h1 id="additional-notes">Additional notes</h1>

<ul>
  <li>You can swap steps 7 and 8 around if that’s more comfortable for you</li>
  <li>You may want to have a computer or a laptop running an input tester nearby to check if you didn’t screw up the soldering before you put the whole thing back together. Just touch the two plates together and check if an input is registered</li>
  <li>The clean acryllic panels aren’t premade. I went to a local polycarb fab and asked for 277mm square shaped 3mm polycarb panels and drilled the holes myself with a 5mm bit and using the old panels as guides (you can save a lot of money that way!)</li>
  <li>If the screws don’t stay screwed anymore, you may want to try putting a toothpick into a screw hole. You want to trim the toothpick so that it doesn’t stick out of the hole.
    <ul>
      <li>If the toothpick didn’t help, try a match!</li>
    </ul>
  </li>
</ul>

<h1 id="acknowledgements">Acknowledgements</h1>
<ul>
  <li><strong>Lisek</strong> for documenting the mod in the first place</li>
  <li><strong>zibson</strong> and <strong>Thumbsy</strong> for confirming that the mod can be done with stock sensors and also providing some pics of the mod</li>
  <li><strong>L-Tek</strong> for providing the ITG players with pads that while good for totally casual play, must be tinkered with in order to be competitive in 2023</li>
</ul>]]></content><author><name></name></author></entry><entry><title type="html">W-reMIX Result - a classic skin rewritten for beatoraja</title><link href="http://localhost:4000/2023/03/03/wremix.html" rel="alternate" type="text/html" title="W-reMIX Result - a classic skin rewritten for beatoraja" /><published>2023-03-03T03:00:00+01:00</published><updated>2023-03-03T03:00:00+01:00</updated><id>http://localhost:4000/2023/03/03/wremix</id><content type="html" xml:base="http://localhost:4000/2023/03/03/wremix.html"><![CDATA[<ul id="markdown-toc">
  <li><a href="#w-remix-result" id="markdown-toc-w-remix-result">W-reMIX Result</a>    <ul>
      <li><a href="#features" id="markdown-toc-features">Features</a></li>
      <li><a href="#customization" id="markdown-toc-customization">Customization</a></li>
      <li><a href="#roadmap" id="markdown-toc-roadmap">Roadmap</a></li>
      <li><a href="#download" id="markdown-toc-download">Download</a></li>
      <li><a href="#how-to-install" id="markdown-toc-how-to-install">How to install</a></li>
      <li><a href="#acknowledgements" id="markdown-toc-acknowledgements">Acknowledgements</a></li>
    </ul>
  </li>
</ul>

<h1 id="w-remix-result">W-reMIX Result</h1>

<p><img src="/assets/wremix/wremix1.jpg" alt="screen1" />
<img src="/assets/wremix/wremix2.jpg" alt="screen2" /></p>

<p>I always was a fan of W-MIX. Its simplicity hits the sweet spot for me.
For some time during my previous W-MIX adventures I was even using the result theme, but at the time thought that I’ll tackle fixing it for beatoraja some other time.</p>

<p>“Some other time” is now.</p>

<p>W-reMIX Result is a rewrite (or “conversion”) of the W-MIX result theme to Lua. I have gone that route because backwards compability with LR2 result skins is pretty lacking.</p>

<p>I created it as an append pack, so you first need to acquire W-MIX, and then install W-reMIX over it.</p>

<p>W-reMIX does not add any bloating features as to not mess with the simplicity aspect of the theme, but it tries to accomodate for some new features.</p>

<h2 id="features">Features</h2>

<ul>
  <li>Entire theme rewritten in Lua for 1080p displays</li>
  <li>Added support for beatoraja clear lamps and gauges</li>
  <li>Fast/Slow display enabled by default</li>
  <li>Table display either in the corner or embedded into the title</li>
  <li>Use the stagefile as background if present</li>
  <li>Togglable Fast/Slow graphs</li>
  <li><code class="language-plaintext highlighter-rouge">POOR</code> field now shows combined amount of POORs and MISSes</li>
</ul>

<h2 id="customization">Customization</h2>

<ul>
  <li>Everything previously available in W-MIX Result</li>
  <li>Switch between default and W-MIX-like gauge graph color schemes</li>
  <li>Toggle between regular gauge ticker display and “AT-SHIFT” for GAS</li>
</ul>

<h2 id="roadmap">Roadmap</h2>

<ul>
  <li>Implement features from popular W-MIX mods (Random option display etc.)</li>
  <li>Implement the timing and density graphs (place them above the Stagefile or replace it outright)</li>
  <li>Implement IIDX-like “Next Grade” display (add stuff like AAA+)</li>
  <li>Make switching between regular and GAS gauge tickers automatic</li>
  <li>Replace fonts with upscaled/recreated ones more similar to W-MIX originals</li>
  <li>Upscale assets to 1080p</li>
</ul>

<h2 id="download">Download</h2>

<ul>
  <li><a href="/assets/wremix/W-reMIX RESULT 1.0.7z">v1.0</a>
    <ul>
      <li>Initial release</li>
    </ul>
  </li>
</ul>

<h2 id="how-to-install">How to install</h2>

<ol>
  <li><a href="https://onedrive.live.com/?cid=e92e2372413c5a12&amp;id=E92E2372413C5A12%21385&amp;authkey=%21AJDT%5FQWX9IJttnU">Download W-MIX</a> and unpack it in beatoraja’s <code class="language-plaintext highlighter-rouge">skin</code> folder</li>
  <li>Unpack the W-reMIX folder over the W-MIX folder</li>
  <li>In game, switch your RESULT skin to <code class="language-plaintext highlighter-rouge">W-reMIX RESULT</code></li>
</ol>

<p>If you encounter any bugs or discrepancies from the original W-MIX RESULT, please report them either through Twitter or Discord!</p>

<h2 id="acknowledgements">Acknowledgements</h2>

<ul>
  <li>Clear lamp text textures and title font come from the TYPE-M theme by <a href="https://twitter.com/aoi_psy">Ric</a></li>
  <li>W-MIX is a theme originally made by <a href="https://twitter.com/wisp_13">Wisp_13</a> for Lunatic Rave 2</li>
  <li>Special thanks to five, takekun and dolby for various support</li>
  <li>This project was originally commissionned by drew, and they agreed for me to share it with others</li>
</ul>]]></content><author><name></name></author></entry><entry><title type="html">proste gówno - a simple result skin for beatoraja</title><link href="http://localhost:4000/2021/05/07/prostegowno.html" rel="alternate" type="text/html" title="proste gówno - a simple result skin for beatoraja" /><published>2021-05-07T10:00:00+02:00</published><updated>2021-05-07T10:00:00+02:00</updated><id>http://localhost:4000/2021/05/07/prostegowno</id><content type="html" xml:base="http://localhost:4000/2021/05/07/prostegowno.html"><![CDATA[<ul id="markdown-toc">
  <li><a href="#proste-gówno" id="markdown-toc-proste-gówno">Proste Gówno</a>    <ul>
      <li><a href="#features" id="markdown-toc-features">Features</a></li>
      <li><a href="#customization" id="markdown-toc-customization">Customization</a></li>
      <li><a href="#download" id="markdown-toc-download">Download</a></li>
    </ul>
  </li>
</ul>

<h1 id="proste-gówno">Proste Gówno</h1>

<p><img src="/assets/result/pass.jpg" alt="screen1" />
<img src="/assets/result/fail.jpg" alt="screen2" /></p>

<h2 id="features">Features</h2>

<ul>
  <li>Simple as shit</li>
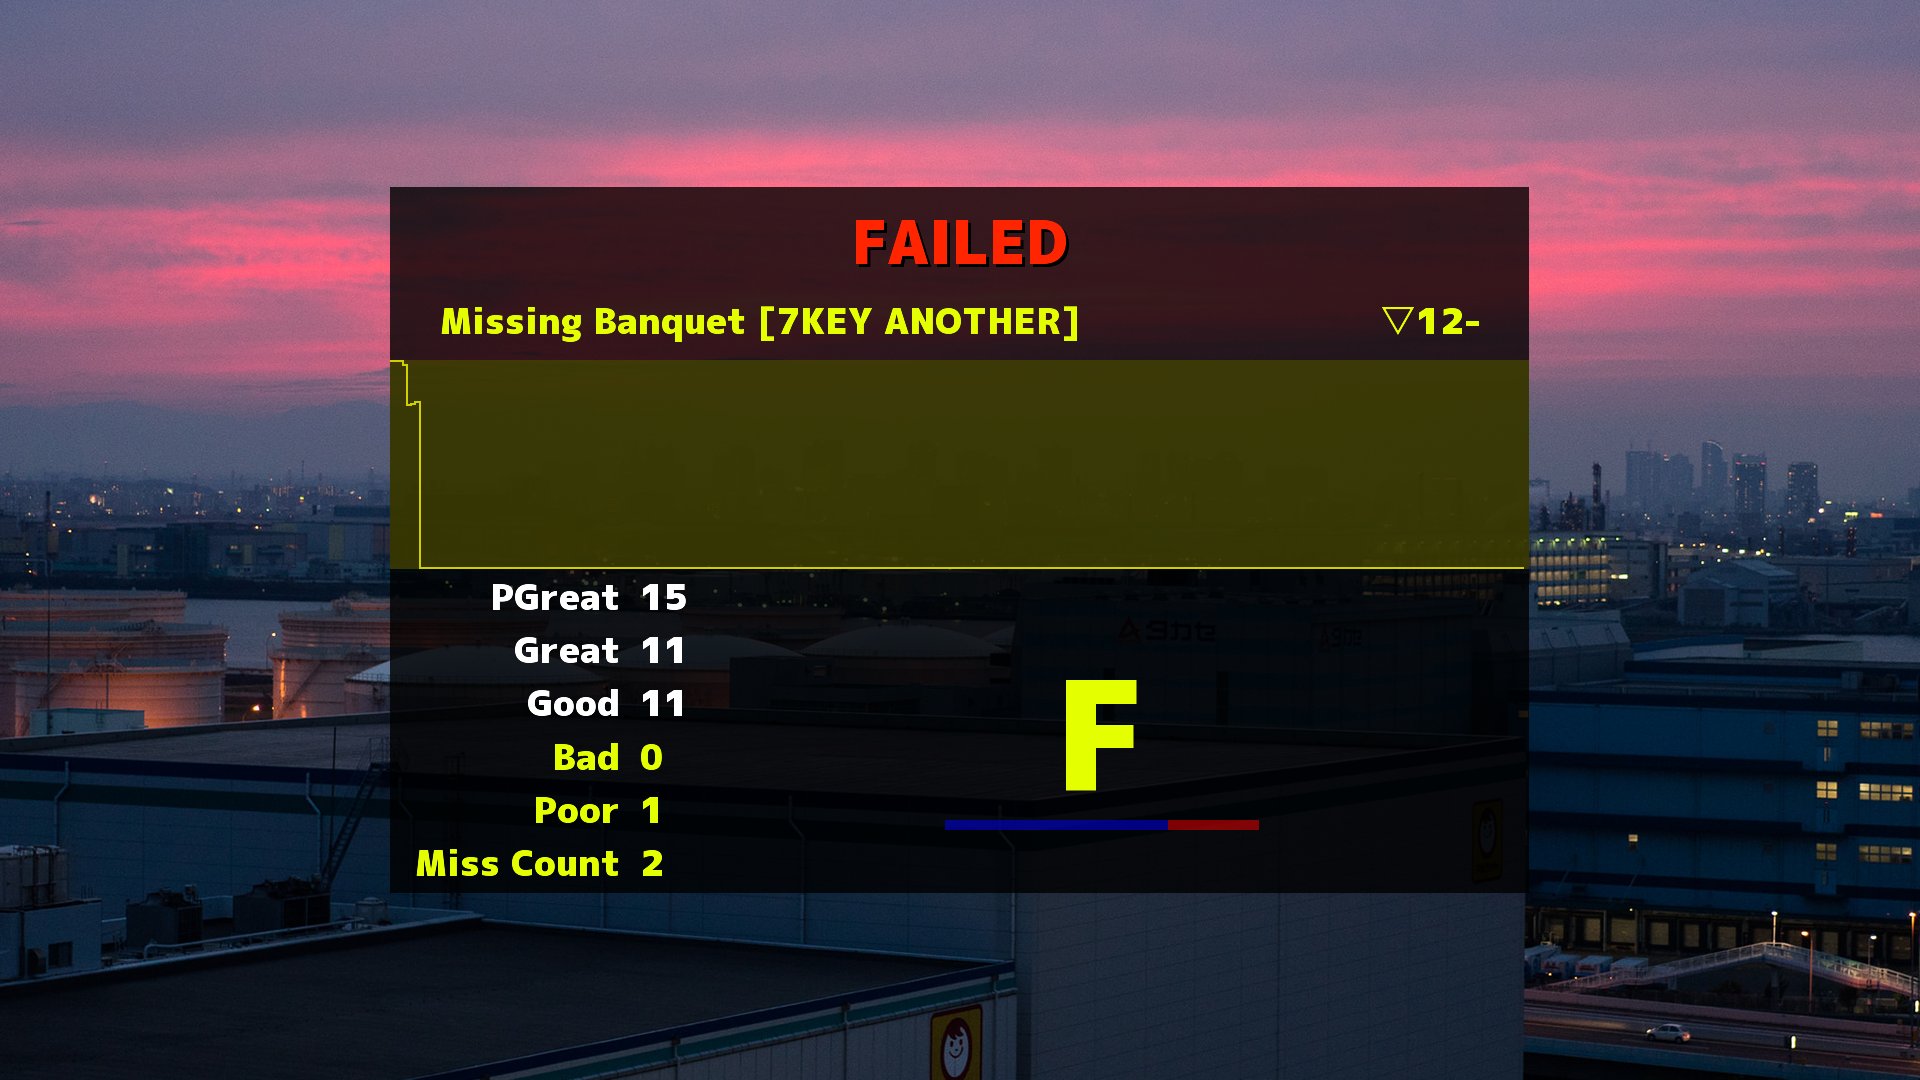
  <li>Clear type, graph, song title + table level, PG/GR/GD/BD/PR/Misscount, grade and F/S balance</li>
  <li>Smol (24k without assets)</li>
  <li>All features done purely in Lua (only external assets are the font and the backgrounds)</li>
</ul>

<h2 id="customization">Customization</h2>

<p>None. No need</p>

<h2 id="download">Download</h2>

<p><a href="/assets/result/proste gówno.7z">v1.0</a></p>]]></content><author><name></name></author></entry><entry><title type="html">Collection of my beatoraja and LR2 skin edits</title><link href="http://localhost:4000/2021/02/22/skin-edits.html" rel="alternate" type="text/html" title="Collection of my beatoraja and LR2 skin edits" /><published>2021-02-22T09:00:00+01:00</published><updated>2021-02-22T09:00:00+01:00</updated><id>http://localhost:4000/2021/02/22/skin-edits</id><content type="html" xml:base="http://localhost:4000/2021/02/22/skin-edits.html"><![CDATA[<ul id="markdown-toc">
  <li><a href="#overview" id="markdown-toc-overview">Overview</a></li>
  <li><a href="#simple-play-by-mnpyprrn" id="markdown-toc-simple-play-by-mnpyprrn">simple-play by @mnpyprrn</a>    <ul>
      <li><a href="#modifier-ribbons" id="markdown-toc-modifier-ribbons">Modifier ribbons</a></li>
      <li><a href="#3x1-bga-block" id="markdown-toc-3x1-bga-block">3x1 BGA block</a></li>
      <li><a href="#partyparrot-bombs" id="markdown-toc-partyparrot-bombs">Partyparrot bombs</a></li>
      <li><a href="#lr2-full-combo-animation" id="markdown-toc-lr2-full-combo-animation">LR2 full combo animation</a></li>
      <li><a href="#chomikbox-hamster-mascot" id="markdown-toc-chomikbox-hamster-mascot">ChomikBox hamster mascot</a></li>
      <li><a href="#english-translation-for-the-cs-graph" id="markdown-toc-english-translation-for-the-cs-graph">English translation for the CS graph</a></li>
      <li><a href="#my-personal-7key-settings-file" id="markdown-toc-my-personal-7key-settings-file">My personal 7key settings file</a></li>
    </ul>
  </li>
  <li><a href="#m-select-by-mnpyprrn" id="markdown-toc-m-select-by-mnpyprrn">m-select by @mnpyprrn</a>    <ul>
      <li><a href="#translated-panels" id="markdown-toc-translated-panels">Translated panels</a></li>
    </ul>
  </li>
</ul>

<h2 id="overview">Overview</h2>

<p>Since I’ve been doing a lot of small skin edits that I’ve been sharing in small circles, I’ve decided to group them in this post.
I will update this post whenever I create an edit and share it somewhere.</p>

<p><strong>You’re free to share this anywhere or include it in any skins, but please at least give credit :D</strong></p>

<h2 id="simple-play-by-mnpyprrn">simple-play by <a href="https://twitter.com/mnpyprrn">@mnpyprrn</a></h2>

<h3 id="modifier-ribbons"><a href="/assets/skinmod/Ribbons.zip">Modifier ribbons</a></h3>

<p><img src="/assets/skinmod/ribbons.png" alt="ribbons" class="img-responsive" /></p>

<p>Inspired by Remi and K-COOL skins. Rectangular ribbons displaying current game modifiers:</p>
<ul>
  <li>lane modifier</li>
  <li>difficulty</li>
  <li>gauge (and GAS)</li>
  <li>auto/replay</li>
  <li>LN mode (if LNs are present)</li>
</ul>

<p>Unzip into <code class="language-plaintext highlighter-rouge">/customize/extension</code> and enable by setting one of the “Extension front” options to “Ribbons”.
Refer to the <code class="language-plaintext highlighter-rouge">parts.lua</code> file for placement options.</p>

<p><em>I’ve included some code related to displaying the current stage (For courses), but I couldn’t get to work. If you know how to make it work, please get in touch!</em></p>

<h3 id="3x1-bga-block"><a href="/assets/skinmod/BGA Block.zip">3x1 BGA block</a></h3>

<p><img src="/assets/skinmod/bgab.png" alt="bgab" class="img-responsive" /></p>

<p>Can be used as a background filler if, for example, you have your playfield centered.
Unzip into <code class="language-plaintext highlighter-rouge">/customize/extension</code> and enable by setting one of the “Extension front” options to “BGA Block”.
Refer to the <code class="language-plaintext highlighter-rouge">parts.lua</code> file for placement options.</p>

<h3 id="partyparrot-bombs"><a href="/assets/skinmod/papuga.zip">Partyparrot bombs</a></h3>

<video controls="" preload="metadata" onclick="(function(el){ if(el.paused) el.play(); else el.pause() })(this)"><source src="/assets/skinmod/parrot.mp4" type="video/mp4; codecs=&quot;avc1.42E01E, mp4a.40.2&quot;" /></video>

<p>Party parrot bombs originally made for LITONE by <a href="http://twitter.com/Chazoshtare">Chazoshtare</a>, which I’ve adapted for simple-play.
Unzip into <code class="language-plaintext highlighter-rouge">/customize/bomb</code> and enable by setting the “Bomb” and “Bomb PG” options to “papuga”.
Refer to the <code class="language-plaintext highlighter-rouge">bomb.lua</code> file if you want to edit parrots’ size.</p>

<h3 id="lr2-full-combo-animation"><a href="/assets/skinmod/lr2fc.zip">LR2 full combo animation</a></h3>

<video controls="" preload="metadata" onclick="(function(el){ if(el.paused) el.play(); else el.pause() })(this)"><source src="/assets/skinmod/lr2fc.mp4" type="video/mp4; codecs=&quot;avc1.42E01E, mp4a.40.2&quot;" /></video>

<p>Simple addon which executes an animation when a full combo is reached.
Unzip into <code class="language-plaintext highlighter-rouge">/customize/fullcombo</code> and enable by setting the “Fullcombo” option to “LR2”.</p>

<h3 id="chomikbox-hamster-mascot"><a href="/assets/skinmod/chomikbox.zip">ChomikBox hamster mascot</a></h3>

<p><img src="/assets/skinmod/chomik.png" alt="chomik" class="img-responsive" /></p>

<p>An 8 frame animation of the Chomikuj.pl mascot.
Unzip into <code class="language-plaintext highlighter-rouge">/customize/moving_mascot</code> and enable by setting the “Mascot” option to “MOVING” and the “Moving Mascot” option to “chomikbox”.</p>

<h3 id="english-translation-for-the-cs-graph"><a href="/assets/skinmod/CSgraph.zip">English translation for the CS graph</a></h3>

<p><img src="/assets/skinmod/engraph.png" alt="engraph" class="img-responsive" /></p>

<p>Small edit to the CS graph which translates the only text strings present there.</p>

<p>Unzip into <code class="language-plaintext highlighter-rouge">/customize/scoregraph/CS_1p</code> and enable by setting the “Scoregraph” option to “CS_1p”.</p>

<h3 id="my-personal-7key-settings-file"><a href="/assets/skinmod/Marysettings.zip">My personal 7key settings file</a></h3>

<p>My settings file which aims to reflect the scale and placement of the OADX+ CS skin series, while keeping the playfield around the center of the screen.</p>

<p>Unzip into <code class="language-plaintext highlighter-rouge">/customize/settings</code> and enable by setting the “Settings file (7keys)” option to “Marucha CS”.</p>

<h2 id="m-select-by-mnpyprrn">m-select by <a href="https://twitter.com/mnpyprrn">@mnpyprrn</a></h2>

<h3 id="translated-panels"><a href="/assets/skinmod/msel_english.zip">Translated panels</a></h3>

<p><img src="/assets/skinmod/mseleng.png" alt="mseleng" class="img-responsive" /></p>

<p>I’ve used the .psd files supplied by Uncle Munimini himself (that’s what his Twitter handle translates to) to translate the panels from Japanese to English.</p>

<p>Unzip into <code class="language-plaintext highlighter-rouge">/customize/advanced</code>, enable by changing “default” to “english” in the following lines in the <code class="language-plaintext highlighter-rouge">/customize/advanced/enable.txt</code> file:</p>

<ul>
  <li>default_achievement</li>
  <li>default_chart</li>
  <li>default_optionpanel2</li>
  <li>default_ranking</li>
  <li>default_rivaldata</li>
  <li>default_selectinfo2</li>
</ul>]]></content><author><name></name></author></entry><entry><title type="html">Journey through porting LR2 play skins to beatoraja</title><link href="http://localhost:4000/2021/01/22/lr2-skins-beatoraja.html" rel="alternate" type="text/html" title="Journey through porting LR2 play skins to beatoraja" /><published>2021-01-22T09:50:35+01:00</published><updated>2021-01-22T09:50:35+01:00</updated><id>http://localhost:4000/2021/01/22/lr2-skins-beatoraja</id><content type="html" xml:base="http://localhost:4000/2021/01/22/lr2-skins-beatoraja.html"><![CDATA[<ul id="markdown-toc">
  <li><a href="#tldr" id="markdown-toc-tldr">TL;DR</a></li>
  <li><a href="#preamble" id="markdown-toc-preamble">Preamble</a></li>
  <li><a href="#prerequisities" id="markdown-toc-prerequisities">Prerequisities</a></li>
  <li><a href="#out-of-the-box-experience" id="markdown-toc-out-of-the-box-experience">Out of the box experience</a></li>
  <li><a href="#scaling-aka-resolution" id="markdown-toc-scaling-aka-resolution">Scaling, aka #RESOLUTION</a>    <ul>
      <li><a href="#hd-skins" id="markdown-toc-hd-skins">HD skins</a></li>
      <li><a href="#fixing-the-rotation-in-sd-skins" id="markdown-toc-fixing-the-rotation-in-sd-skins">Fixing the rotation in SD skins</a></li>
    </ul>
  </li>
  <li><a href="#font-conversion" id="markdown-toc-font-conversion">Font conversion</a></li>
  <li><a href="#sticking-scratch-laser" id="markdown-toc-sticking-scratch-laser">Sticking scratch laser</a></li>
  <li><a href="#primer-on-lr2-skin-format" id="markdown-toc-primer-on-lr2-skin-format">Primer on LR2 skin format</a></li>
  <li><a href="#lift" id="markdown-toc-lift">Lift</a>    <ul>
      <li><a href="#lifting-missing-elements" id="markdown-toc-lifting-missing-elements">Lifting missing elements</a></li>
      <li><a href="#lift-cover" id="markdown-toc-lift-cover">Lift cover</a></li>
    </ul>
  </li>
  <li><a href="#ex-hard-and-assist-gauges" id="markdown-toc-ex-hard-and-assist-gauges">EX-HARD and ASSIST gauges</a></li>
  <li><a href="#gn-display" id="markdown-toc-gn-display">GN display</a></li>
  <li><a href="#fast-and-slow" id="markdown-toc-fast-and-slow">FAST and SLOW</a>    <ul>
      <li><a href="#built-in-display" id="markdown-toc-built-in-display">Built-in display</a></li>
      <li><a href="#bring-your-own-fastslows" id="markdown-toc-bring-your-own-fastslows">Bring Your Own Fastslows</a></li>
    </ul>
  </li>
  <li><a href="#bilinear-filtering" id="markdown-toc-bilinear-filtering">Bilinear filtering</a></li>
  <li><a href="#skin-elements-not-loading" id="markdown-toc-skin-elements-not-loading">Skin elements not loading?</a></li>
  <li><a href="#closing-words" id="markdown-toc-closing-words">Closing words</a></li>
  <li><a href="#sources" id="markdown-toc-sources">Sources</a></li>
</ul>

<h2 id="tldr">TL;DR</h2>
<ul>
  <li>LR2 play skins can be made to work with beatoraja like it was a native skin</li>
  <li>Depending on what you want to achieve, you might only need to convert a couple files and change some in-game settings, OR you may need to dive into the skin files themselves and do some dirty coding work</li>
  <li>No, I don’t know how to fix Bluewhite or KCOOL</li>
</ul>

<h2 id="preamble">Preamble</h2>
<p>As a “rytmiczny świr” I have always tried to convince as many people as possible to try out BMS. And if someone is already a BMS playa, I try and make them to switch away from LR2 to beatoraja. There <em>might</em> be slight fanboyism here at play, but in the grand scheme of things they’d be better off playing on software that was not abandoned 10 years ago and that doesn’t force you to use outdated standards (background videos only in .mpg format, <em>sheesh</em>).
One of the “against” points I tend to face is <code class="language-plaintext highlighter-rouge">will my favourite skin work?</code> The answer is “yes”, because exch-bms2 - the main author of beatoraja - has implemented <strong>backwards compability for Lunatic Rave 2 themes</strong> in the beatoraja skin format. 
Sadly it’s not all fine and dandy, as there is manual work required. If you get lucky, it might end at converting a couple files, and if not, you will need to edit the skin <code class="language-plaintext highlighter-rouge">.csv</code> files by hand, and for that you’ll need some basic knowledge of the format.</p>

<p>In this post I’ll walk you through the process of “editing” a skin to make it work as close to the author’s intention as possible.
All the info provided here comes either from my own research (reading through the code of beatoraja and its native skins) or from posts from other people, which I’ll link at the bottom of the post.</p>

<h2 id="prerequisities">Prerequisities</h2>
<p>Depending on how far you’ll need to go to make your features work, you’ll need one or all of the following:</p>
<ul>
  <li><strong>dxa_decode.exe</strong> from Lunatic Rave 2
    <ul>
      <li>This will be used to unpack <code class="language-plaintext highlighter-rouge">.dxa</code> archives, which most LR2 skins use to store fonts in, as beatoraja cannot process these files natively</li>
    </ul>
  </li>
  <li><strong>A spreadsheet editor</strong> like <strong>Microsoft Excel</strong>, <strong>OpenOffice Calc</strong> or <strong>Google Sheets</strong>
    <ul>
      <li>The code of LR2 skins is contained within <code class="language-plaintext highlighter-rouge">.csv</code> (comma separated values) files, which in theory can be edited with a text editor, but using a spreadsheet editor makes the files way more comprehensive to read. In order to backport certain beatoraja-exclusive features, we’ll need to go down into the nitty-gritty</li>
    </ul>
  </li>
  <li><strong>An image editor</strong>
    <ul>
      <li>This may or may not be required depending on how the skin is structured internally</li>
    </ul>
  </li>
</ul>

<h2 id="out-of-the-box-experience">Out of the box experience</h2>
<p><em>In this example I will be using the stock Lunatic Rave 2 skin, “LR2 STANDARD (7 KEYS)”</em></p>

<p>In order to add a skin to beatoraja, you have to copy its directory to <code class="language-plaintext highlighter-rouge">beatoraja/skin</code>. That simple.
After that you will be able to load it either in the config menu (through the <code class="language-plaintext highlighter-rouge">Skin</code> panel), or directly in game (by hitting F12). 
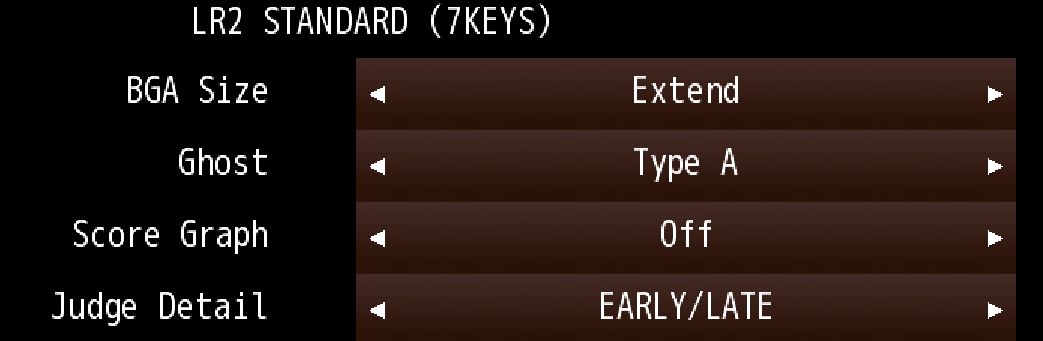
There is a couple options you can tweak there, but let’s not bother with that for a minute. Let’s instead fire up a song and see what happens.</p>
<video controls="" preload="metadata" onclick="(function(el){ if(el.paused) el.play(); else el.pause() })(this)"><source src="/assets/oobe.webm" type="video/webm; codecs=&quot;vp8, vorbis&quot;" /></video>
<p><em>yeah…this ain’t right…</em></p>

<p>So right off the bat there is a couple glaring issues</p>
<ul>
  <li>Artist and title are not present</li>
  <li>Rotating elements are way off</li>
  <li>Gauge does not respect EX-HARD setting (yep, it was set here)</li>
  <li>LIFT only affects certain skin elements</li>
</ul>

<p>Luckily all of these can be addressed with editing the files one way or another, but first let’s tackle a problem, solving which will prove very useful in the future.</p>

<h2 id="scaling-aka-resolution">Scaling, aka #RESOLUTION</h2>
<p>Beatoraja’s scaling implementation is by no means perfect. Above you saw how well it handles rotating images - that’s an issue which occurs if the skin’s intended aspect ratio differs from the game’s aspect ratio. In the example above I was running a LR2SD (thus 4:3) skin in Full HD (1920x1080, which is 16:9). Funnily enough, if you run the game in a 4:3 resolution, those issues will be gone from LR2SD skins, but there’s no telling what would happen to LR2HD skins.</p>
<h3 id="hd-skins">HD skins</h3>
<p>Sadly, beatoraja has no way of telling a skin’s intended resolution/aspect ratio on its own. If you tried to load a LR2HD or LR2FHD skin like WMIX or EndlessCirculation without any prior edits, you would only see a small chunk of the screen.</p>

<p>Turns out the required edit is contained within a single line you need to place in your skin’s <code class="language-plaintext highlighter-rouge">.lr2skin</code> file. 
First you need to locate and open said <code class="language-plaintext highlighter-rouge">.lr2skin</code> file in a text editor of your choice. In our case it’ll be located under <code class="language-plaintext highlighter-rouge">skin/LR2/Play/play_7.lr2skin</code>.
It’ll look something like this:</p>
<div class="language-plaintext highlighter-rouge"><div class="highlight"><pre class="highlight"><code>//,type,title,maker,thumbnail...
#INFORMATION,0,LR2 STANDARD (7KEYS),cyclia,LR2files\Theme\LR2\Play\ss_7.png
//typeは,,,,
//0 7KEYS,,,,
//1 5KEYS,,,,
//2 14KEYS,,,,
//3 10KEYS,,,,
//4 9KEYS,,,,
//5 MUSICSELECT,,,,
//6 DECIDE,,,,
//7 RESULT,,,,
//8 KEYCONFIG,,,,
//9 SKINSELECT,,,,
//10 SOUNDSET,,,,
//11 THEME,,,,
</code></pre></div></div>
<p>All we want to do in here is to add a new line at the beginning of the file and add the following:</p>
<div class="language-plaintext highlighter-rouge"><div class="highlight"><pre class="highlight"><code>#RESOLUTION,x
</code></pre></div></div>
<p>where the <code class="language-plaintext highlighter-rouge">x</code> is:</p>
<ul>
  <li><code class="language-plaintext highlighter-rouge">1</code> for LR2HD (1280x720) skins</li>
  <li><code class="language-plaintext highlighter-rouge">2</code> for LR2FHD (1920x1080) skins</li>
</ul>

<p>After that’s done you save the file and try loading a song in beatoraja. You should see that it now appears in all its glory!</p>

<h3 id="fixing-the-rotation-in-sd-skins">Fixing the rotation in SD skins</h3>

<p>The same edit will allow us to fix the oddly rotating elements in SD skins, with one side effect - now the skin will only take up a small chunk of the screen’s real estate.
To combat this, go into skin settings (in config window or in-game through F12) and scroll down until you see <code class="language-plaintext highlighter-rouge">All offset(%)</code> options. These will allow us to move and resize the skin to our liking <strong>without affecting the internal resolution</strong>, so it will not screw up the rotation again.</p>

<p>Below are examples of recommended values and their results.</p>

<table>
  <thead>
    <tr>
      <th>x</th>
      <th>y</th>
      <th>w</th>
      <th>h</th>
      <th>Result</th>
    </tr>
  </thead>
  <tbody>
    <tr>
      <td>0</td>
      <td>0</td>
      <td>0</td>
      <td>0</td>
      <td><img src="/assets/alloffset/none.jpg" alt="full" class="img-responsive" /> <em>Only a chunk of the screen is used</em></td>
    </tr>
    <tr>
      <td>0</td>
      <td>-50</td>
      <td>50</td>
      <td>50</td>
      <td><img src="/assets/alloffset/left.jpg" alt="left" class="img-responsive" /> <em>4:3 aspect ratio, aligned to the left (useful for CS size skins)</em></td>
    </tr>
    <tr>
      <td>25</td>
      <td>-50</td>
      <td>50</td>
      <td>50</td>
      <td><img src="/assets/alloffset/right.jpg" alt="right" class="img-responsive" /> <em>4:3 aspect ratio, aligned to the right</em></td>
    </tr>
    <tr>
      <td>12</td>
      <td>-50</td>
      <td>50</td>
      <td>50</td>
      <td><img src="/assets/alloffset/center.jpg" alt="center" class="img-responsive" /> <em>4:3 aspect ratio, aligned more or less to the center</em></td>
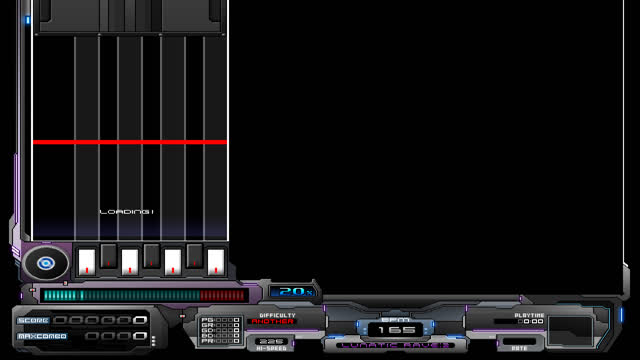
    </tr>
    <tr>
      <td>0</td>
      <td>-50</td>
      <td>100</td>
      <td>50</td>
      <td><img src="/assets/alloffset/full.jpg" alt="full" class="img-responsive" /> <em>Stretched across the screen (useful for AC size SD skins)</em></td>
    </tr>
  </tbody>
</table>

<h2 id="font-conversion">Font conversion</h2>

<p>As stated in the beginning of this post, beatoraja does not natively handle <code class="language-plaintext highlighter-rouge">.dxa</code> files. They have to be unpacked prior to use.
It turns out that most skins will deliver fonts in that format, which will result in missing titles in beatoraja. To fix this we only need to unpack the fonts.
First locate the font <code class="language-plaintext highlighter-rouge">.dxa</code> files (usually they’re inside a “font” folder…big shocker, I know), and then drag and drop each one onto <code class="language-plaintext highlighter-rouge">dxa_decode.exe</code> that you got from Lunatic Rave 2. It’ll create a folder containing graphics and a <code class="language-plaintext highlighter-rouge">.lr2font</code> file, which beatoraja will happily process.
If for whatever reason the conversion doesn’t happen (may happen with filenames containing foreign characters), you may have to temporarily rename the file for the conversion process, and then rename it back.</p>

<p>In our case, oddly enough, the font files are in the <code class="language-plaintext highlighter-rouge">skin/LR2/Select</code> directory. Converting all of them will satisfy beatoraja, which now shows titles during the load process.</p>

<table>
  <thead>
    <tr>
      <th>Before</th>
      <th>After</th>
    </tr>
  </thead>
  <tbody>
    <tr>
      <td><img src="/assets/font/before.jpg" alt="before" class="img-responsive" /></td>
      <td><img src="/assets/font/after.jpg" alt="after" class="img-responsive" /></td>
    </tr>
  </tbody>
</table>

<h2 id="sticking-scratch-laser">Sticking scratch laser</h2>
<p><strong><em>If you’re a keyboard player, you can skip this part.</em></strong></p>

<p>Most, if not all BM controllers bind the turntable digitally to an axis (for example clockwise turn means “Up” while a counter-clockwise turn means “Down”). As an anti-ghosting measure, after you’re done turning, the axis will stay “pressed” for some time, usually around half a second. The side effect is that when you use the scratch in-game, the laser will stay on for that period - and that doesn’t look pretty. Many players have simply got used to this visual bug. The fix is pretty simple though.<br />
<strong>This is where we start delving into <code class="language-plaintext highlighter-rouge">.csv</code> files. The structure will be explained as we go.</strong><br />
First locate the file of interest (in our case it’s under <code class="language-plaintext highlighter-rouge">skin/LR2/Play/7keys/7_LL0.csv</code> - this may differ depending on the implementation in the <code class="language-plaintext highlighter-rouge">.lr2skin</code> file) and open it in your spreadsheet editor of choice. Then you want to find the part of the file responsible for lasers (Search for <code class="language-plaintext highlighter-rouge">laser off</code> or <code class="language-plaintext highlighter-rouge">レーザーオフ</code>).
You will see many lines of stuff, which look like this:
<img src="/assets/scr/csv.jpg" alt="csv" class="img-responsive" /><br />
Right now we’re interested in a chunk, which <code class="language-plaintext highlighter-rouge">timer</code> value in the <code class="language-plaintext highlighter-rouge">#SRC_IMAGE</code> row equals to <code class="language-plaintext highlighter-rouge">120</code>.</p>

<ul>
  <li><code class="language-plaintext highlighter-rouge">timer</code> value is used to tie a property to an in-game event. In this example value of <code class="language-plaintext highlighter-rouge">120</code> corresponds to letting go of the Scratch button.</li>
</ul>

<p>Now select and copy the rows related to this chunk (should be one row starting with <code class="language-plaintext highlighter-rouge">#SRC_IMAGE</code> and two with <code class="language-plaintext highlighter-rouge">#DST_IMAGE</code>).
We want to paste this over the “laser on” chunk, which shouldn’t be that far away - just scroll up a bit until you see a row in which the <code class="language-plaintext highlighter-rouge">timer</code> value equals <code class="language-plaintext highlighter-rouge">100</code>.
When you find it, paste the previously copied “laser off” chunk over it, and change the <code class="language-plaintext highlighter-rouge">timer</code> value in the <code class="language-plaintext highlighter-rouge">#SRC_IMAGE</code> row from <code class="language-plaintext highlighter-rouge">120</code> to <code class="language-plaintext highlighter-rouge">100</code> and save the file.</p>

<h2 id="primer-on-lr2-skin-format">Primer on LR2 skin format</h2>
<p>The following parts will require basic knowledge of the LR2 skin format, so we’ll go through that quickly.<br />
Nothing in excruciating detail, just enough to get going.</p>

<p>The skin language does a <strong>single pass</strong>, meaning that it’s executed once when you load the skin. This also grounds the hierarchy of all the skin elements, meaning that the further down in the file is an element placed, the closer to the foreground it’ll appear (e.g. fail shutters will appear at the very end of the file so that they’ll cover everything).</p>

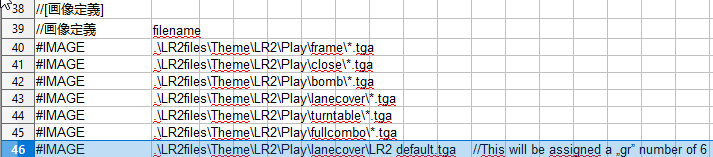
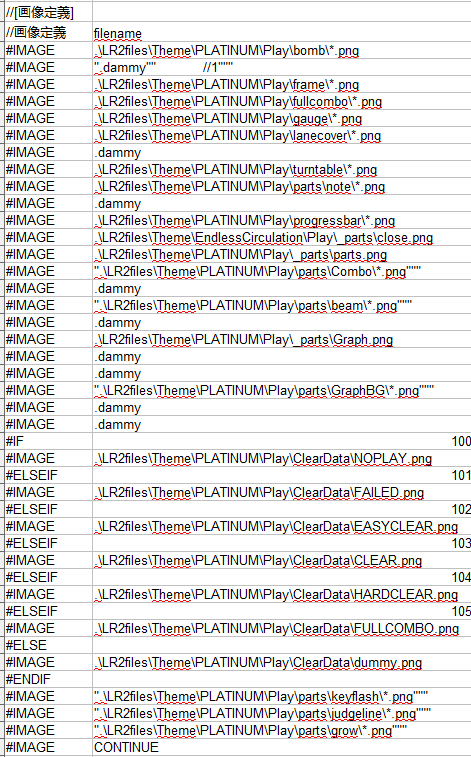
<p>Around the beginning of the file there are declarations of images and fonts. They’ll look something like this:</p>

<table>
  <thead>
    <tr>
      <th>//画像定義</th>
      <th>filename</th>
    </tr>
  </thead>
  <tbody>
    <tr>
      <td>#IMAGE</td>
      <td>.\LR2files\Theme\LR2\Play\frame*.tga</td>
    </tr>
    <tr>
      <td>#IMAGE</td>
      <td>.\LR2files\Theme\LR2\Play\close*.tga</td>
    </tr>
    <tr>
      <td>#IMAGE</td>
      <td>.\LR2files\Theme\LR2\Play\bomb*.tga</td>
    </tr>
    <tr>
      <td>#IMAGE</td>
      <td>.\LR2files\Theme\LR2\Play\lanecover*.tga</td>
    </tr>
    <tr>
      <td>#IMAGE</td>
      <td>.\LR2files\Theme\LR2\Play\turntable*.tga</td>
    </tr>
    <tr>
      <td>#IMAGE</td>
      <td>.\LR2files\Theme\LR2\Play\fullcombo*.tga</td>
    </tr>
  </tbody>
</table>

<p><em>(Don’t worry about the path being incorrect for beatoraja, the <code class="language-plaintext highlighter-rouge">.\LR2files\Theme\</code> bit is corrected internally by the game itself)</em>
Each of these will be assigned to a <code class="language-plaintext highlighter-rouge">gr</code> parameter in order, meaning that <code class="language-plaintext highlighter-rouge">frame*.tga</code> will be assigned a <code class="language-plaintext highlighter-rouge">gr</code> value of <code class="language-plaintext highlighter-rouge">0</code>, <code class="language-plaintext highlighter-rouge">close*.tga</code> will be assigned a <code class="language-plaintext highlighter-rouge">gr</code> value of <code class="language-plaintext highlighter-rouge">1</code> and so on.</p>

<p>The asterisk means that it’ll choose randomly from all the files that fit the wildcard, unless such file was defined in the <code class="language-plaintext highlighter-rouge">.lr2skin</code> file under <code class="language-plaintext highlighter-rouge">#CUSTOMFILE</code>, in which it’ll use the file chosen from the skin settings menu.</p>

<p>There are multiple commands and variables defined within this language. A full list of them (compiled by ovnz) is available <a href="https://github.com/ovnz/blanket/blob/main/prop.lua">here</a>.
They’re divided into multiple categories:</p>
<ul>
  <li><strong>image</strong> - used for calling images which are always defined the same way, namely black/white still frames, song banners or backgrounds</li>
  <li><strong>num</strong> - used for storing numerical values like current hi-speed, combo or score</li>
  <li><strong>timer</strong> - used to indicate various events happening within the game engine like announcing failing a song, successfully downloading scores from the IR, or even just hitting a note</li>
  <li><strong>op</strong> - booleans used to store various states like the judgement for the last note hit or presence of a BGA</li>
  <li><strong>text</strong> - used to store various strings like song title or the current folder</li>
</ul>

<p>Let’s now bring up a skin element that has been called inside the file:</p>

<p><img src="/assets/csv/chunk.png" alt="chunk" class="img-responsive" /></p>

<p>When you call an element, you need to define a <code class="language-plaintext highlighter-rouge">#SRC_</code> and a <code class="language-plaintext highlighter-rouge">#DST_</code> line.<br />
A <code class="language-plaintext highlighter-rouge">#SRC_</code> line relates to what part of the image (defined by <code class="language-plaintext highlighter-rouge">gr</code>) we’re pulling: <code class="language-plaintext highlighter-rouge">x</code> and <code class="language-plaintext highlighter-rouge">y</code> are the origin point of our texture within the file, <code class="language-plaintext highlighter-rouge">w</code> and <code class="language-plaintext highlighter-rouge">h</code> describe the dimensions, and <code class="language-plaintext highlighter-rouge">div_x</code> and <code class="language-plaintext highlighter-rouge">div_y</code> define the amount of horizontal and vertical segments contained within that bit (which will be cycled through every amount of miliseconds defined in <code class="language-plaintext highlighter-rouge">cycle</code>). This entire bit of code will be called when the timer defined in the <code class="language-plaintext highlighter-rouge">timer</code> field is activated. In this case it’s timer <code class="language-plaintext highlighter-rouge">50</code>, which corresponds to a bomb being triggered in the 1P scratch lane.<br />
A <code class="language-plaintext highlighter-rouge">#DST_</code> line describes how the image will behave when this bit of code is triggered. <code class="language-plaintext highlighter-rouge">time</code> is an amount of miliseconds which have to pass between triggering the code and the event itself happening. <code class="language-plaintext highlighter-rouge">x</code> and <code class="language-plaintext highlighter-rouge">y</code> are the origin position of the element on the screen, while <code class="language-plaintext highlighter-rouge">w</code> and <code class="language-plaintext highlighter-rouge">h</code> are its dimensions. If <code class="language-plaintext highlighter-rouge">w</code> and <code class="language-plaintext highlighter-rouge">h</code> are not the same across <code class="language-plaintext highlighter-rouge">#SRC_</code> and <code class="language-plaintext highlighter-rouge">#DST_</code>, there will be stretching. <code class="language-plaintext highlighter-rouge">a</code>, <code class="language-plaintext highlighter-rouge">r</code>, <code class="language-plaintext highlighter-rouge">g</code> and <code class="language-plaintext highlighter-rouge">b</code> correspond to the 8-bit RGBA values of the texture (so if you wanted to make a green-tinted image, you’d set everything but <code class="language-plaintext highlighter-rouge">g</code> to 0, and keep that one at <code class="language-plaintext highlighter-rouge">255</code>). <code class="language-plaintext highlighter-rouge">filter</code> toggles bilinear filtering for the texture, <code class="language-plaintext highlighter-rouge">angle</code> sets its rotation and <code class="language-plaintext highlighter-rouge">loop</code> sets the amount of miliseconds after which this line of code will trigger again. <code class="language-plaintext highlighter-rouge">op</code> values are conditions which will have to be met for this bit of code to execute (with exceptions).</p>

<h2 id="lift">Lift</h2>
<p>Let’s move on to backporting new features into LR2 skins. First one we’ll tackle is Lift, which will raise the bottom of the playfield by a defined amount. It’s used mostly when you want to achieve lower “green number” without drastically increasing the note speed, but your playing setup disallows use of a lane cover (for example your point for reading notes is too high for the lanecover to be viable).</p>

<p>LR2 skins will have fundamental support for this feature in beatoraja, but only partially.</p>

<h3 id="lifting-missing-elements">Lifting missing elements</h3>
<p>The program is not taking shots in the dark on what should be lifted and what should be not, so on its own it only lifts element that it’s sure about - notes, judge line, judgements and combo - while leaving everything else intact. Those intact elements include judge detail (ghost), judgeline glow, lasers and bombs. To fix these, we’ll need to edit each call with one simple parameter.</p>

<p>Let’s go back to the bit of the <code class="language-plaintext highlighter-rouge">.csv</code> I showed you in the previous point - you can see that there is three <code class="language-plaintext highlighter-rouge">op</code> fields. Actually there’s an <code class="language-plaintext highlighter-rouge">op4</code> field available which was barely used in LR2 (it was only used to signal rotation of the element when the scratch is used), but it’s got a new purpose in beatoraja.<br />
If you set the <code class="language-plaintext highlighter-rouge">op4</code> to <code class="language-plaintext highlighter-rouge">3</code> in the desired element’s <code class="language-plaintext highlighter-rouge">#DST_</code> line, it’ll be shifted upwards by the lift amount.</p>

<p><img src="/assets/lift/op4.png" alt="op4" class="img-responsive" /></p>

<p>You can use it to lift any element you desire, but we’re looking for specific one. The table below will help you find them by their <code class="language-plaintext highlighter-rouge">timer</code> value from <code class="language-plaintext highlighter-rouge">#DST_</code> line. When you’re searching for a value, search only in a column where you know it’d be located</p>

<p><img src="/assets/lift/search.png" alt="search" class="img-responsive" /></p>

<table>
  <thead>
    <tr>
      <th><code class="language-plaintext highlighter-rouge">timer</code> value</th>
      <th>used for</th>
      <th>used in</th>
    </tr>
  </thead>
  <tbody>
    <tr>
      <td>140</td>
      <td>beat</td>
      <td>Judgeline flashing</td>
    </tr>
    <tr>
      <td>50-57</td>
      <td>bombs</td>
      <td>Bombs</td>
    </tr>
    <tr>
      <td>70-77</td>
      <td>LN bombs</td>
      <td>LN Bombs</td>
    </tr>
    <tr>
      <td>100-107</td>
      <td>hitting a key</td>
      <td>Laser</td>
    </tr>
    <tr>
      <td>120-127</td>
      <td>letting go of a key</td>
      <td>Laser off</td>
    </tr>
  </tbody>
</table>

<p>Most skins will have multiple options for the position of the judge detail, and the code responsible for them can usually be found by looking for <code class="language-plaintext highlighter-rouge">TYPE A</code>. You can tell it’s the detail if the <code class="language-plaintext highlighter-rouge">num</code> value in the <code class="language-plaintext highlighter-rouge">#SRC_</code> row is set to <code class="language-plaintext highlighter-rouge">108</code>, which is the difference in EX score between the current play and the target score.</p>

<table>
  <thead>
    <tr>
      <th>Before</th>
      <th>After</th>
    </tr>
  </thead>
  <tbody>
    <tr>
      <td><img src="/assets/lift/before.jpg" alt="before" class="img-responsive" /></td>
      <td><img src="/assets/lift/after.jpg" alt="after" class="img-responsive" /></td>
    </tr>
  </tbody>
</table>

<h3 id="lift-cover">Lift cover</h3>
<p>On the images above you can see that even after lifting the missing elements there’s still a glaring sonuvabitch of a hole left between the buttons and the judge line. While you could bake in a ghetto lift cover for one specific lift height, beatoraja offers us a far more elegant solution: a <code class="language-plaintext highlighter-rouge">LIFT</code> call. In short it works like a lane cover for lift. Wow.</p>

<p>First of all we need to decide what do want to use as a lift cover. I like to use the default lane cover for the skin, but you may want to add your own thing, or use what’s the current lanecover using. Here I’m only going to cover the process of using a single image - for reference on adding a selection, refer to how lane cover is implemented in the <code class="language-plaintext highlighter-rouge">.lr2skin</code> file.</p>

<p>So, in order to define a static file, we need to scroll way up to the <code class="language-plaintext highlighter-rouge">#IMAGE</code> definitions and drop our own in there.</p>

<p><img src="/assets/lift/newlane.png" alt="newlane" class="img-responsive" /></p>

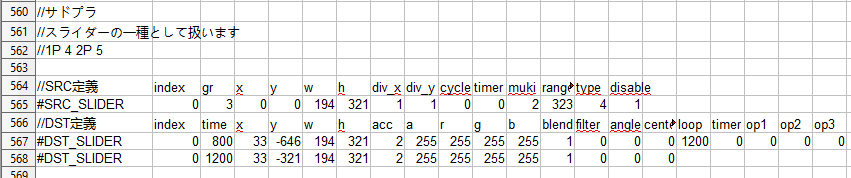
<p>Now we need to locate where is the lane cover exactly called in the code. In the image above we can deduce, that it has a <code class="language-plaintext highlighter-rouge">gr</code> value of <code class="language-plaintext highlighter-rouge">3</code>. Lane covers are called with a <code class="language-plaintext highlighter-rouge">SLIDER</code>. So let’s search for a <code class="language-plaintext highlighter-rouge">#SRC_SLIDER</code> with a <code class="language-plaintext highlighter-rouge">gr</code> value of <code class="language-plaintext highlighter-rouge">3</code>.</p>

<p><img src="/assets/lift/thereitis.png" alt="thereitis" class="img-responsive" /></p>

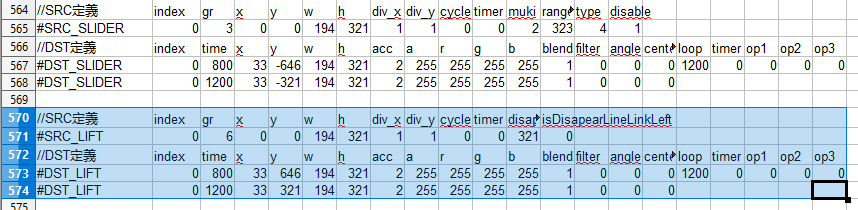
<p>We’ve found the lane cover! Now let’s make a couple of empty rows below that and copy it whole.
There’s a couple of changes that we want to make here with our new copy:</p>
<ul>
  <li>Change <code class="language-plaintext highlighter-rouge">#SRC_SLIDER</code> and <code class="language-plaintext highlighter-rouge">#DST_SLIDER</code> to <code class="language-plaintext highlighter-rouge">#SRC_LIFT</code> and <code class="language-plaintext highlighter-rouge">#DST_LIFT</code> respectively</li>
  <li>in the commented out <code class="language-plaintext highlighter-rouge">SRC</code> line remove <code class="language-plaintext highlighter-rouge">muki</code>, <code class="language-plaintext highlighter-rouge">range</code>, <code class="language-plaintext highlighter-rouge">type</code> and <code class="language-plaintext highlighter-rouge">disable</code>. Put <code class="language-plaintext highlighter-rouge">disapearLine</code> and <code class="language-plaintext highlighter-rouge">isDisapearLineLinkLeft</code> in their place (this is totally optional but serves as a visual aid)</li>
  <li>Remove the values of the fields you deleted in the previous line, set <code class="language-plaintext highlighter-rouge">disapearLine</code> value to be the same as <code class="language-plaintext highlighter-rouge">h</code> and <code class="language-plaintext highlighter-rouge">isDisapearLineLinkLeft</code> to 0</li>
  <li>invert the sign of <code class="language-plaintext highlighter-rouge">y</code> values in both <code class="language-plaintext highlighter-rouge">#DST_LIFT</code> rows so that positive is now negative and vice versa</li>
</ul>

<p><img src="/assets/lift/post.png" alt="post" class="img-responsive" /></p>

<p>This happens to work like a charm for LR2, just look at it go!</p>

<video controls="" preload="metadata" onclick="(function(el){ if(el.paused) el.play(); else el.pause() })(this)"><source src="/assets/lift/result.webm" type="video/webm; codecs=&quot;vp8, vorbis&quot;" /></video>

<p>Keep in mind that this is <strong>not</strong> a one-size-fits-all solution, some skins may require additional steps to make them work.</p>

<h2 id="ex-hard-and-assist-gauges">EX-HARD and ASSIST gauges</h2>

<p>Lunatic Rave 2 did not have EX-Hard or Assisted Easy gauges, so naturally LR2 skins do not implement these in any way. The backporting process is pretty straightforward however. It may vary depending on how your skin is structured.
First of all locate the <code class="language-plaintext highlighter-rouge">GROOVEGAUGE</code> call in your skin. Then you want to make around 12 empty rows under that, and copy the entire <code class="language-plaintext highlighter-rouge">GROOVEGAUGE</code> block 1 or 2 times depending on your needs.</p>

<p>Turns out that the current gauge is signaled by different <code class="language-plaintext highlighter-rouge">op</code> parameters, and that can be used to control the current gauge texture.<br />
Those ops work as follows:</p>

<table>
  <thead>
    <tr>
      <th>Gauge type</th>
      <th>op 1046 <code class="language-plaintext highlighter-rouge">gauge_ex</code></th>
      <th>op 42 <code class="language-plaintext highlighter-rouge">gauge_groove</code></th>
      <th>op 43 <code class="language-plaintext highlighter-rouge">gauge_hard</code></th>
    </tr>
  </thead>
  <tbody>
    <tr>
      <td>(Assist) Easy</td>
      <td>yes</td>
      <td>yes</td>
      <td>no</td>
    </tr>
    <tr>
      <td>Groove</td>
      <td>no</td>
      <td>yes</td>
      <td>no</td>
    </tr>
    <tr>
      <td>Hard</td>
      <td>no</td>
      <td>no</td>
      <td>yes</td>
    </tr>
    <tr>
      <td>EX-Hard</td>
      <td>yes</td>
      <td>no</td>
      <td>yes</td>
    </tr>
  </tbody>
</table>

<p>With that knowledge we can take 2 approaches to the process, either:</p>
<ul>
  <li>Copy the gauge block once and assign a different texture for op <code class="language-plaintext highlighter-rouge">1046</code> gauges</li>
  <li>Copy the gauge block twice and assign different textures for both Easy and EX-Hard gauges</li>
</ul>

<p>Below I’ll describe the process for the first approach. The other one only requires for the two new gauge blocks to check for ops <code class="language-plaintext highlighter-rouge">42</code> and <code class="language-plaintext highlighter-rouge">43</code> on top of <code class="language-plaintext highlighter-rouge">1046</code>.</p>

<p>For starters, we’ll need to define a gauge texture with colors corresponding to the state we’re interested in. Some skins like WMIX, ILAS or GirlishCafe store gauges in separate files, which makes the defining process that much easier, but if that’s not the case, we’ll need to extract the gauge from another file and adjust our code block a bit.<br />
First locate the file in which the gauge is stored (in our case the <code class="language-plaintext highlighter-rouge">#SRC_GROOVEGAUGE</code> line calls for <code class="language-plaintext highlighter-rouge">gr</code> of <code class="language-plaintext highlighter-rouge">0</code>, so we’re interested in a file from the <code class="language-plaintext highlighter-rouge">skin\LR2\Play\frame</code> directory). Then we can use the coordinates from <code class="language-plaintext highlighter-rouge">#SRC_GROOVEGAUGE</code> to locate the gauge texture and extract it into a separate file, which then we can define in the <code class="language-plaintext highlighter-rouge">#IMAGE</code> block.</p>

<p><img src="/assets/gajga/edit.jpg" alt="edit" class="img-responsive" /><br />
<em>On the left: original gauge from the default frame file</em><br />
<em>On the right: my edit which follows the simple-7keys color scheme</em></p>

<p>Now back to the code…
For the commented <code class="language-plaintext highlighter-rouge">DST</code> line in each block you want to add <code class="language-plaintext highlighter-rouge">op1</code> through <code class="language-plaintext highlighter-rouge">op3</code> at the end, if they don’t have them, purely for visual aid. Now in the first <code class="language-plaintext highlighter-rouge">#DST_GROOVEGAUGE</code> line of the first block you want to make the <code class="language-plaintext highlighter-rouge">op1</code> value into <code class="language-plaintext highlighter-rouge">-1046</code> (a minus sign is a “not”, so here’ we’re checking if we are <em>not</em> in an EX gauge), and <code class="language-plaintext highlighter-rouge">1046</code> in the other block.</p>

<p>The first block is done, but the other one needs some more work, since we’re using a different texture for it.
All the changes that need to be done are within the <code class="language-plaintext highlighter-rouge">#SRC_GROOVEGAUGE</code> row - change the <code class="language-plaintext highlighter-rouge">gr</code> to point to your newly defined gauge texture, and change <code class="language-plaintext highlighter-rouge">x</code> and <code class="language-plaintext highlighter-rouge">y</code> to 0, so that they point to the origin of the image.</p>

<video controls="" preload="metadata" onclick="(function(el){ if(el.paused) el.play(); else el.pause() })(this)"><source src="/assets/gajga/ass2.mp4" type="video/mp4; codecs=&quot;avc1.42E01E, mp4a.40.2&quot;" /></video>
<p><em>And there it is!</em></p>

<h2 id="gn-display">GN display</h2>
<p>beatoraja has the ability to display a lot of numerical values that LR2 did not even implement, like lift number, speed values at minimum and maximum BPM and such. In this example I’m gonna show you how to show the IIDX Green Number.</p>

<p>First of all, find a block which <code class="language-plaintext highlighter-rouge">#SRC_NUMBER</code> row has a <code class="language-plaintext highlighter-rouge">num</code> value of <code class="language-plaintext highlighter-rouge">14</code> (<code class="language-plaintext highlighter-rouge">lanecover1</code>).
Add a couple of rows below that block and make a copy. Now change the <code class="language-plaintext highlighter-rouge">num</code> value in the copy to <code class="language-plaintext highlighter-rouge">313</code> (which corresponds to the IIDX GN) and change the <code class="language-plaintext highlighter-rouge">r</code> and <code class="language-plaintext highlighter-rouge">b</code> values to <code class="language-plaintext highlighter-rouge">0</code>, so that our Green Number is truly green.<br />
You’ll also want to change the <code class="language-plaintext highlighter-rouge">x</code> value in both blocks’ <code class="language-plaintext highlighter-rouge">#DST_NUMBER</code> rows to space them out a bit, so that they don’t overlap each other.
By the way, remember the <code class="language-plaintext highlighter-rouge">op4</code> thingy from back when we were fixing Lift? Well, turns out you can also use that op to make elements follow the lanecover! Just set the <code class="language-plaintext highlighter-rouge">op4</code> value to <code class="language-plaintext highlighter-rouge">4</code> and then tweak the <code class="language-plaintext highlighter-rouge">y</code> values in both <code class="language-plaintext highlighter-rouge">#DST_NUMBER</code> blocks to your liking!</p>
<video controls="" preload="metadata" onclick="(function(el){ if(el.paused) el.play(); else el.pause() })(this)"><source src="/assets/gn/done.webm" type="video/webm; codecs=&quot;vp8, vorbis&quot;" /></video>

<h2 id="fast-and-slow">FAST and SLOW</h2>
<p>This bit has taken me the longest time to figure out.
Long story short, there’s two ways going about this, either:</p>
<ul>
  <li>Use beatoraja’s built-in fast/slow display (quick and dirty, but gets the job done)</li>
  <li>(Re)implement your own Fast/Slow display (requires (re)writing a bit of the code related to showing F/S)</li>
</ul>

<h3 id="built-in-display">Built-in display</h3>
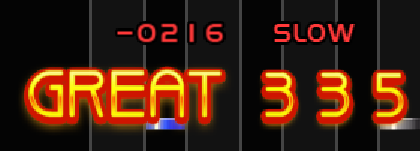
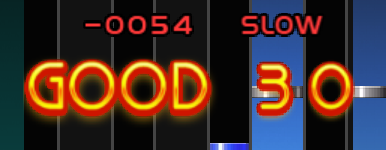
<p>Each LR2 skin loaded into beatoraja can make use of the built-in fast/slow display, which can be in traditional text form, or can show how much miliseconds were you off.
All of this and positioning of the detail can be changed in skin settings.</p>

<p><img src="/assets/fs/options.jpg" alt="edit" class="img-responsive" /><br />
<em>The options available for all LR2 skins by default</em></p>

<p>While this is very simple to set up, respects LIFT options on its own, and is fully movable and customizable, you’re stuck with the default font (the same used for all the tickers at the top of the screen), which you may not end up liking.</p>

<h3 id="bring-your-own-fastslows">Bring Your Own Fastslows</h3>
<p><strong>This part can be also applied if you want to implement your own F/S display</strong>
Certain LR2 skins like WMIX or Bluewhite were designed to take advantage of certain LR2 hacks, which implemented a Fast/Slow display. While there is F/S stuff exposed to the skinmakers, it’s fundamentally different in beatoraja, so there is more work involved in re-enabling the display.</p>

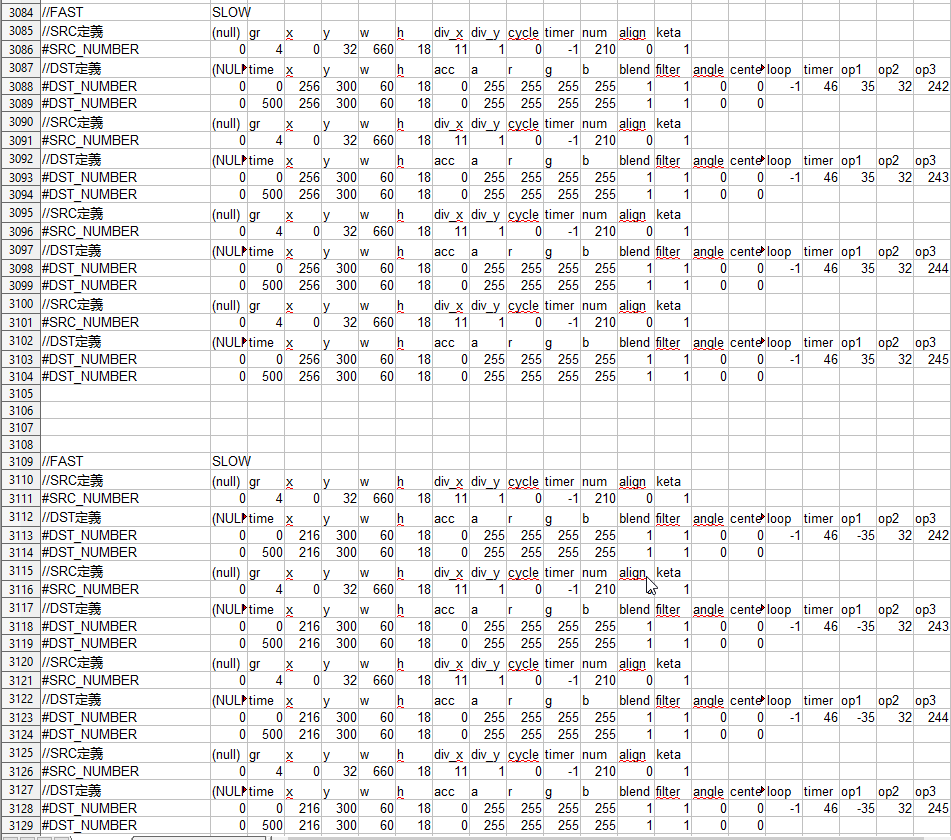
<p>As the default LR2 skin does not even implement that, we’re gonna jump over to WMIX for this example, specifically the file <code class="language-plaintext highlighter-rouge">skin\WMIX_HD\play\csv\wide_1p.csv</code>.
In order to locate the code responsible for Fasts and Slows, just look for “FAST”.
In this case it’s located near the end of the code.</p>

<p><img src="/assets/fs/csv.png" alt="edit" class="img-responsive" /><br />
<em>This chungus is responsible for displaying Fasts and Slows</em></p>

<p>We cannot use this code in its current form because the num value <code class="language-plaintext highlighter-rouge">210</code> which was used to signal whether you hit fast on slow in LR2 hacks has been repurposed in beatoraja as the number of players who have failed a chart. Besides, ops <code class="language-plaintext highlighter-rouge">242</code> through <code class="language-plaintext highlighter-rouge">245</code> used to signal whether you hit something that basically wasn’t a PGreat are now obsolete, as beatoraja exposes ops <code class="language-plaintext highlighter-rouge">1242</code> and <code class="language-plaintext highlighter-rouge">1243</code> which signal an early and a late hit respectively.<br />
So instead we’re gonna write our own code to replace the non-working stuff, but first let’s walk through what we have in here.</p>

<p>The chunks we’re looking at use a hacky method by having the fast/slow textures represent the number held in the num value <code class="language-plaintext highlighter-rouge">210</code>. The only difference between the two 4-chunk parts is <code class="language-plaintext highlighter-rouge">op1</code> which in one case is <code class="language-plaintext highlighter-rouge">35</code>, and in another is <code class="language-plaintext highlighter-rouge">-35</code> (this op tells us whether “Ghost A” (above the judgements) is enabled).</p>

<p>First we’re going to get rid of all but one chunk in first half, so that we have reference for position.
Then you want to find an <code class="language-plaintext highlighter-rouge">IMAGE</code> chunk in the code which has one <code class="language-plaintext highlighter-rouge">#SRC_</code> row and two <code class="language-plaintext highlighter-rouge">#DST_</code> rows and copy that in each half of the F/S part. We’re going to use these as base for implementing our own thing.
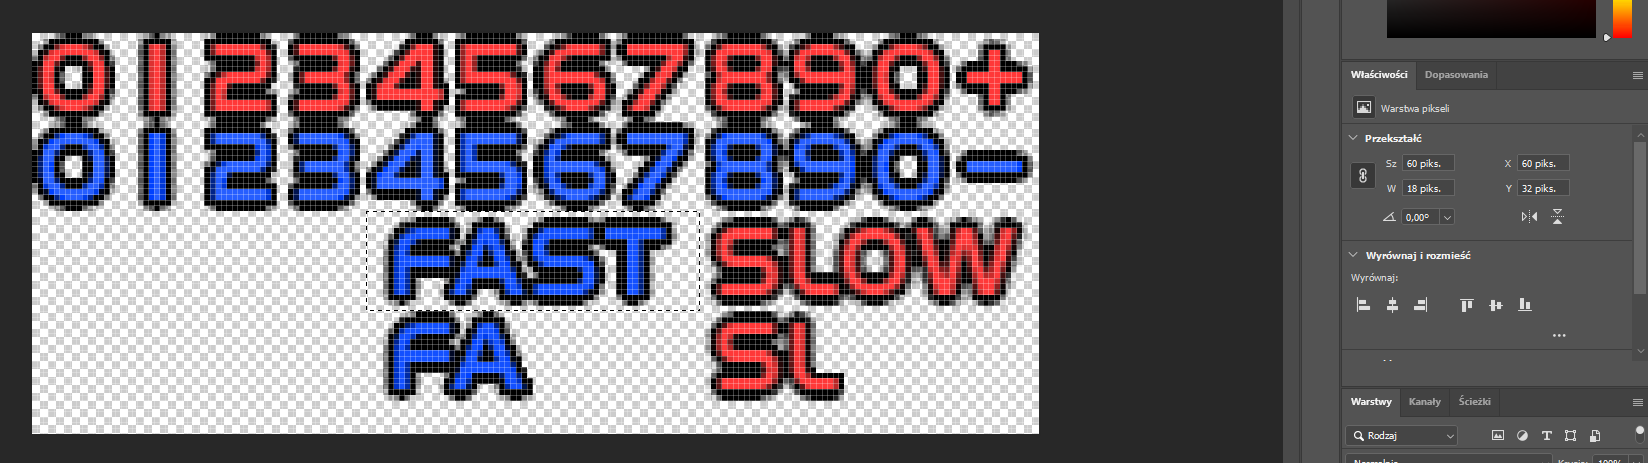
Now open the image which is assigned to the <code class="language-plaintext highlighter-rouge">gr</code> value used in the F/S <code class="language-plaintext highlighter-rouge">#SRC_NUMBER</code> row. Use your favourite image editing software to pinpoint the origin point of the FAST ticker (you’re looking for a rectangle which has <code class="language-plaintext highlighter-rouge">w</code> and <code class="language-plaintext highlighter-rouge">h</code> dimensions). In our case the origin point has a <code class="language-plaintext highlighter-rouge">x</code> of <code class="language-plaintext highlighter-rouge">60</code> and <code class="language-plaintext highlighter-rouge">y</code> of <code class="language-plaintext highlighter-rouge">32</code>.</p>

<p><img src="/assets/fs/dimensions.png" alt="edit" class="img-responsive" /><br />
<em>Finding the origin point in Photoshop 2020</em></p>

<p>After that you want to copy over certain elements from the original <code class="language-plaintext highlighter-rouge">NUMBER</code> chunk to the new <code class="language-plaintext highlighter-rouge">IMAGE</code> chunk:</p>

<p><img src="/assets/fs/tocopy.png" alt="edit" class="img-responsive" /><br />
<em>The elements you want to copy over are marked in green</em></p>

<p>You also want to copy <code class="language-plaintext highlighter-rouge">timer</code> values both from <code class="language-plaintext highlighter-rouge">#SRC_NUMBER</code> and <code class="language-plaintext highlighter-rouge">#DST_NUMBER</code> rows, and set all the <code class="language-plaintext highlighter-rouge">op</code> values in <code class="language-plaintext highlighter-rouge">#SRC_</code> to 0.<br />
If your skin distinguishes the placement of the F/S ticker based on the presence of the Ghost, you’ll want to set <code class="language-plaintext highlighter-rouge">op1</code> to either <code class="language-plaintext highlighter-rouge">35</code> or <code class="language-plaintext highlighter-rouge">-35</code>. <code class="language-plaintext highlighter-rouge">op2</code> should be set to <code class="language-plaintext highlighter-rouge">1242</code>.<br />
Now save the <code class="language-plaintext highlighter-rouge">.csv</code> and check if you can see FASTs in-game (you should, if you can’t then hit me up). Now copy the <code class="language-plaintext highlighter-rouge">IMAGE</code> chunk we’ve just created and paste it right under the original. In that one change <code class="language-plaintext highlighter-rouge">op2</code> to <code class="language-plaintext highlighter-rouge">1243</code> and change the <code class="language-plaintext highlighter-rouge">x</code> and <code class="language-plaintext highlighter-rouge">y</code> in <code class="language-plaintext highlighter-rouge">#SRC_</code> to point to the SLOW graphic.
Don’t remember to set <code class="language-plaintext highlighter-rouge">op4</code> to <code class="language-plaintext highlighter-rouge">3</code> to make the ticker follow Lift!</p>

<video controls="" preload="metadata" onclick="(function(el){ if(el.paused) el.play(); else el.pause() })(this)"><source src="/assets/fs/done.webm" type="video/webm; codecs=&quot;vp8, vorbis&quot;" /></video>
<p><em>Look at it go!</em></p>

<h2 id="bilinear-filtering">Bilinear filtering</h2>
<p>When you load a LR2 skin into beatoraja, you may notice that some elements look more pixelated than others. Turns out that the skin format allows for a <code class="language-plaintext highlighter-rouge">filter</code> flag, which will enable bilinear filtering for a called element. You can see it in the previous point in the <code class="language-plaintext highlighter-rouge">#DST_</code> segment. Sadly you can’t just apply a filter for the entire skin - you must apply it on per-element basis. But boy, it does improve the visuals.</p>

<table>
  <thead>
    <tr>
      <th><img src="/assets/filter/rtx_off.png" alt="edit" class="img-responsive" /></th>
      <th><img src="/assets/filter/rtx_on.png" alt="edit" class="img-responsive" /></th>
    </tr>
  </thead>
  <tbody>
    <tr>
      <td><code class="language-plaintext highlighter-rouge">filter</code> set to <code class="language-plaintext highlighter-rouge">1</code> only for the Ghost</td>
      <td><code class="language-plaintext highlighter-rouge">filter</code> set to 1 on Ghost, F/S and Judge</td>
    </tr>
  </tbody>
</table>

<h2 id="skin-elements-not-loading">Skin elements not loading?</h2>
<p>I have encountered this specific issue with EndlessCirculation and CB_MODOKI skins (they use similar <code class="language-plaintext highlighter-rouge">.csv</code> files). If you open any of its <code class="language-plaintext highlighter-rouge">.csv</code> files in a spreadsheet editor, you’ll notice something peculiar about the way the define <code class="language-plaintext highlighter-rouge">#IMAGE</code> files:</p>

<p><img src="/assets/quotes/ecse.png" alt="edit" class="img-responsive" /><br />
<em>This looks “"”normal”””</em></p>

<p>For whatever reason the creator of this skin used an excessive amount of quotation marks. While LR2 will gladly take these and use them properly, it’ll knock off beatoraja’s backwards compability and not load an image, resulting in mostly black playfield. The solution is simple - remove the excessive quotation marks.</p>

<h2 id="closing-words">Closing words</h2>
<p>Next time someone tells you that they won’t switch to beatoraja because they can’t carry over their favourite skin, you can tell them to fuck right off!
Writing this entire thing helped me understand how LR2 (and in turn, beatoraja) skins work under the hood, and that may push me into writing my own skin one day.</p>

<p>Naturally I’ll share the LR2 skin files I’ve edited for all of this, so that you can see and compare the changes yourself.<br />
<a href="/assets/lr2.zip">LR2 Standard 7keys 1P with Lift, EXH gauges and GN display</a> (remember to change <code class="language-plaintext highlighter-rouge">All offset(%)</code> values in settings)<br />
<a href="/assets/wmix.zip">WMIX AC 1P with Lift, EXH gauges, GN and F/S + Wide 1P with just the F/S</a></p>

<p>While I’m glad that all of the things I described above are possible, I really feel that the majority can (and should) be integrated into beatoraja’s code. Hell, LR2’s “press 4 and arrows” way of achieving Lift works better than beatoraja’s out of the box solution! Of course, it gets knocked out of the park once you add edits to the skin, but you shouldn’t <em>need</em> to do that yourself!</p>

<p>I really hope this comes in handy to anyone who’s interested in general skinning manners. To my knowledge this is the first article on the topic fully in English. Gotta make that BMS cab pretty.</p>

<p>And before you ask: No, I couldn’t get KCOOL or Bluewhite to work properly with beatoraja. There’s just something odd about them that beatoraja doesn’t like. If <em>you</em> do figure out what’s wrong with them, please get in touch.</p>

<h2 id="sources">Sources</h2>
<ol>
  <li><a href="https://asa-otoge.hatenablog.com/entry/2020/05/29/142421">LR2用のスキンをbeatoraja特有機能に対応させる by Asa</a></li>
  <li><a href="https://github.com/ovnz/blanket/blob/main/prop.lua">prop.lua from the Blanket result skin by ovnz</a></li>
  <li><a href="https://github.com/exch-bms2/beatoraja">beatoraja Github repo</a></li>
</ol>]]></content><author><name></name></author></entry><entry><title type="html">WFIX - WMIX HD has been made beatoraja-compliant</title><link href="http://localhost:4000/2021/01/22/wmix-beatoraja.html" rel="alternate" type="text/html" title="WFIX - WMIX HD has been made beatoraja-compliant" /><published>2021-01-22T09:50:35+01:00</published><updated>2021-01-22T09:50:35+01:00</updated><id>http://localhost:4000/2021/01/22/wmix-beatoraja</id><content type="html" xml:base="http://localhost:4000/2021/01/22/wmix-beatoraja.html"><![CDATA[<ul id="markdown-toc">
  <li><a href="#overview" id="markdown-toc-overview">Overview</a></li>
  <li><a href="#changelog" id="markdown-toc-changelog">Changelog</a>    <ul>
      <li><a href="#features-left-out-on-purpose" id="markdown-toc-features-left-out-on-purpose">Features left out on purpose</a></li>
    </ul>
  </li>
  <li><a href="#screenshots" id="markdown-toc-screenshots">Screenshots</a></li>
  <li><a href="#download" id="markdown-toc-download">Download</a></li>
  <li><a href="#installation-instructions" id="markdown-toc-installation-instructions">Installation instructions</a></li>
  <li><a href="#credits" id="markdown-toc-credits">Credits</a></li>
</ul>

<h2 id="overview">Overview</h2>

<p>Following my previous post, this is WMIX HD by Wisp, which I have edited to take advantage of beatoraja-specific features.</p>

<p><span style="color:red"><strong>This fix is meant for beatoraja. It is not required for LR2, nor will it bring any additional features for that player.</strong></span></p>

<h2 id="changelog">Changelog</h2>

<ul>
  <li>Unpacked .dxa fonts
    <ul>
      <li>beatoraja is not able to process <code class="language-plaintext highlighter-rouge">.dxa</code> files on its own</li>
    </ul>
  </li>
  <li>Fixed Lift
    <ul>
      <li>Lift cover is present, elements like Ghost, lasers and bombs now respect Lift</li>
      <li>Lift cover uses the current Lane Cover texture. If you wish to change it, add your own texture into the <code class="language-plaintext highlighter-rouge">#IMAGE</code> block and change the <code class="language-plaintext highlighter-rouge">gr</code> number in <code class="language-plaintext highlighter-rouge">#SRC_LIFT</code> (refer to my previous post)</li>
    </ul>
  </li>
  <li>Added EX-Hard and (Assist) Easy gauges
    <ul>
      <li>They use the default Yellow and Blue gauge textures respectively</li>
    </ul>
  </li>
  <li>Fixed Fast/Slow display
    <ul>
      <li>Previously F/S would not work because of the changes in the underlying mechanics</li>
      <li>To enable F/S, change the “Display FAST/SLOW” option in skin settings.</li>
    </ul>
  </li>
  <li>Added Green Number and Lift Height display
    <ul>
      <li>These will respect the presence of both Lane Cover and Lift Cover</li>
    </ul>
  </li>
  <li>Enabled filtering for all skin elements
    <ul>
      <li>This is to help with scaling when playing in non-720p resolutions</li>
    </ul>
  </li>
  <li>Added a “beatoraja” effector badge
    <ul>
      <li>Originally when there was no effect in use, this badge would say “Lunatic Rave”</li>
    </ul>
  </li>
  <li>Fixed an issue with oversaturated #BACKBGA images
    <ul>
      <li>Caused by beatoraja’s mishandling of “shadow” effects</li>
    </ul>
  </li>
  <li>Fixed an issue where 1P notes would appear as white and yellow blocks in the Double Play Wide skin
    <ul>
      <li>Caused by an oddity in beatoraja’s parsing of <code class="language-plaintext highlighter-rouge">#SRC_NOTE</code> and <code class="language-plaintext highlighter-rouge">#DST_NOTE</code> calls</li>
    </ul>
  </li>
  <li>Fixed an issue where a white rectangle would appear on certain “Stage Failed” shutters
    <ul>
      <li>Caused by beatoraja’s different way of rendering textures which are placed outside of the original image’s boundaries</li>
    </ul>
  </li>
  <li>Fixed an issue where notes and some skin elements would appear in wrong lanes when playing 5keys on 2P side or 10keys
    <ul>
      <li>Caused by beatoraja’s different handling of 7keys skins in 5keys play</li>
      <li>Thanks go to <a href="https://twitter.com/AOiRO_Manbow">@AOiRO_Manbow</a> for coming up with a fix!</li>
    </ul>
  </li>
</ul>

<h3 id="features-left-out-on-purpose">Features left out on purpose</h3>

<ul>
  <li>Hidden cover
    <ul>
      <li>Realistically speaking no one is playing with Hidden on, so I did not bother implementing it
        <ul>
          <li>If you desire to implement it, you can make a copy of the <code class="language-plaintext highlighter-rouge">#SRC_LIFT</code> block and rename <code class="language-plaintext highlighter-rouge">#SRC_LIFT</code> and <code class="language-plaintext highlighter-rouge">#DST_LIFT</code> to <code class="language-plaintext highlighter-rouge">#SRC_HIDDEN</code> and <code class="language-plaintext highlighter-rouge">#DST_HIDDEN</code>.</li>
        </ul>
      </li>
    </ul>
  </li>
  <li>(G-)Battle skins
    <ul>
      <li>As far as I’m aware, it’s not possible to play in Battle mode in beatoraja, so even if I wanted to edit those skins, I’d have no way of testing.</li>
    </ul>
  </li>
</ul>

<h2 id="screenshots">Screenshots</h2>

<p><img src="/assets/wmix/screen1.jpg" alt="screen1" class="img-responsive" />  <br />
<img src="/assets/wmix/screen2.jpg" alt="screen2" class="img-responsive" />  <br />
<img src="/assets/wmix/screen3.jpg" alt="screen3" class="img-responsive" />  <br />
<img src="/assets/wmix/screen4.jpg" alt="screen4" class="img-responsive" /></p>

<h2 id="download">Download</h2>

<ul>
  <li><strong><a href="/assets/wmix/wfix11.7z">v1.1</a></strong>
    <ul>
      <li>Fixed misaligned skin elements when playing 5keys 2P or 10keys</li>
    </ul>
  </li>
  <li><a href="/assets/wmix/wfix101.7z">v1.01</a>
    <ul>
      <li>Added missing shutter images</li>
    </ul>
  </li>
  <li><a href="/assets/wmix/wfix10.7z">v1.0</a>
    <ul>
      <li>Initial release</li>
    </ul>
  </li>
</ul>

<h2 id="installation-instructions">Installation instructions</h2>

<ol>
  <li>Make sure you have WMIX HD in your <code class="language-plaintext highlighter-rouge">/beatoraja/skins</code>/ folder</li>
  <li>Unpack the WFIX zip into <code class="language-plaintext highlighter-rouge">/beatoraja/skins/</code>, merging the contents of two <code class="language-plaintext highlighter-rouge">WMIX_HD</code> folders</li>
  <li>Go overjoy)</li>
</ol>

<h2 id="credits">Credits</h2>
<ul>
  <li><strong><a href="https://twitter.com/wisp_13">Wisp</a></strong> for making WMIX HD</li>
  <li><strong>Mr. Mary</strong> for applying the beatoraja edits</li>
  <li><strong><a href="https://twitter.com/Asa_Poke_pawa">Asa</a></strong> for making <a href="https://asa-otoge.hatenablog.com/entry/2020/05/29/142421">the original blog post</a> describing the skin modding process</li>
  <li>Other contributors
    <ul>
      <li><a href="https://twitter.com/AOiRO_Manbow">@AOiRO_Manbow</a></li>
    </ul>
  </li>
</ul>]]></content><author><name></name></author></entry></feed>